 GoSign Business Manual (Mobile)
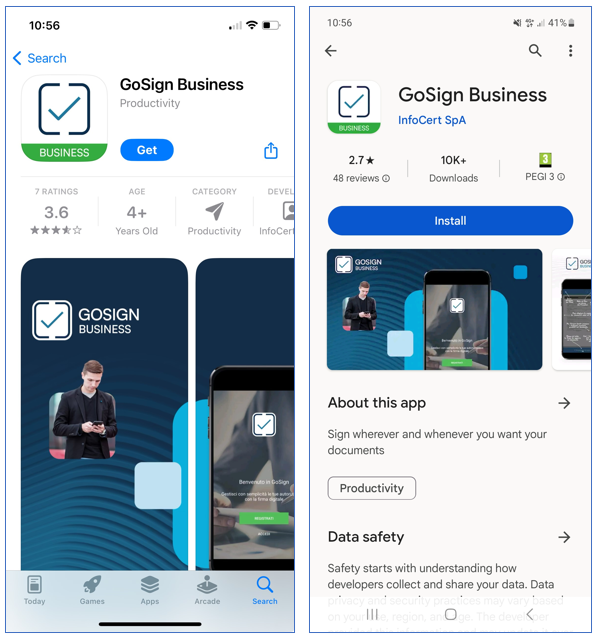
Once Google Play, Apple Store, or Microsoft Store are launched, you need to enter "GoSign Business" as a search item. A click on the Install or Get button (depending on the phone's system) allows you to go ahead and install the App.
Through the application, you can consult your signed documents and apply the required actions on them.
In particular, it is also possible to upload documents, in PDF or MS Office format (Word, Excel and Power Point) and sign them with one of your signatures.
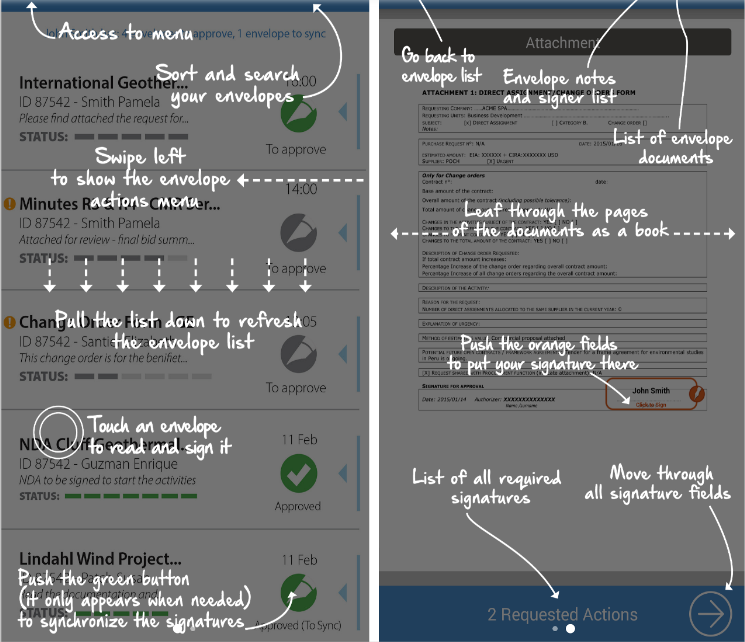
A graphical tutorial has been introduced for the two main pages of the application (Home page and document view).
The tutorial consists of a transparent slide superimposed on the pages of the application, with graphic indications on the use.
The tutorial is active during the first use. Once you read the instructions, you can close it with a tap on the screen: on iOS devices you have to touch the video and then press the Finish button; on Android devices you have to press the Return button.
You can review the tutorial by entering Settings in the menu of accessory functions of the application (see next paragraphs).
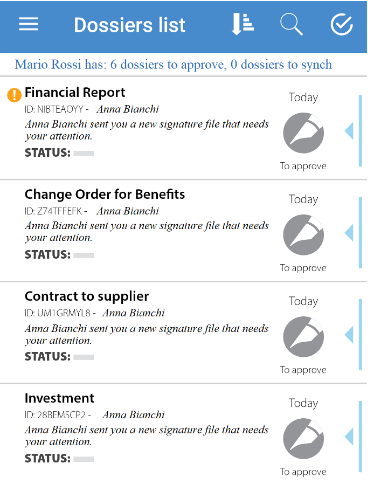
The figure shows the main page of the App with the list of documents received waiting for processing.
Urgent documents are identified with a yellow icon to the left of the object of the file.
The structure of the screen and the information presented are as follows:
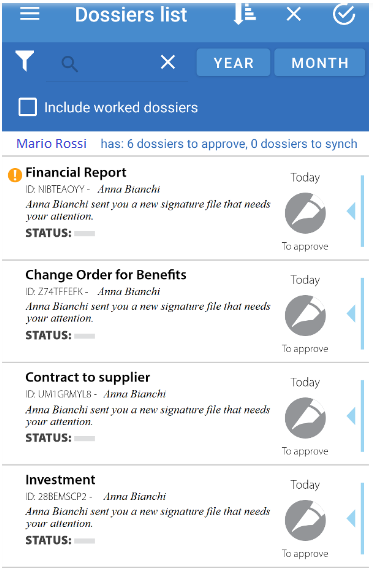
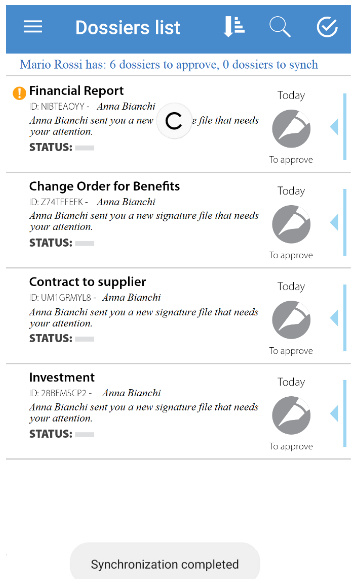
Synchronization takes place with a swipe downward (drag down) of the list.
At the end of the synchronization, the manager list is populated with the documents on the server. If the user connects for the first time, the result is the download of all documents received on the date.
If the user repeats the synchronization again, the list is updated with any new practices to be worked (documents received in the interval between the two synchronizations).
During synchronization, the system shows the user information about the time interval elapsed since the previous synchronization.
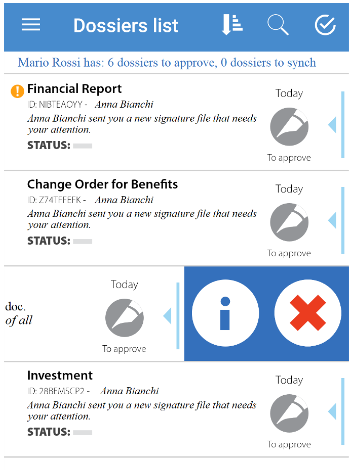
"Swiping on left" on a practice, the following functions are available:
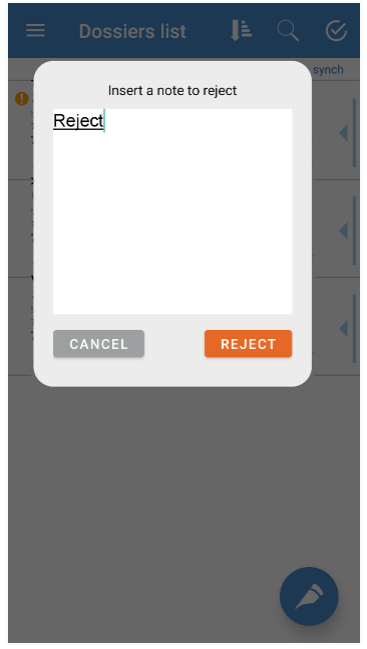
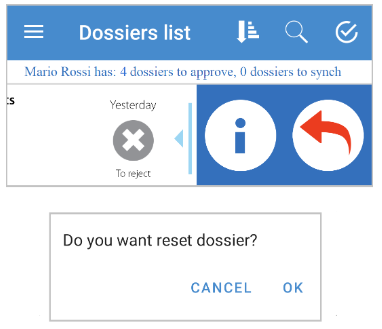
Reject/Restore Pratice (Icon "X") – if you consider the content of the file is incorrect or not all the information to authorize the signing process is available. The rejection of a file requires the insertion of a note to justify the refusal action. A previously set rejection action can be undone by pressing "Restore Practice" (button that appears in place of "Reject Practice").
Info Pratice (Icon "i") – is a page that presents the summary of the working process of the practice. Information about the signing process of the file is summarized: who created it, what actions are required, who are the recipients, what documents and the pratice progress.
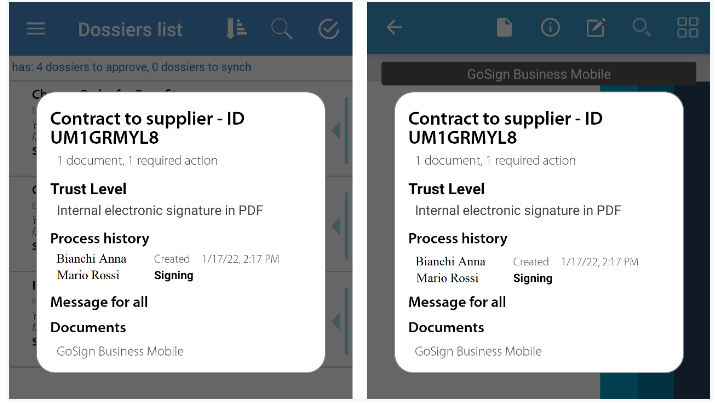
By selecting a specific practice (tap on the line), you access the processing page of the practice (page confirming the required actions).
The system displays the page of the first document of the file in which the user is called to perform an action (signature, approval or viewed).
The user can browse all the documents of a practice simply by flipping through the pages in sequence (once a document is finished, the next one is presented).
In the header of the page there are some function keys (from left to right):
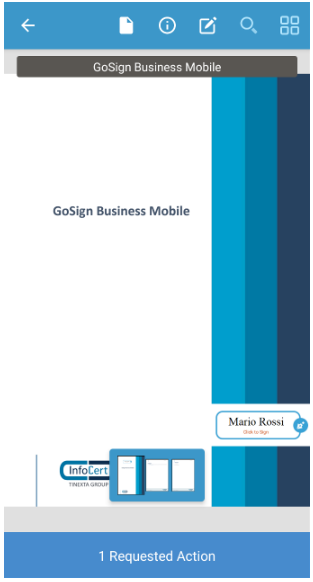
Below is the number of actions already confirmed compared to the total present in the practice.
Using the arrows on the sides, always at the bottom, the user can quickly move from one action to another without need to browse all the documents of the practice.
Pressing on the above inscription a further detail appears: the list of actions to be by the manager on the documents of the practice. For each action, the references of the document and the page that contains it are indicated. By selecting a particular action, the system opens its page.
There is also the "Reject practice" option, similar to what was described above.
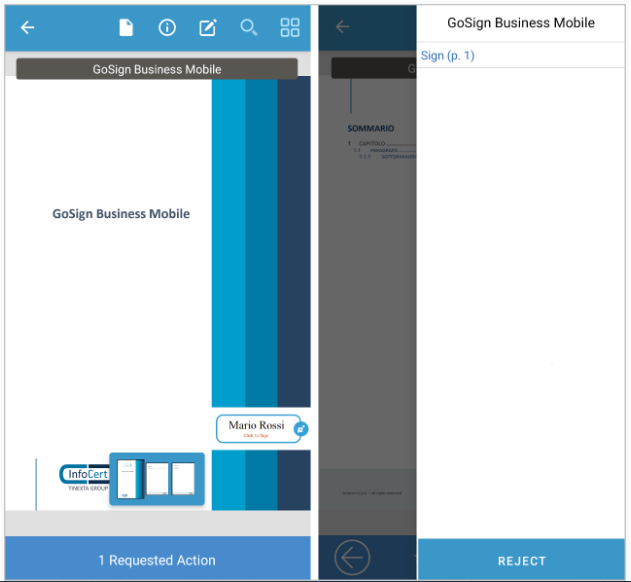
The signing mode is "Tap to Sign": on the document page, the point where the manager must affix his signature is highlighted with a colored tag that shows the name of the signatory, with the indication "Press to sign".
By selecting it (tap on the tag), the user confirms his will to sign.
The field changes shape, the user's signature loaded on the system (if available) or the name written in italics appears, with the indication "press to cancel" (pressing again the confirmation is cancelled and the action returns to its original status).
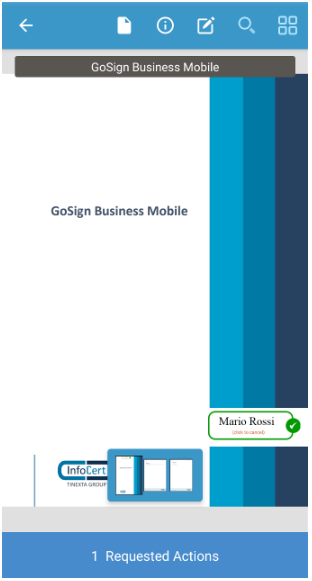
The signature action is currently in the "prepared" status: the actual affixing of the signature takes place at the time of synchronization, when the recognition procedure is required based on the set authorization level.
The signatures entered, until a synchronization is performed, can be deleted and re-inserted in case of error.
The collection of signatures can take place in a single session or at different times. It is also possible to synchronize the application on the tablet with the Server without necessarily having finished the process of subscribing to a practice. The server hosts the actions performed up to the time of synchronization.
When the user has "prepared" all the actions, the practice is ready to be confirmed (the next action makes the manager's actions definitive, and the practice moves on to the next step of the process).
In the list of practices, the practice in question changes status: from "To be approved" to "To be synchronized".
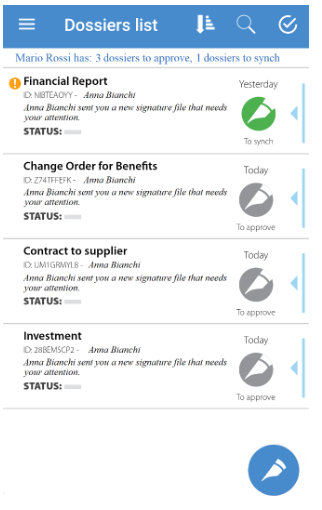
Synchronization without signature (for approvals and visas) takes place when you open the application (if the automatic update option has been set at startup) and /or with a vertical swipe on the list of practices.
To confirm the signature affixed to the document it is necessary to synchronize GoSign through the pen's icon button (Floating Action Button) that appears in the list of documents at the bottom right.
This different mechanism is necessary to highlight to the signatory that the operation he is about to perform is not a simple synchronization / approval but the signature of the document.
You can sign multiple documents within a single synchronization session.
Based on the authorization level defined for the practice, the system requests the user's PIN as confirmation of recognition or the PIN and OTP of the digital certificate.
If there are different practices to sign, with different levels of authorization, the system requires credentials for the different signing methods.
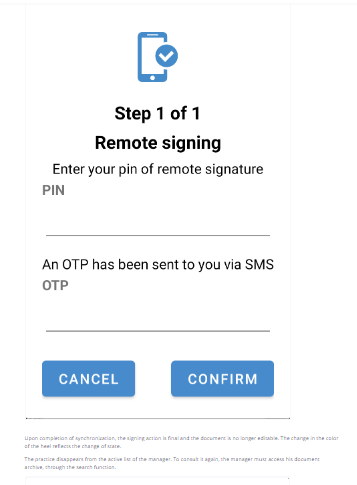
Upon completion of synchronization, the signing action is final and the document is no longer editable. The change in the color of the heel reflects the change of state.
The practice disappears from the active list of the manager. To consult it again, the manager must access his document archive, through the search function.
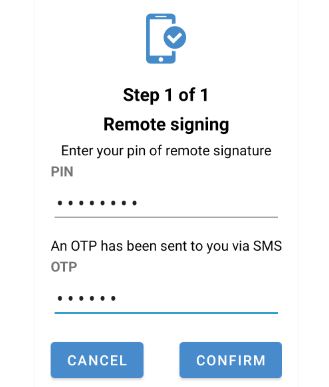
The actions for which a manager is called to confirm are different. In addition to the signature, we have:
For each action described above, you can find one or more heels to "work" on the documents of the practice received.
The procedure for processing is the same as described above for signing the document.
When the user has "set up" all the actions, the document is ready to be confirmed.
Synchronization without signature takes place when opening the application and / or with a vertical swipe on the list of practices.
Upon completion of synchronization, as before, the action is final and the document is made unchangeable. The change in the color of the heel reflects the change of state.
A practice can also be rejected by one of the managers involved in the signing process.
This can happen when the signatory finds that there are no conditions for signing (documents are missing, important content is missing in documents, etc.).
Rejection of the practice can occur in two ways:
To refuse a practice it is necessary to insert a note with the reason for the refusal as shown in the figure.
Once the note is inserted, the practice changes status ("To reject").
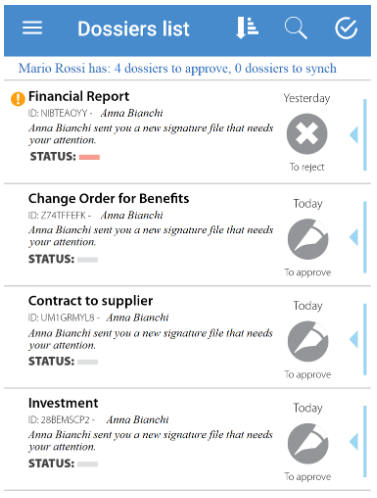
With the next synchronization, the document is frozen in the "Rejected" state. The signing process stops and the practice disappears from the working list of all participants.
The system notifies users via email of the change of status.
A practice in the state "To reject" (set up but not confirmed), can be restored.
The restore operation can be performed (as long as you have not already finalized the action) using the "Restore Practice" button, accessible in the same way as previously seen to set the rejection.
By confirming the restore, the file returns to the "To be approved" state.
The "Confirm All" function allows a signatory to bring all the actions of one or more packages/documents to the status from "To be synchronized" with a simple check on the list.
As a rule, any file can be prepared for signature in this way, except in the case where the practice is part of a document class for which the use of this function is explicitly inhibited.
"Generic" practices, not belonging to any document class, can always be selected for the use of the function.
At the top of the page that presents the list of packages in progress, after the menu icon, there is a new button with which you can:
When this button is pressed, the button changes icon to an "X", shown in Figure 23. Pressing it cancels the operation and restores the list to its original state. A bar also appears that indicates to the user that it is possible to select one or more packages.
Once the multiple selection mode has been activated, it is possible to select the practices to be prepared for signature.
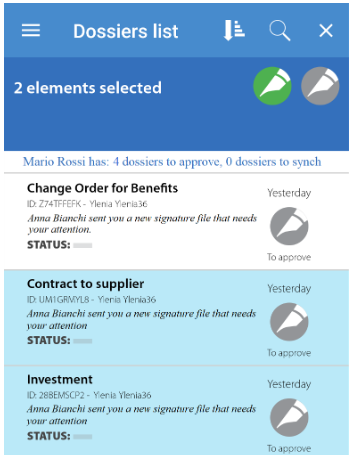
Once the selection of the practices for which you want to prepare for the signature in a massive way completed, you have two choices:
Actions in documents are "labeled" by the application as "massively signed ready". The documents are then available for signature following the normal procedure, together with any other practice that may have already been prepared for signature.
If you prepare for signature, through multiple selection, a document already partially or totally prepared for signature, this is re-processed and prepared for signature by marking all the actions of all documents as "predisposed to signature massively", regardless of their previous state.
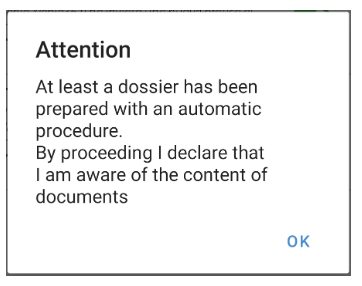
At the time of synchronization / signature, the user is warned that at least one of the practices he is signing / approving has been set up for signature in massive mode. The user declares, in this way, to have read the documents that he has prepared for signature in a massive manner.
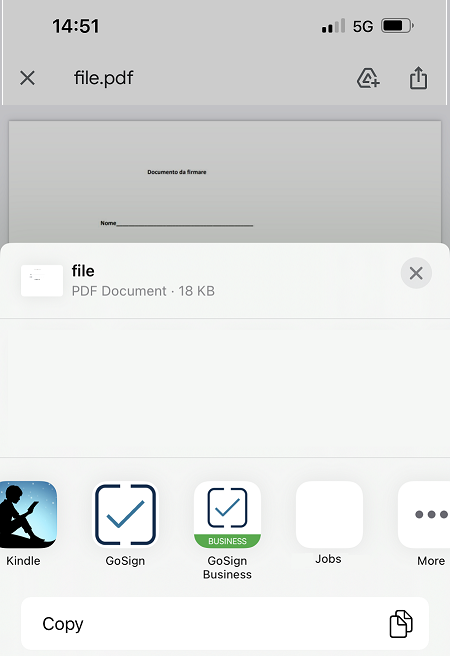
You can choose a file to sign from your device and open it with Go Sign Business Mobile by directly activating the sign and send function.
The page allows the user to:
To cancel the insertion of the document and the signature, the user selects the cancel key (bottom left).
To insert a signature into the document, the user selects the signature or initials key at the bottom of the screen, and then taps the place in the document where they want to insert their signature. To delete a signature inserted by mistake simply select the trash can icon and then tap on the action you want to remove.
The signature feed appears on the document. The same is already in the state "To be confirmed" since the user who entered it is the user who must sign.
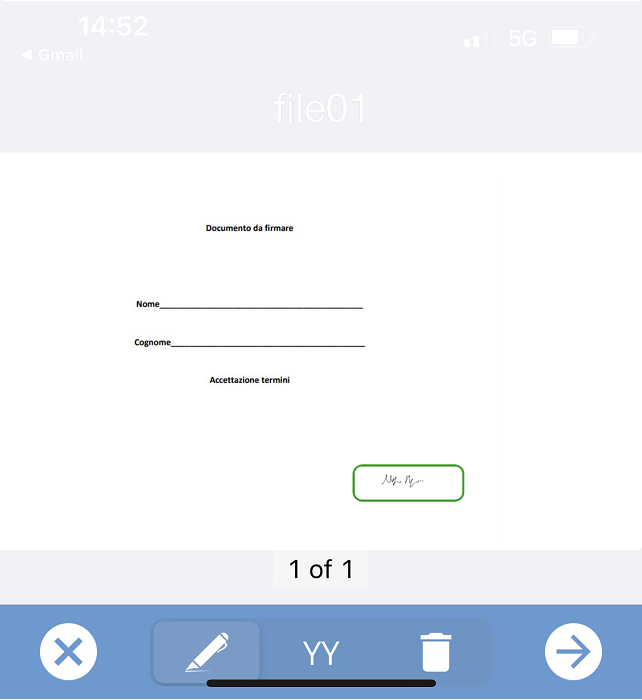
By clicking on the arrow icon at the bottom right, you can proceed to enter the file's:
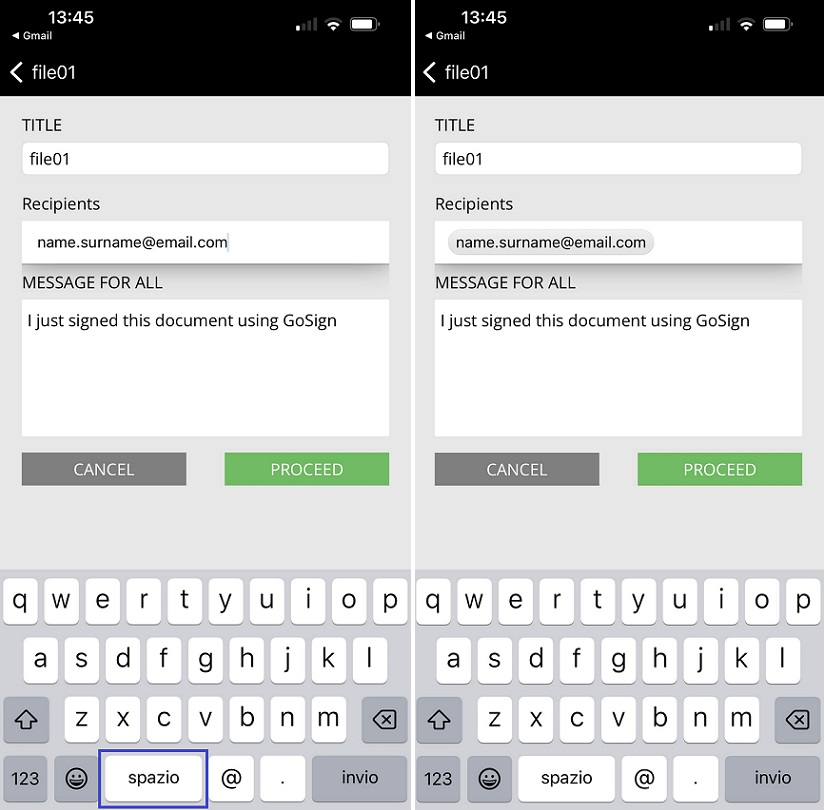
After entering the recipient's e-mail, you will need to click on the space/tab button to validate the email address.
A click on the Proceed button will allow you to confirm the operation.
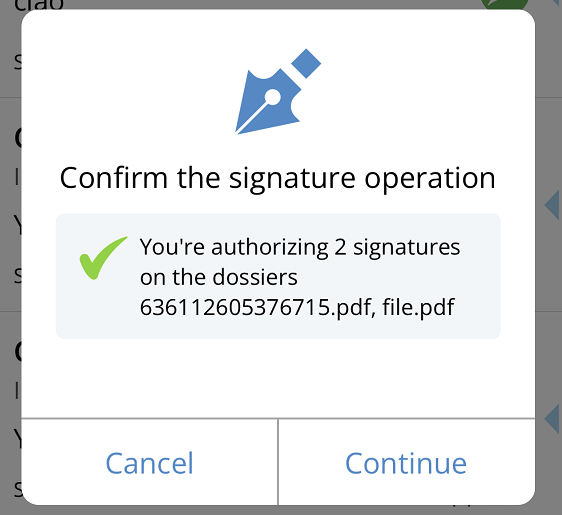
A tap on the Continue button will allow you to add your Signature PIN and the OTP received via SMS.
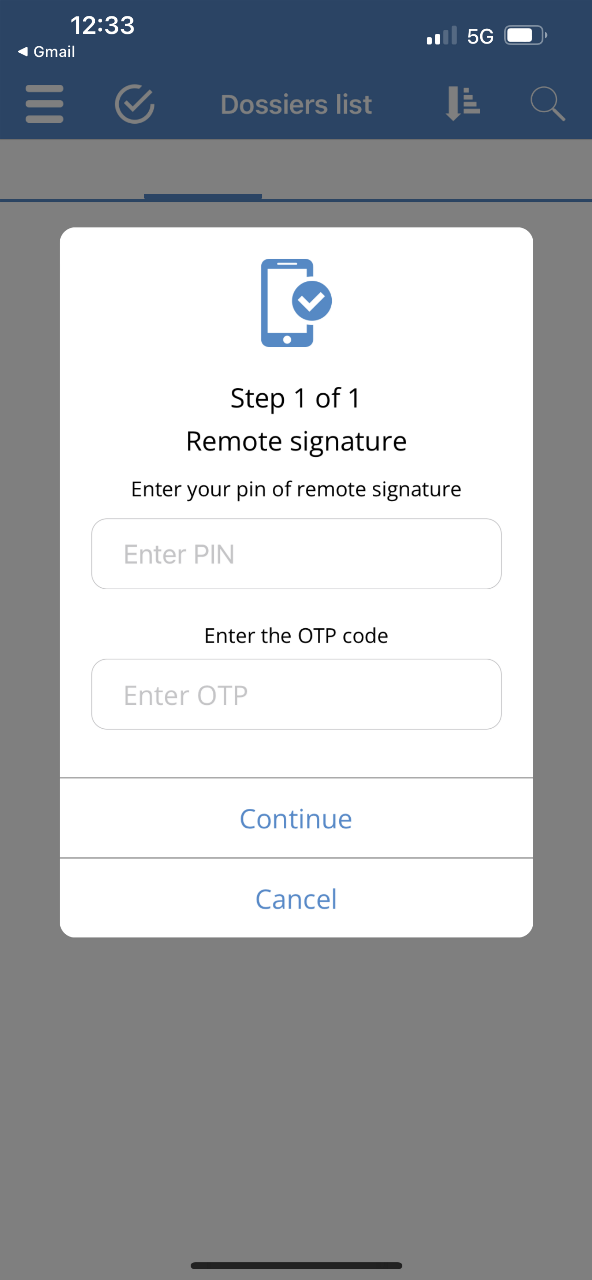
The file will then be sent and synchronized automatically, disappearing from the list of cases still pending.
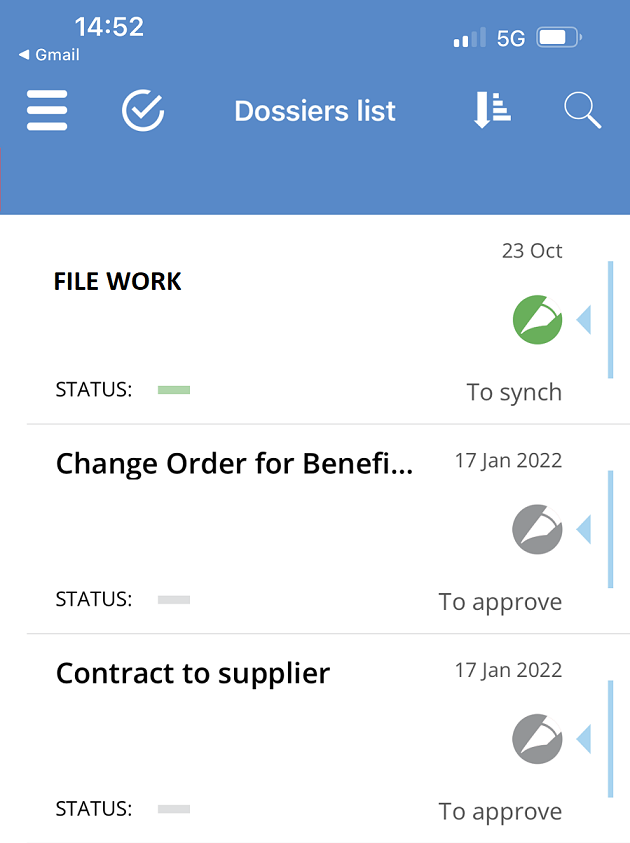
The panel groups all the accessory functions previously accessible in different modes on other pages.
Especially:
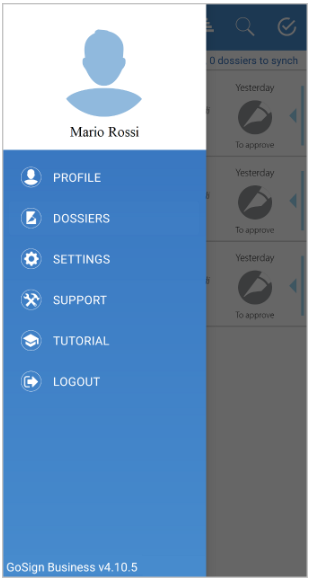
The profile summarizes all the features related to the user's signature.
The information displayed are:
Authentication type (for synchronization) In GoSign there are 3 conditions in which the user can be required to authenticate:
For the first case, GoSign login credentials are required: UserID and Password.
For the second case, the request changes depending on the type of signature assigned to the document:
For the last case it was decided to leave the user the possibility to choose the level of authentication to be used at the time of synchronization.
The user can, by accessing his configuration page (Settings) via web application, choose the type of authentication to be activated during synchronization between Server and APP among the following alternatives:
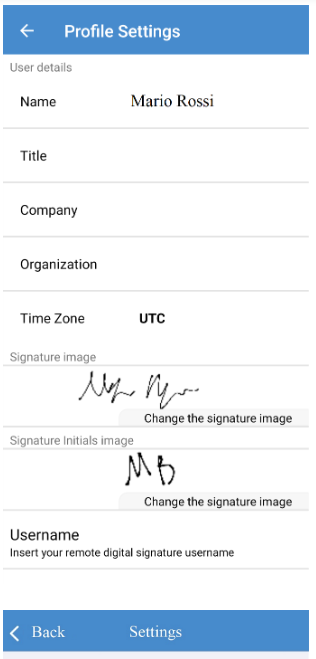
These are advanced configurations that may be required to manage special conditions (iOS devices only):
Log Level – sets the level of information that the application records during operation (by default trace). The change of the parameter is required to analyze anomalies detected in the use of the APP.
Server Proxy – if the Internet connection is made through a connection to a proxy server, this section is used to enter the connection parameters.
By selecting the option, the system prepares an email for application support with the log of the activities carried out attached (only for iOS devices).
This function can be requested by the application support to analyze anomalies detected in the use of the App.
