
 Guide to request and activate QES with Self-Q recognition
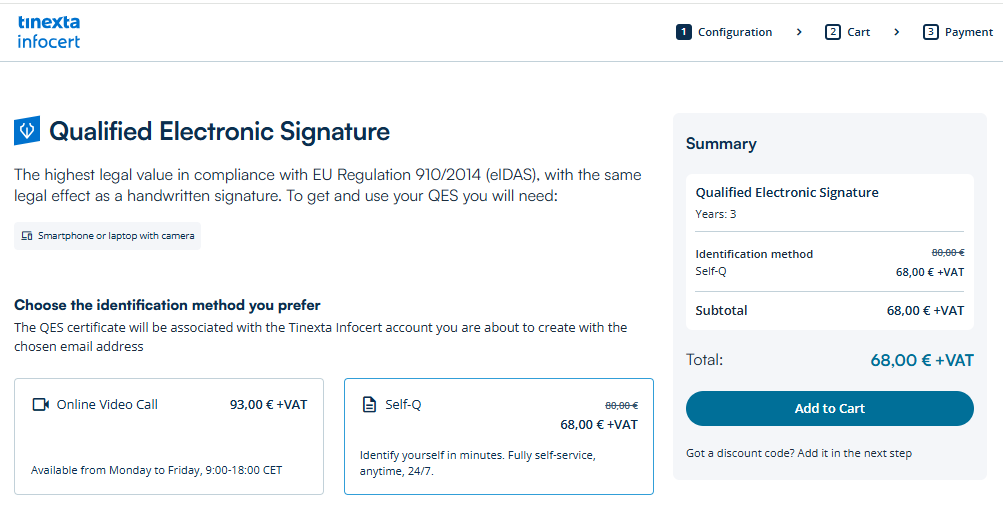
To activate the QES through the SELF-Q recognition process, select the SELF-Q recognition method.
After selecting this recognition method, you will be required to continue the process using your smartphone, in order to capture images of the identity document previously entered.
Then start the request process by clicking the Add to Cart button.
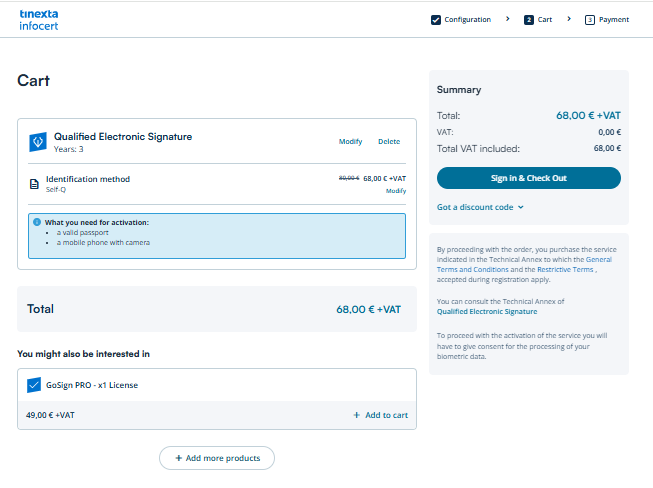
Proceed with the purchase by clicking Sign In & Check Out.
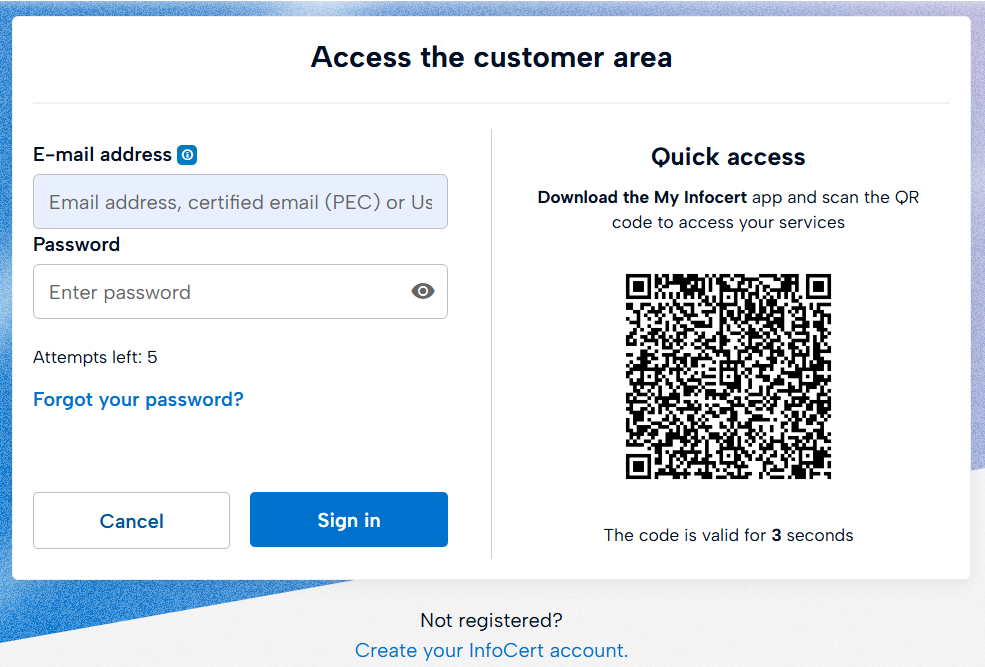
If you already have a Tinexta Infocert account, simply enter your credentials and Sign in.
If you don't have a Tinexta Infocert account yet, and this is your first time purchasing a Tinexta Infocert service, you must create a new account in order to complete the purchase. Click Create your InfoCert account at the bottom of the screen, then click Register to complete the purchase of the service.
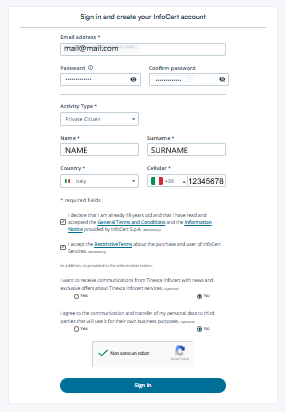
To complete the registration, fill in your personal details and click on Sign in.
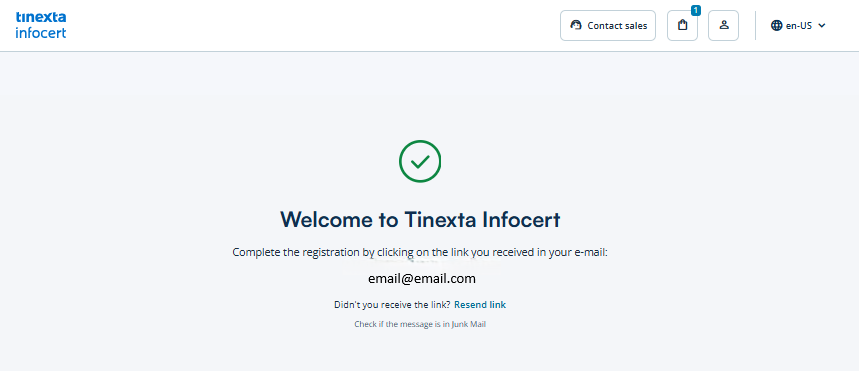
Check your email inbox. You will find a link to complete the registration.
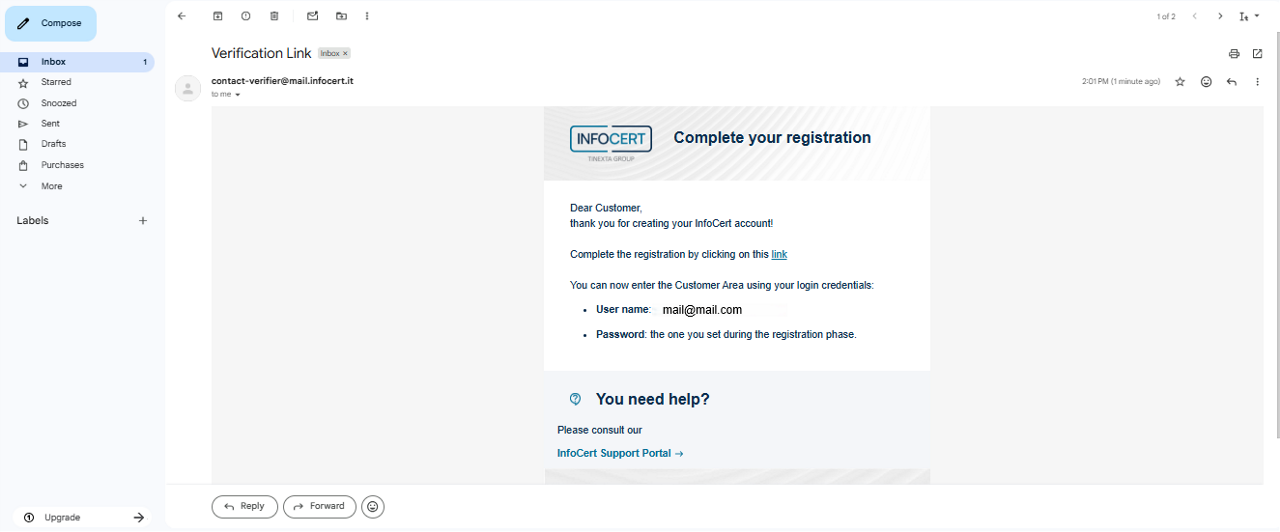
To complete the registration, click on the link.
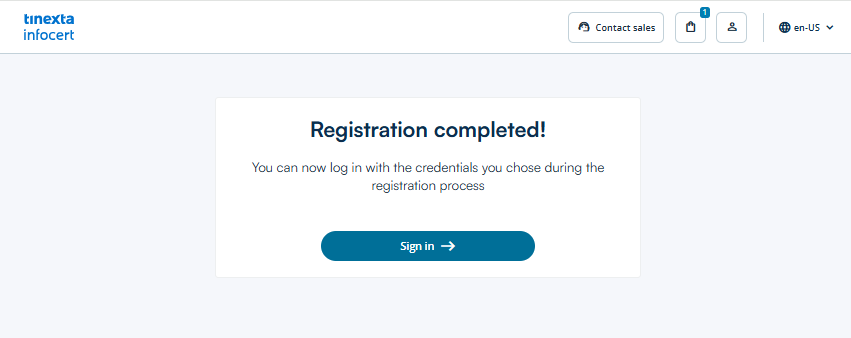
Tinexta Infocert account registration is completed. Click Login to access the Customer Area of the Tinexta Infocert shop.
Enter the email address and password associated with your Tinexta Infocert Customer Area account and click Login, or scan the QR code using the My Infocert app.
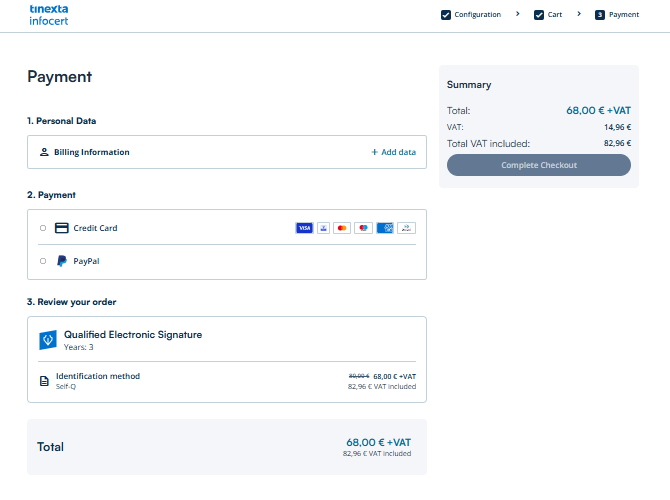
Enter the billing address, if already available. Otherwise, click + Add details and enter the required information in the fields provided.
Then choose one of the available payment methods:
If everything has been completed correctly, a confirmation message will appear on the screen indicating that the order has been successfully placed.
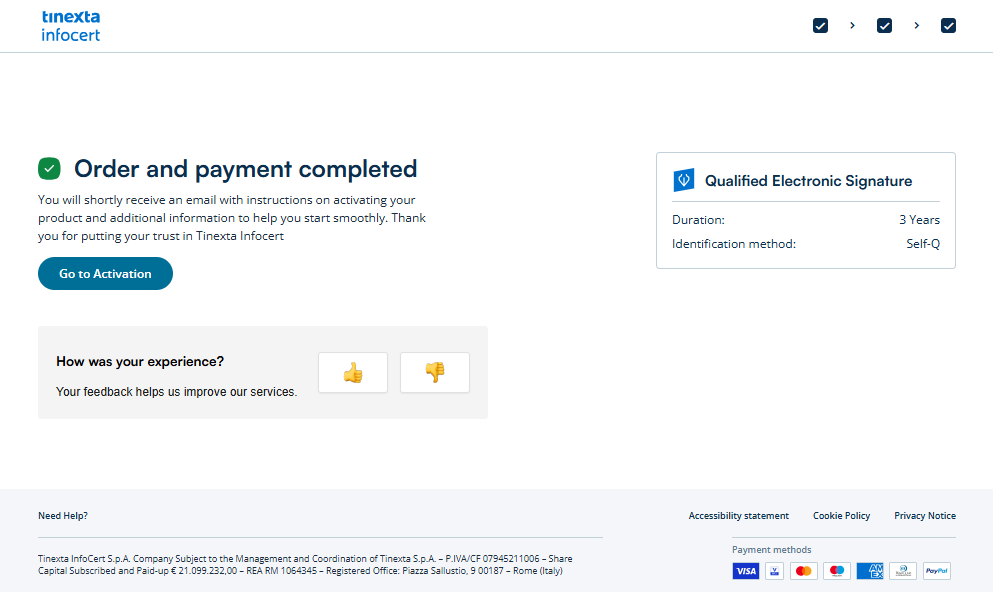
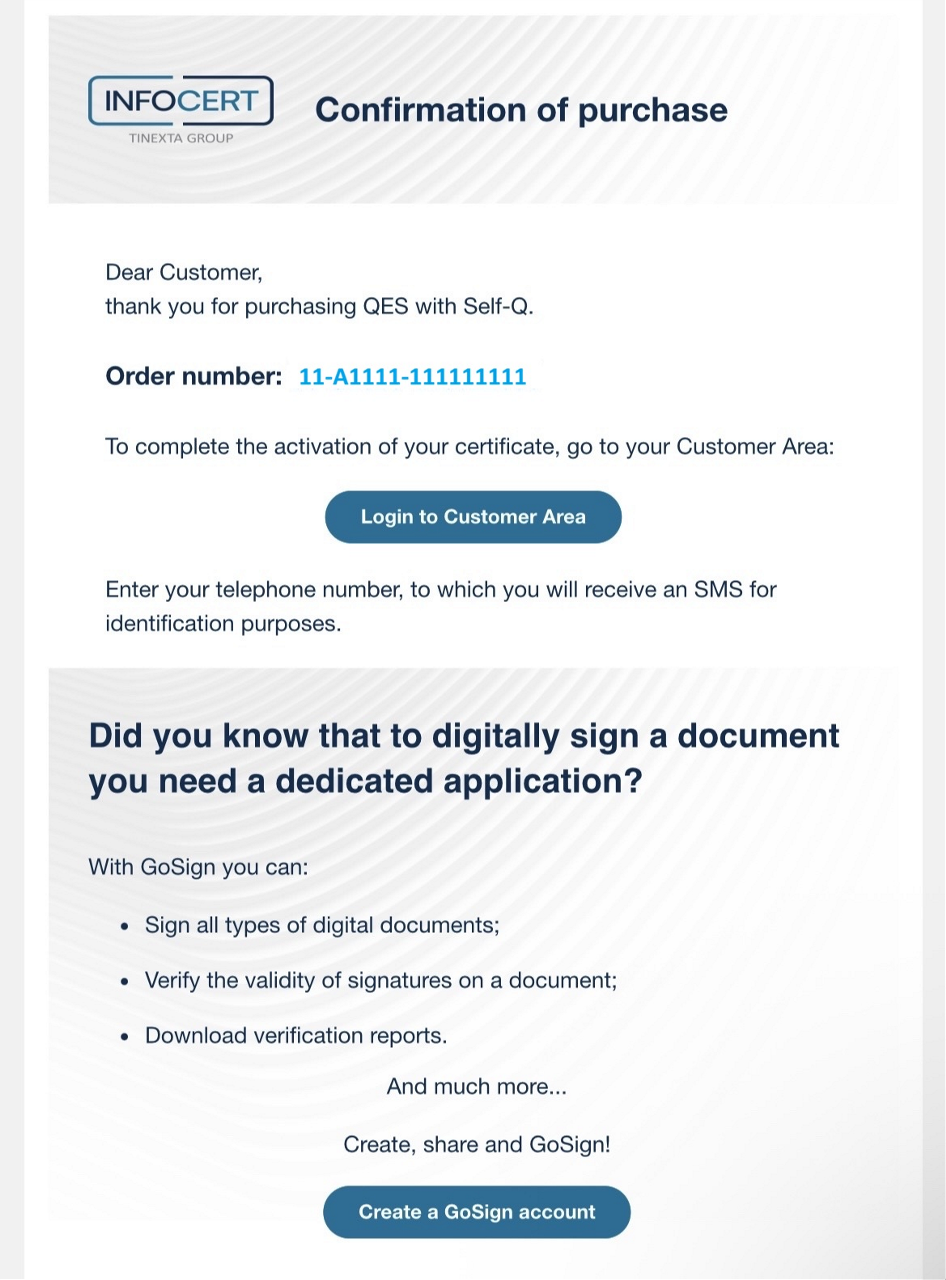
After the purchase, you will receive an email from no-reply-shop@mail.infocert.digital. Click Login to Customer Area in the email and follow the instructions to complete the activation of the service.
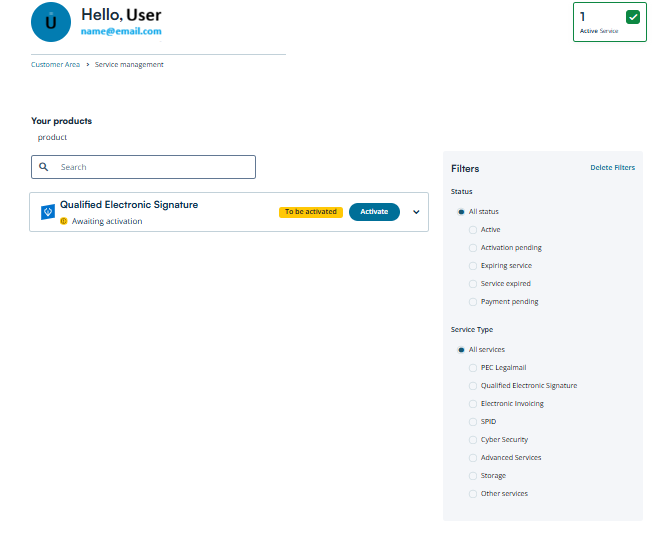
You will now be redirected to the Customer Area where you will see your products.
Select Qualified Electronic Signature, which is awaiting activation, and click Activate.
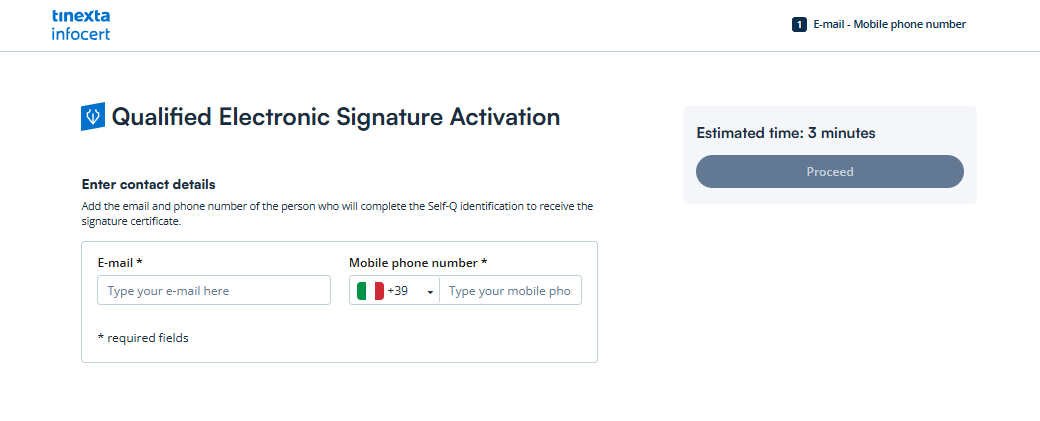
Enter your personal email address and phone number, then click Proceed.
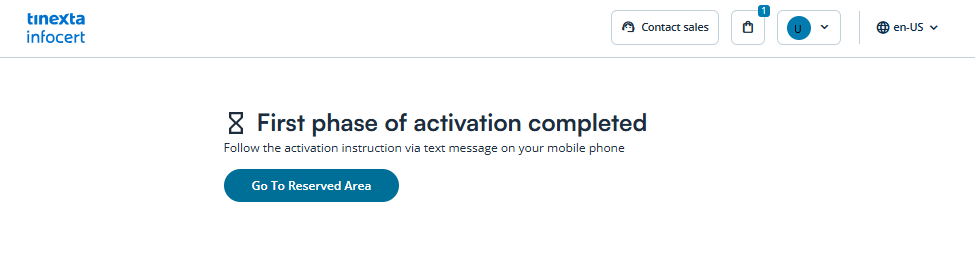
After the first phase of activation is completed, click Go to Reserved Area.
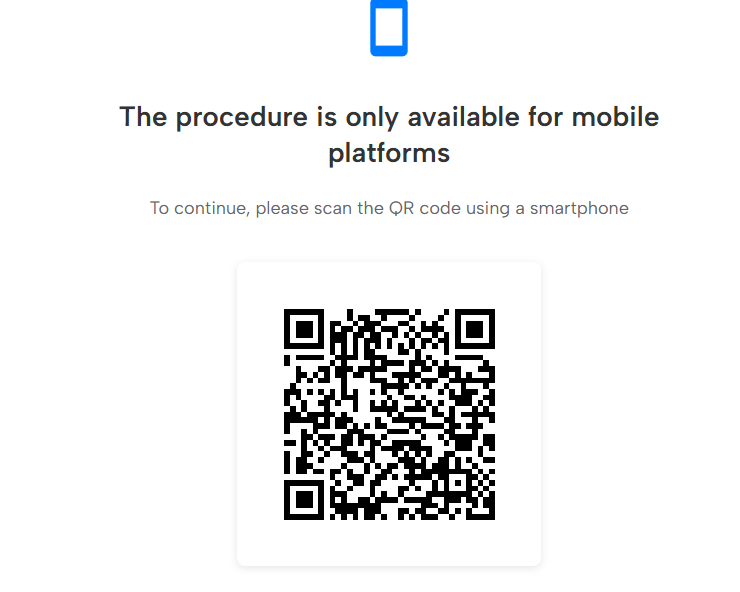
To continue, scan the QR code using your smartphone or click the link received via SMS to start the procedure.
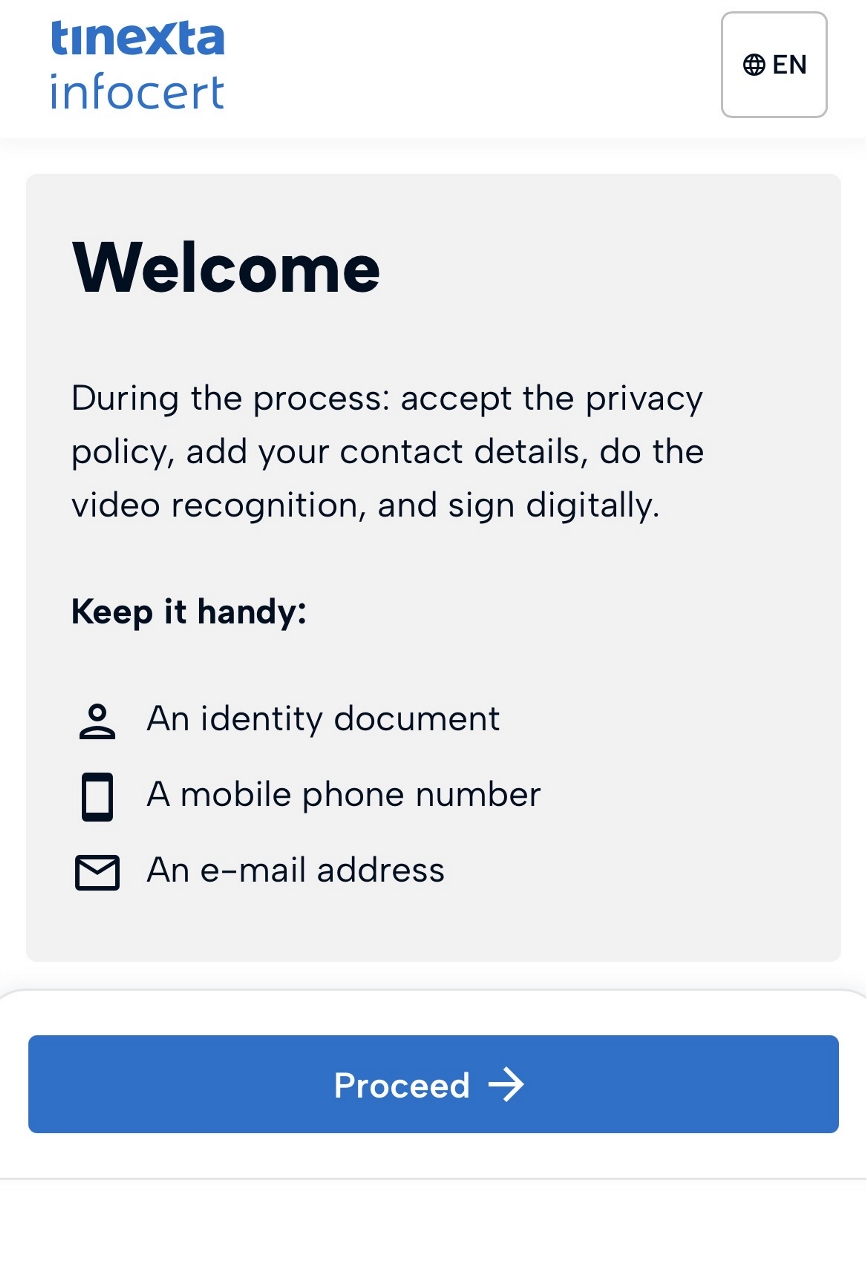
Keep your identity document handy and click Proceed to start the identification process.
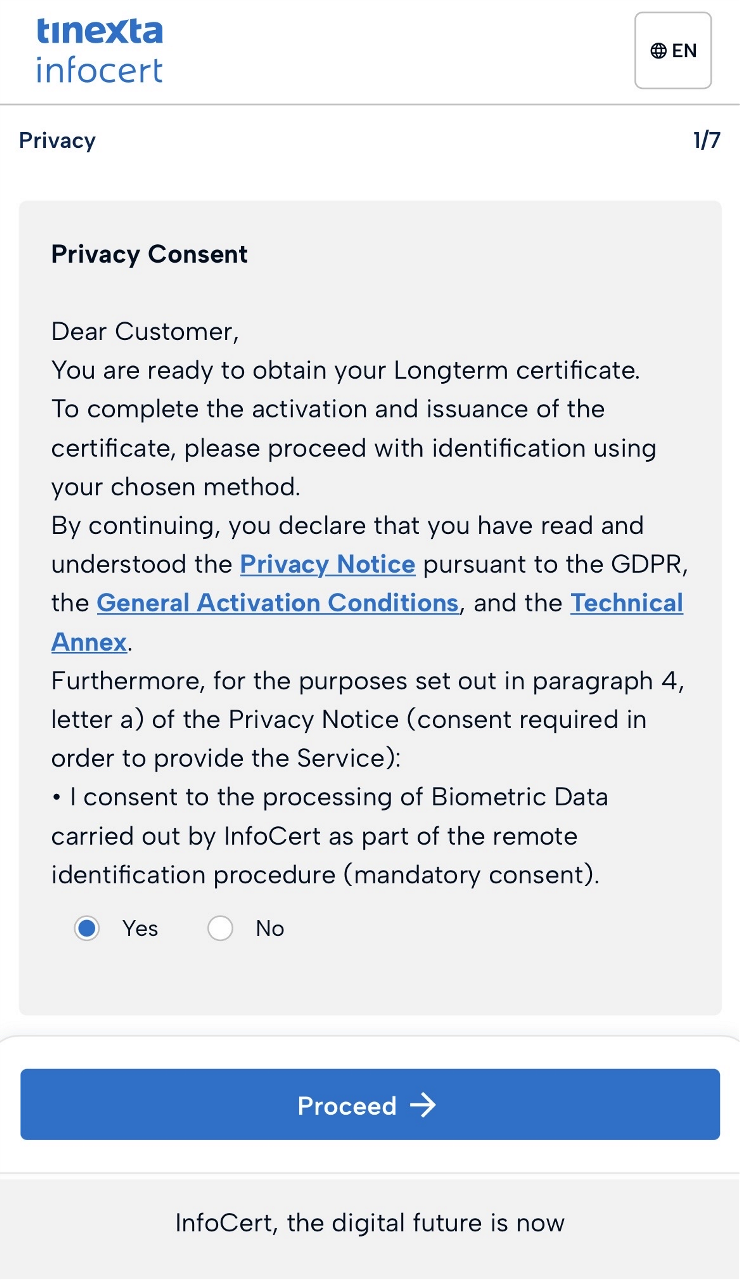
To continue, accept the terms and conditions and click Proceed.
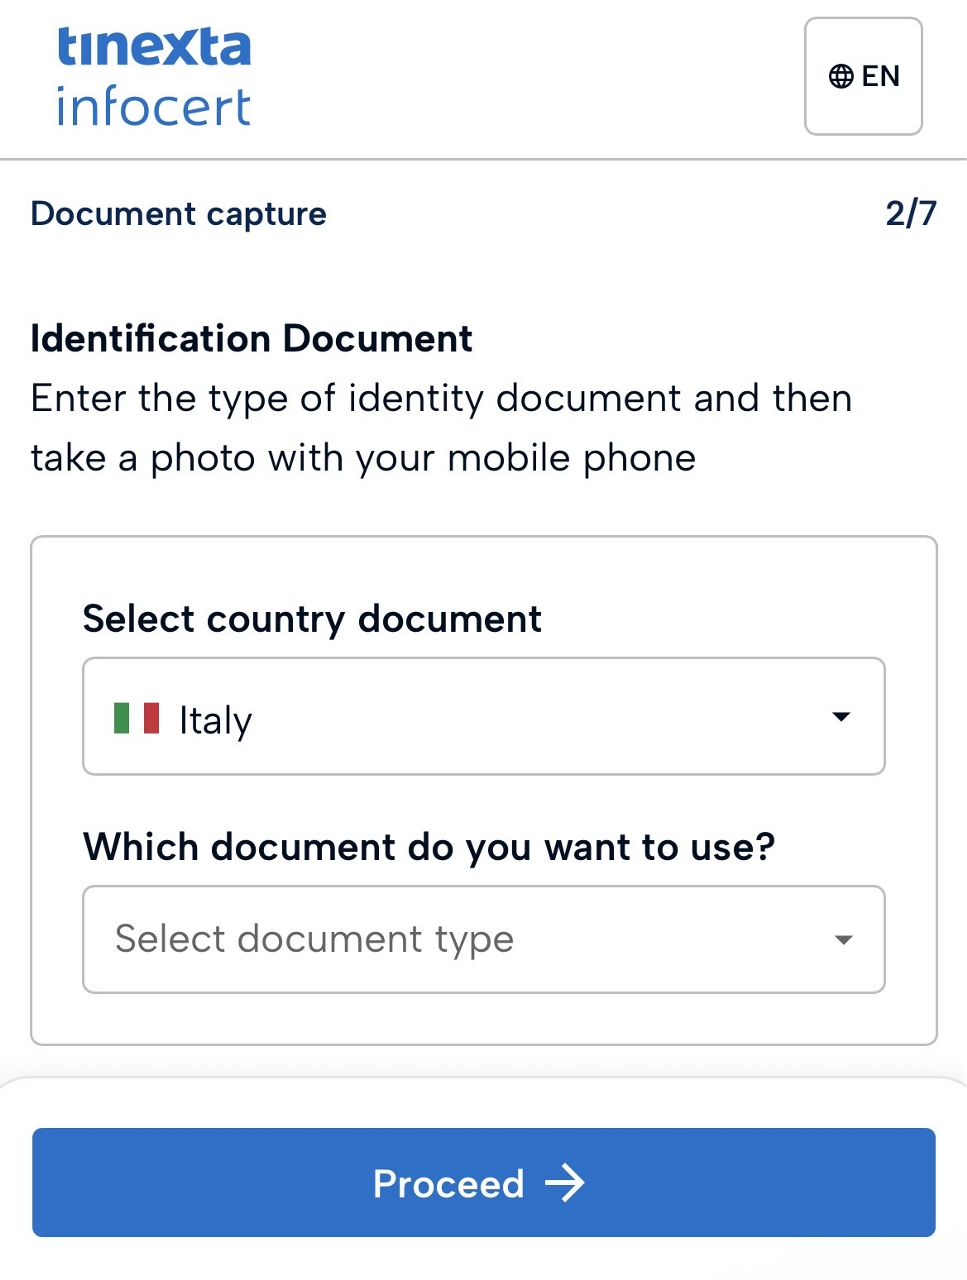
Select your country of issue and document type, then click Proceed.
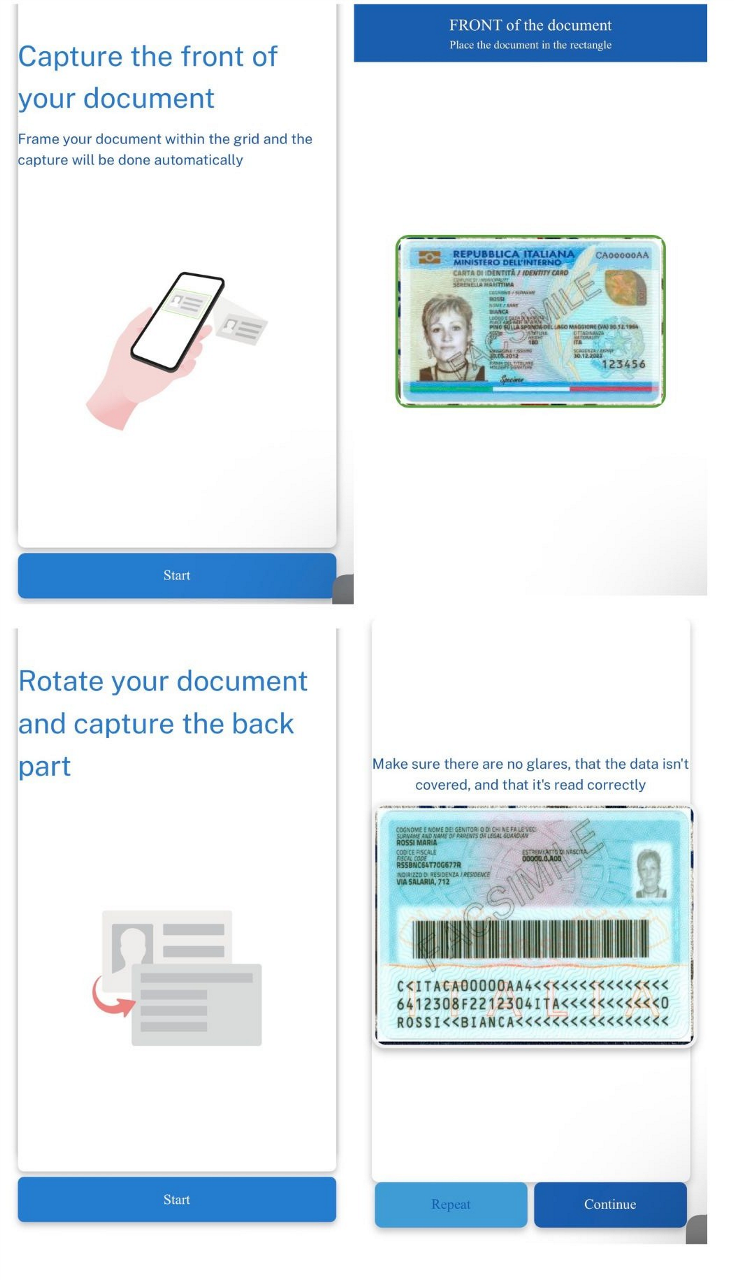
Click Start. First, capture the front side of your document, then capture the back side and click Continue.
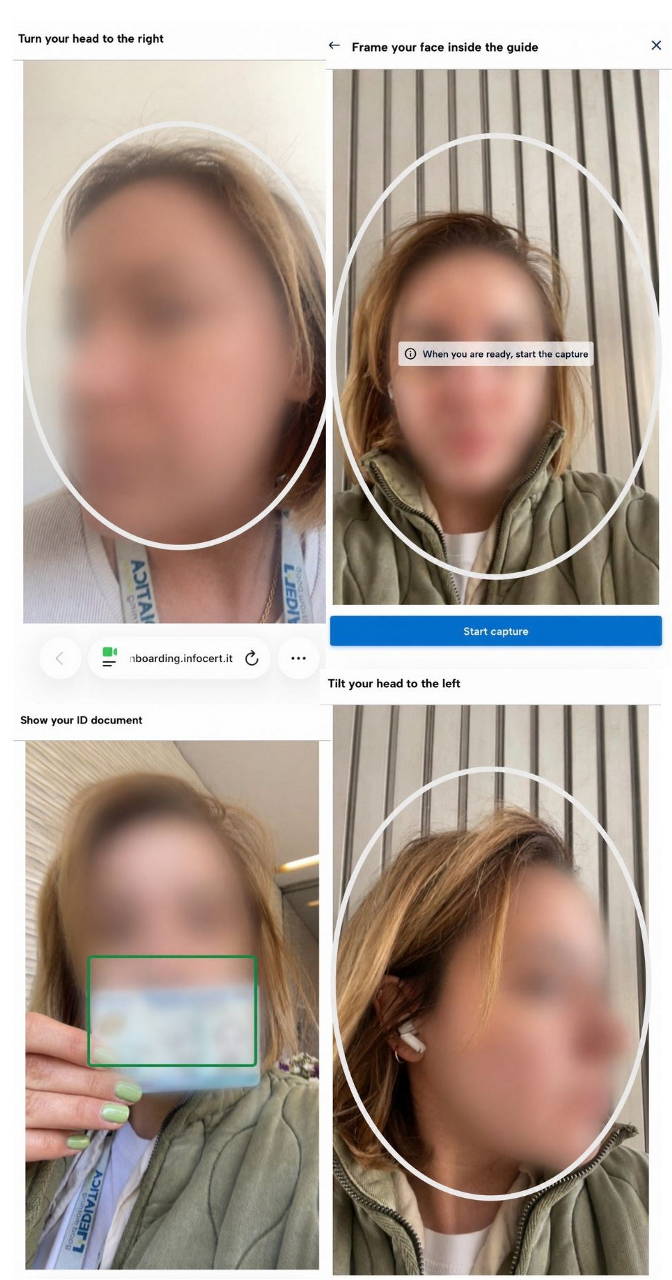
Follow the instructions displayed on the screen to complete the liveness verification process.
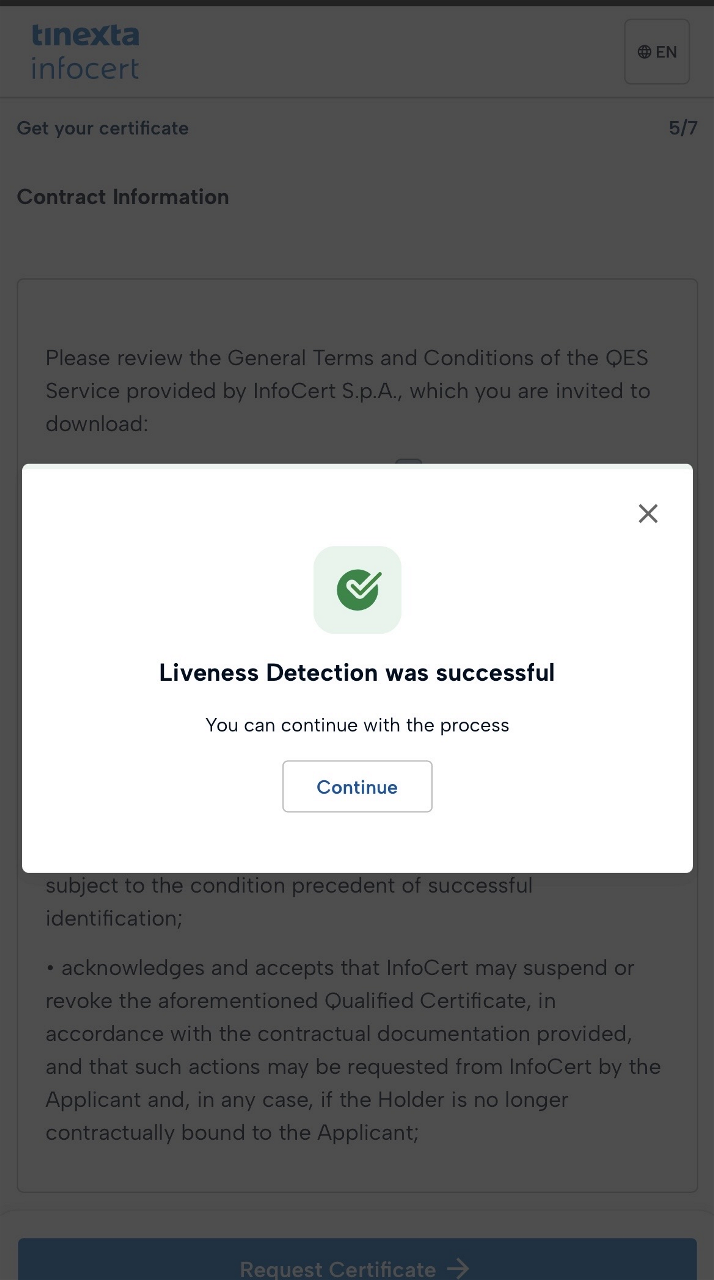
Once the liveness detection has been completed successfully, click Continue to proceed with the process.
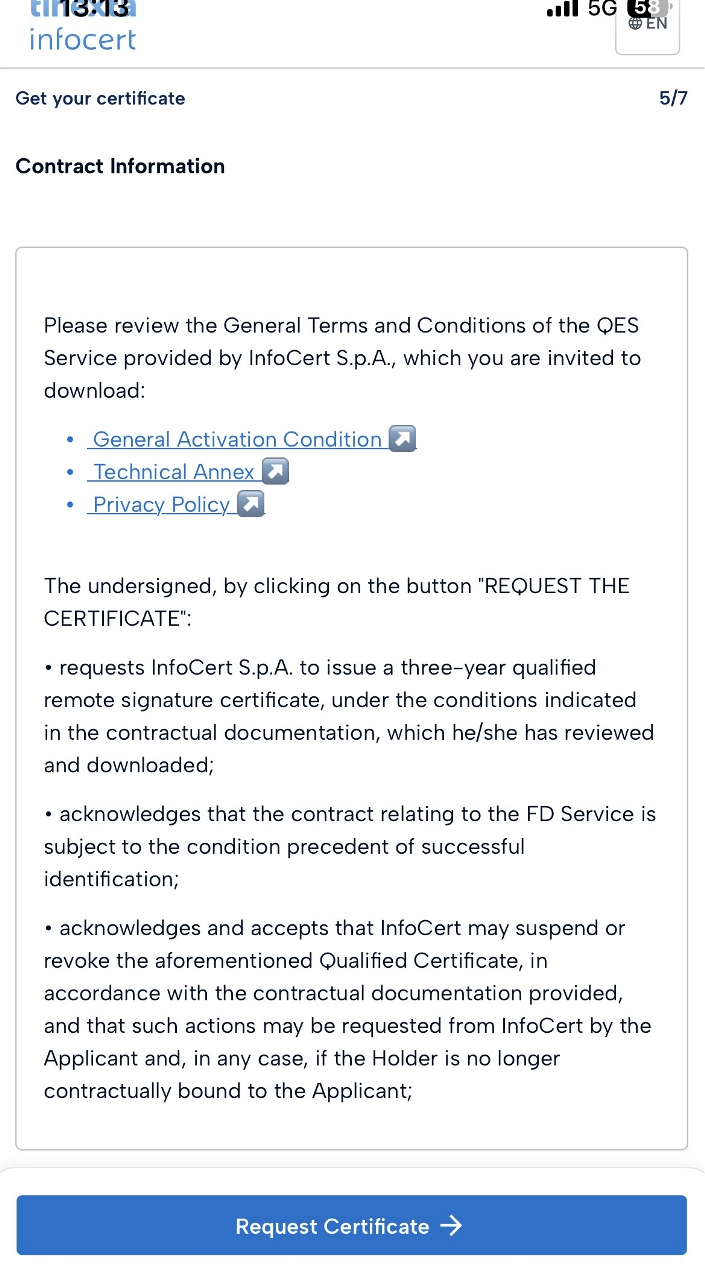
After reviewing the general terms and conditions of the QES service, click Request Certificate.
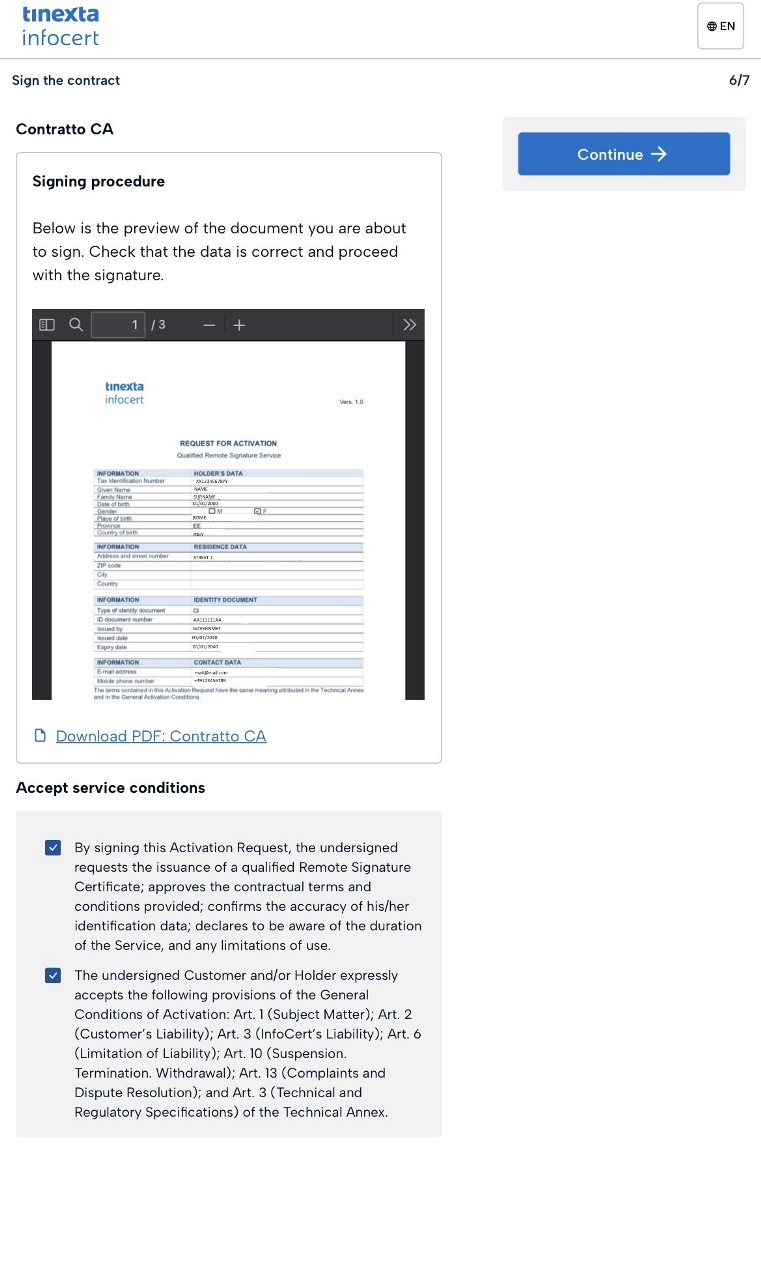
Scroll down, accept the service conditions and click Continue.
Choose a PIN and make sure not to forget it, as you will need it every time you use the certificate. Otherwise, you will have to purchase a new signature.
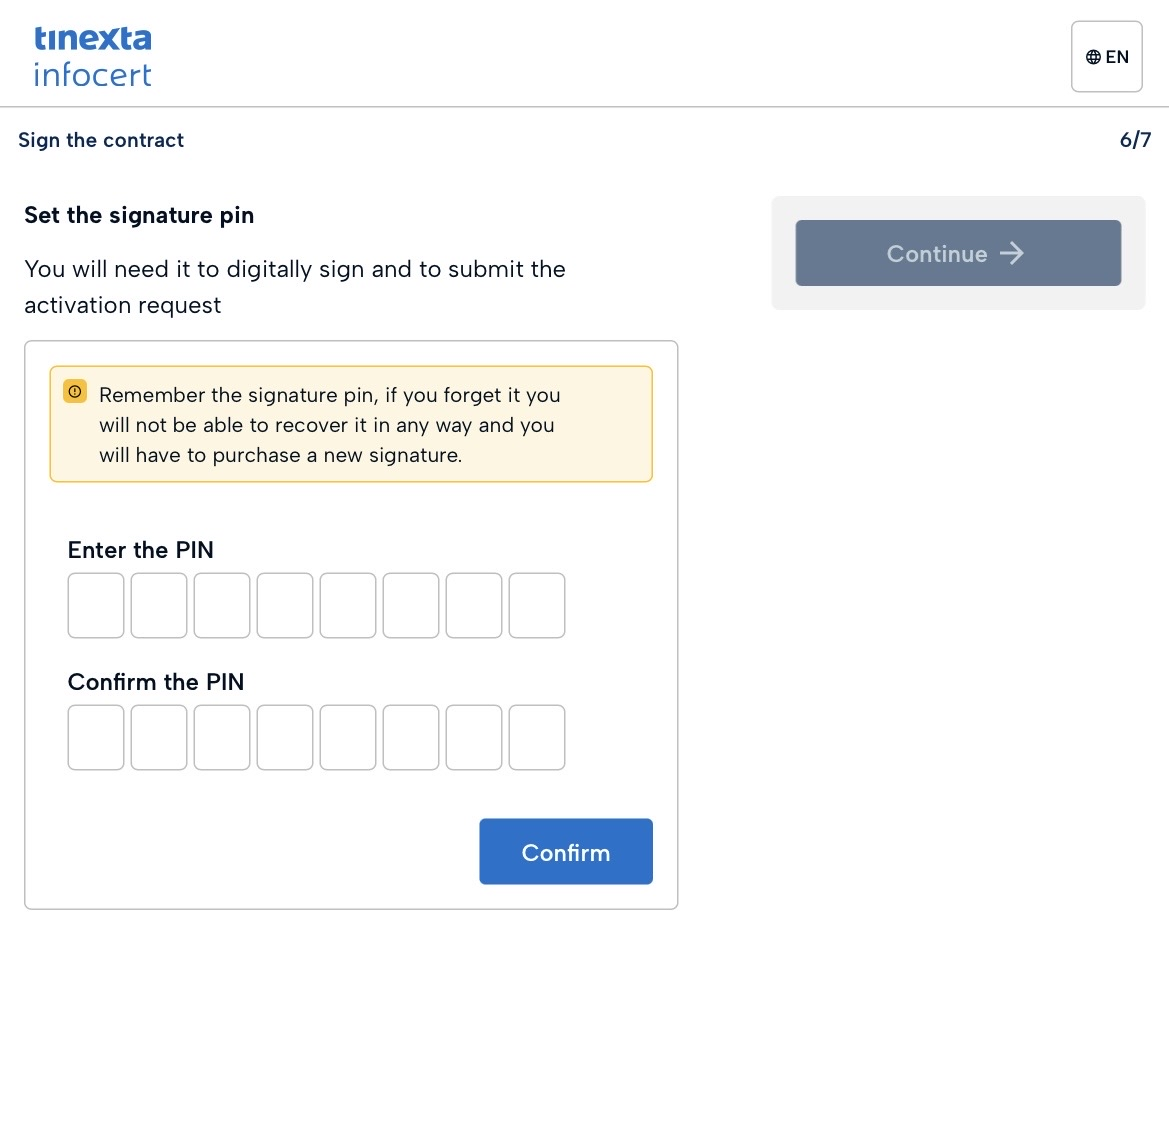
Make sure not to forget the PIN, as you will need it every time you use the certificate.
Once the PIN is set click on Continue to proceed to sign the contract.

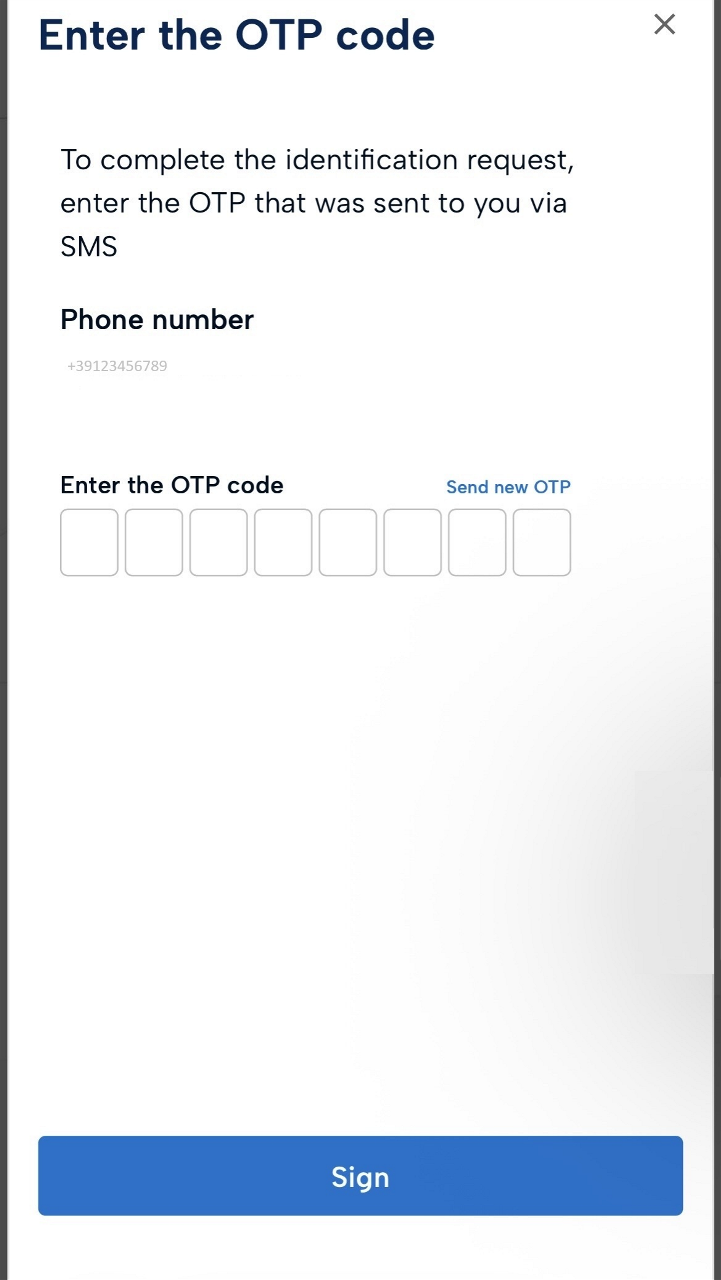
You will receive an OTP via SMS.
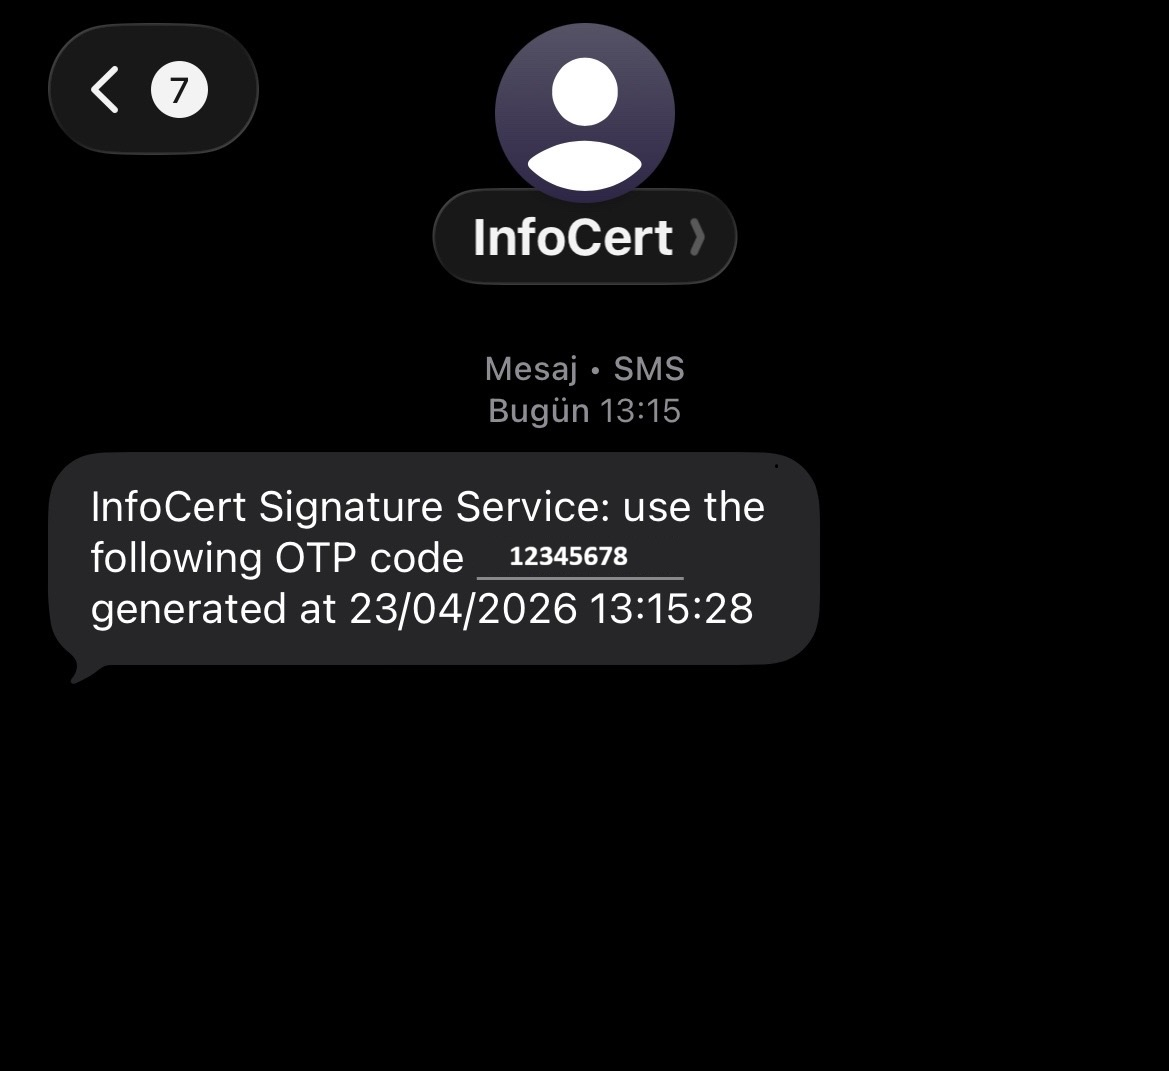
Enter the OTP code received via SMS, then click Sign to continue.
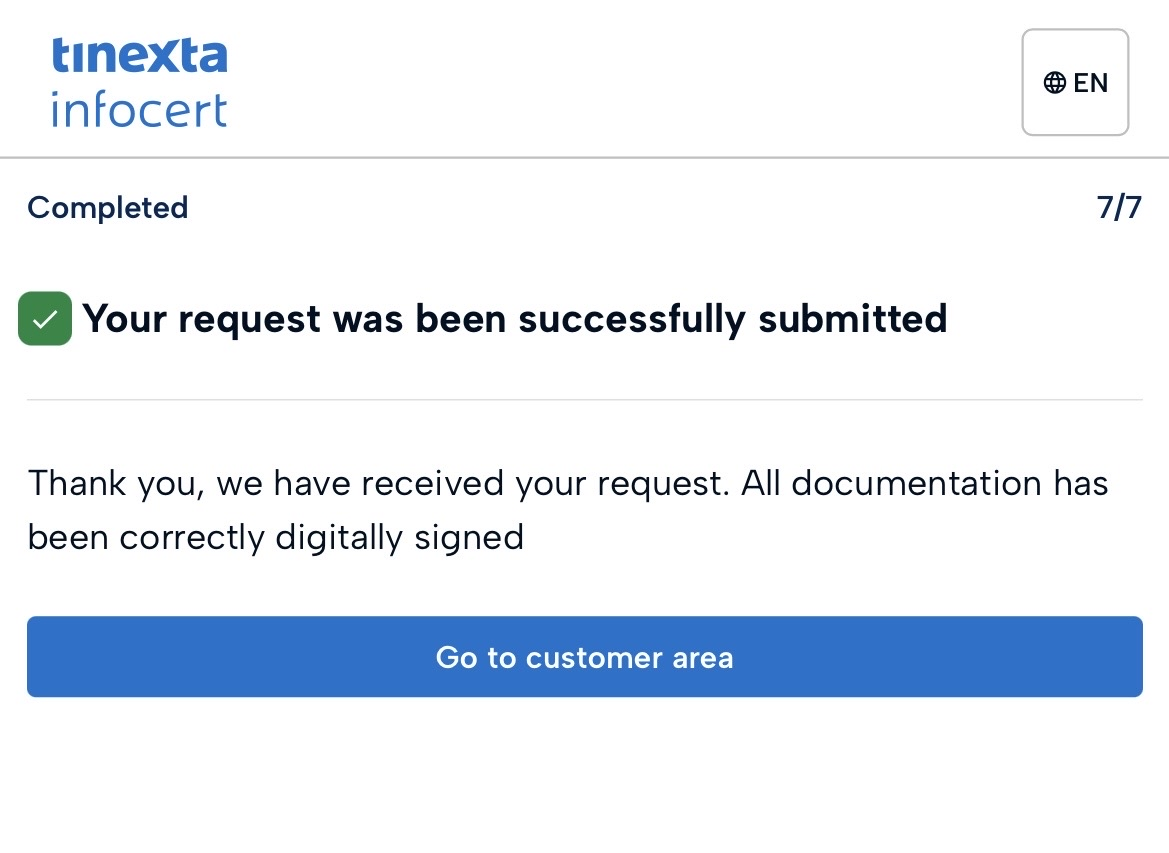
Once your request has been submitted, click Go to Customer Area.
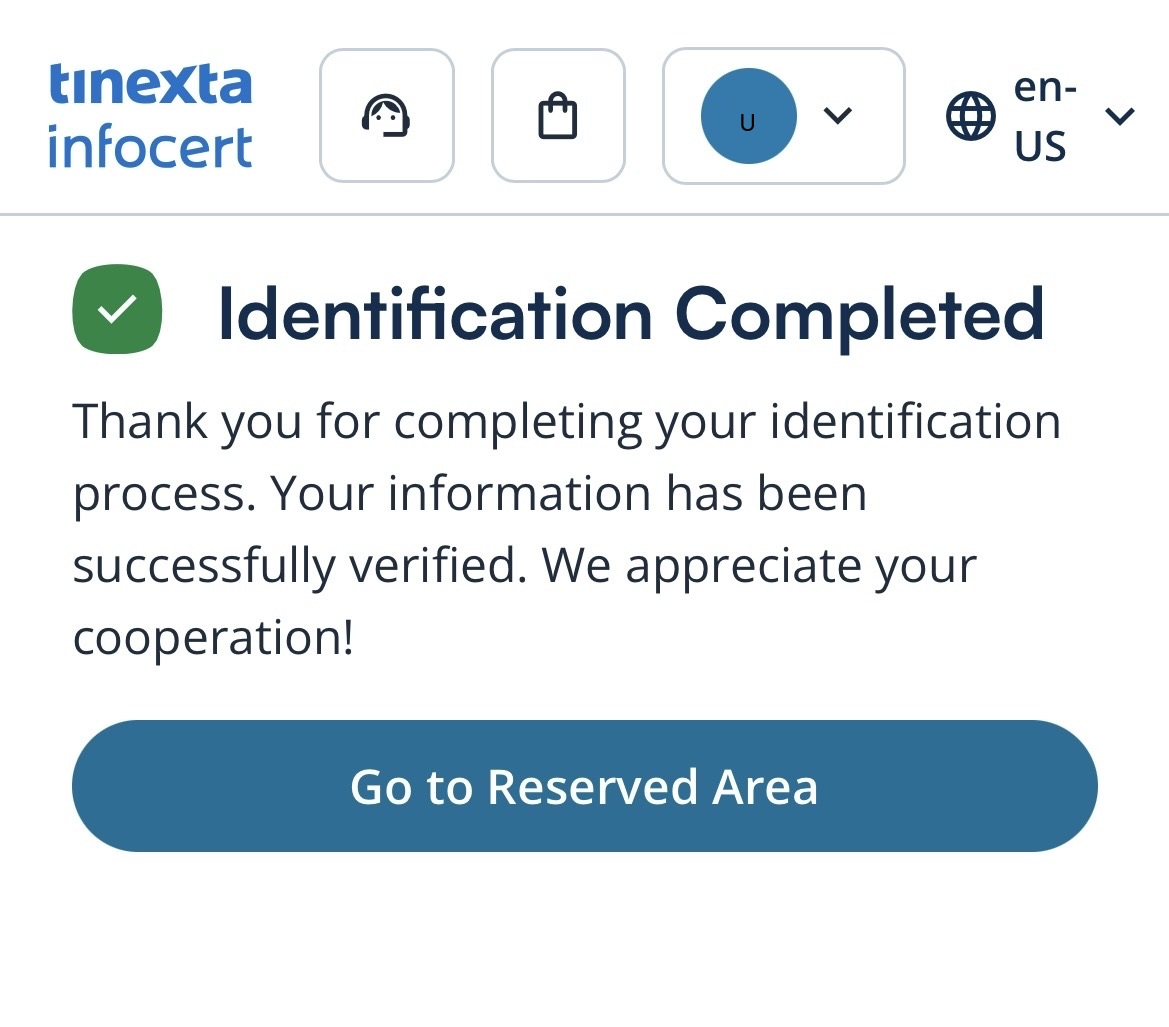
Once your identification has been completed, click Go to Reserved Area to view your purchase.
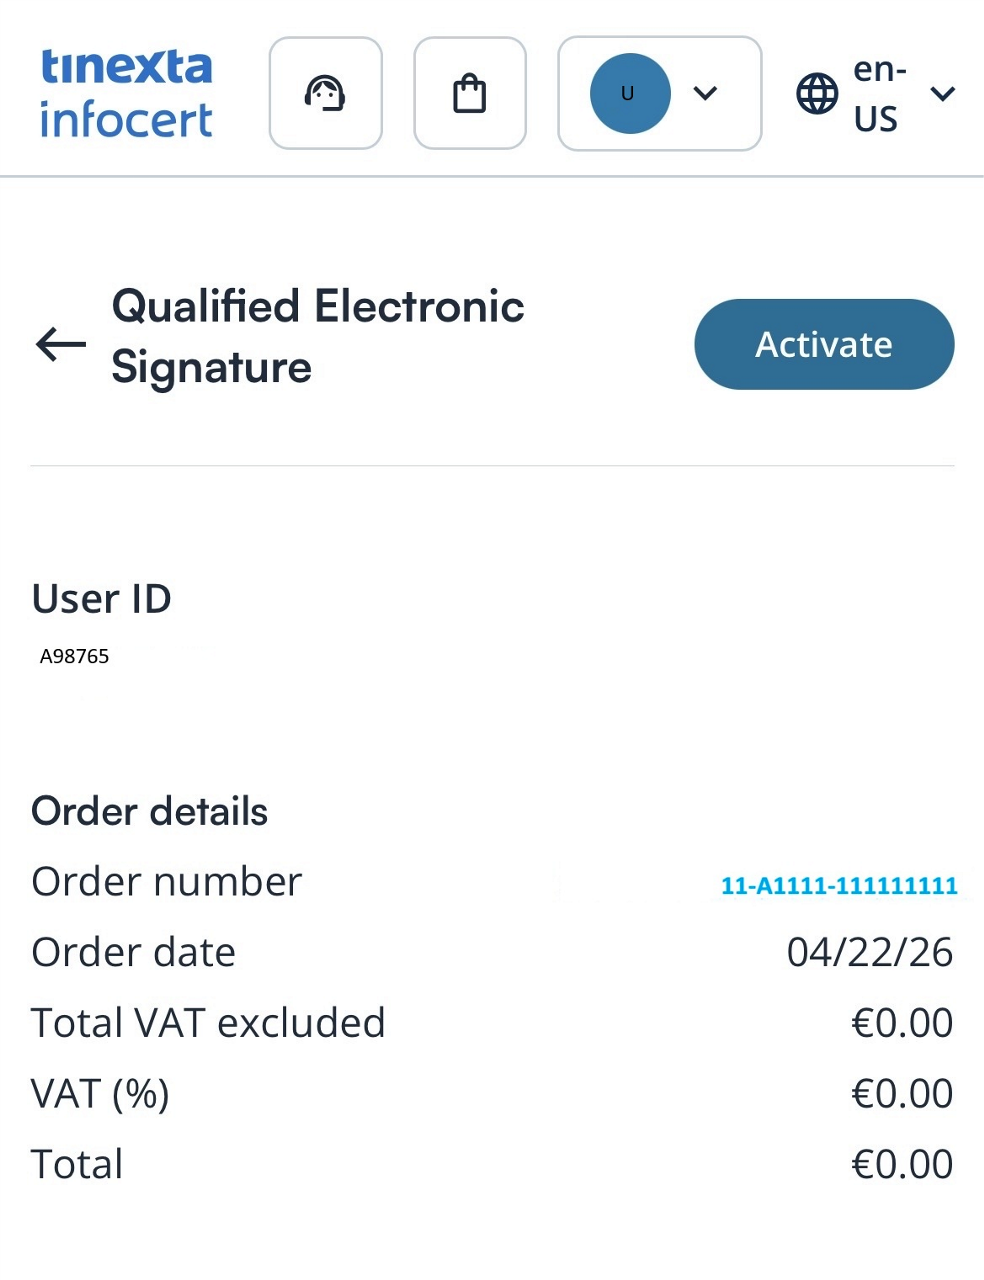
Click Activate to start using the Qualified Electronic Signature.
After a few minutes, check your email and follow the instructions to proceed with signing your documents.

You can now activate GoSign Free by entering your credentials and start using your signature.
For more information on how to use your Qualified Electronic Signature (QES) with GoSign, please refer to the following guide: How to use a Qualified Electronic Signature (QES) with GoSign

