
- What you need
- What to do
- Access to the portal
- Login or Sign up on Tinexta Infocert
- Payment
- Registration and Video ID Procedure
- 1. Privacy Consent
- 2. Document upload
- 3. Check your data
- 4. Face acquisition
- 5. Video recognition
- 6. Contract information
- 7. Signing procedure
- 8. Set the signature PIN
- 9. Enter the OTP code
- 10. Completed
- My Sign
 Guide to requesting and activating a QES Certificate - Video ID
What you need
- The link where you can buy the QES (Qualified Electronic Signature) certificate or directly to the Catalog;
- Your identification document (eg. Passport) with which the InfoCert Operator will be able to identify you during the live web session;
- The details of the payment method you want to select between credit card, or PayPal;
- A mobile phone to receive the OTP codes to complete the subscription of the contract.
What to do
The actions required to activate your QES certificate are:
- Access to the Portal and start the registration process;
- finalize the purchase of the certificate bearing in mind that you buy a QES certificate, payment methods available (eg. Credit Card or PayPal);
- complete the registration;
- follow the instructions given to you during the live web session by the InfoCert Operator;
- check the contract documents;
- sign the contract documents and change your PIN;
- install and configure the signature app.
Access to the portal
To request your QES certificate, you have to access this PAGE and click the button Buy Now on the “QES” card.


Select the type of recognition then to confirm your choise click on the Add to Cart button.
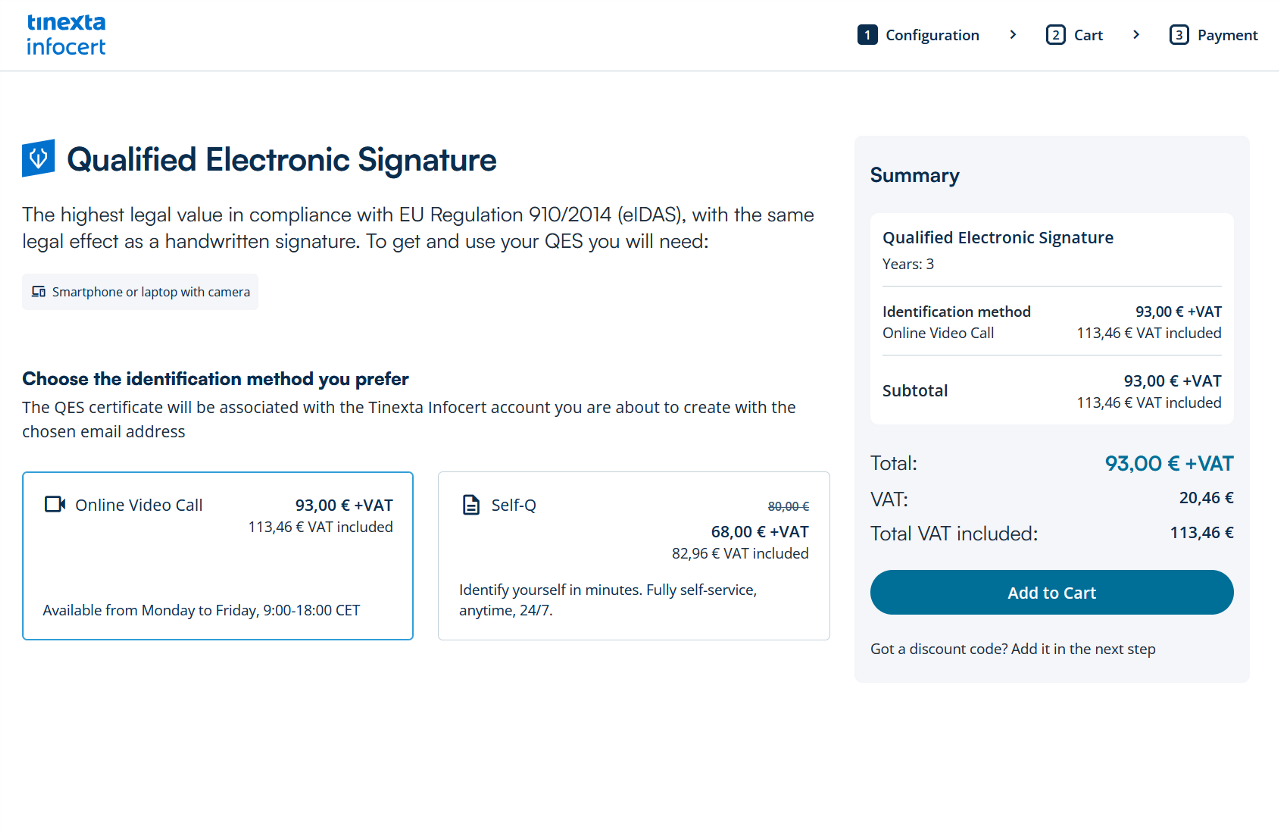
Once on this page, if you have a coupon, click on Got a discount code? Button to apply the coupon and click on Sign in & Check Out.
Login or Sign up on Tinexta Infocert
If you already have an account insert your credentials (e-mail address or UserID, password).

Otherwise, you have to sign up and create a new InfoCert account by clicking on Create your InfoCert account.

When choosing a password, the requirements needed for it to be valid are shown on the screen.

At this point, you will receive an on-screen message inviting you to check the email address you entered to complete the registration of your Tinexta Infocert account.

Click on the link received in the email.

Your account registration process is complete. You can now proceed with purchasing the service.

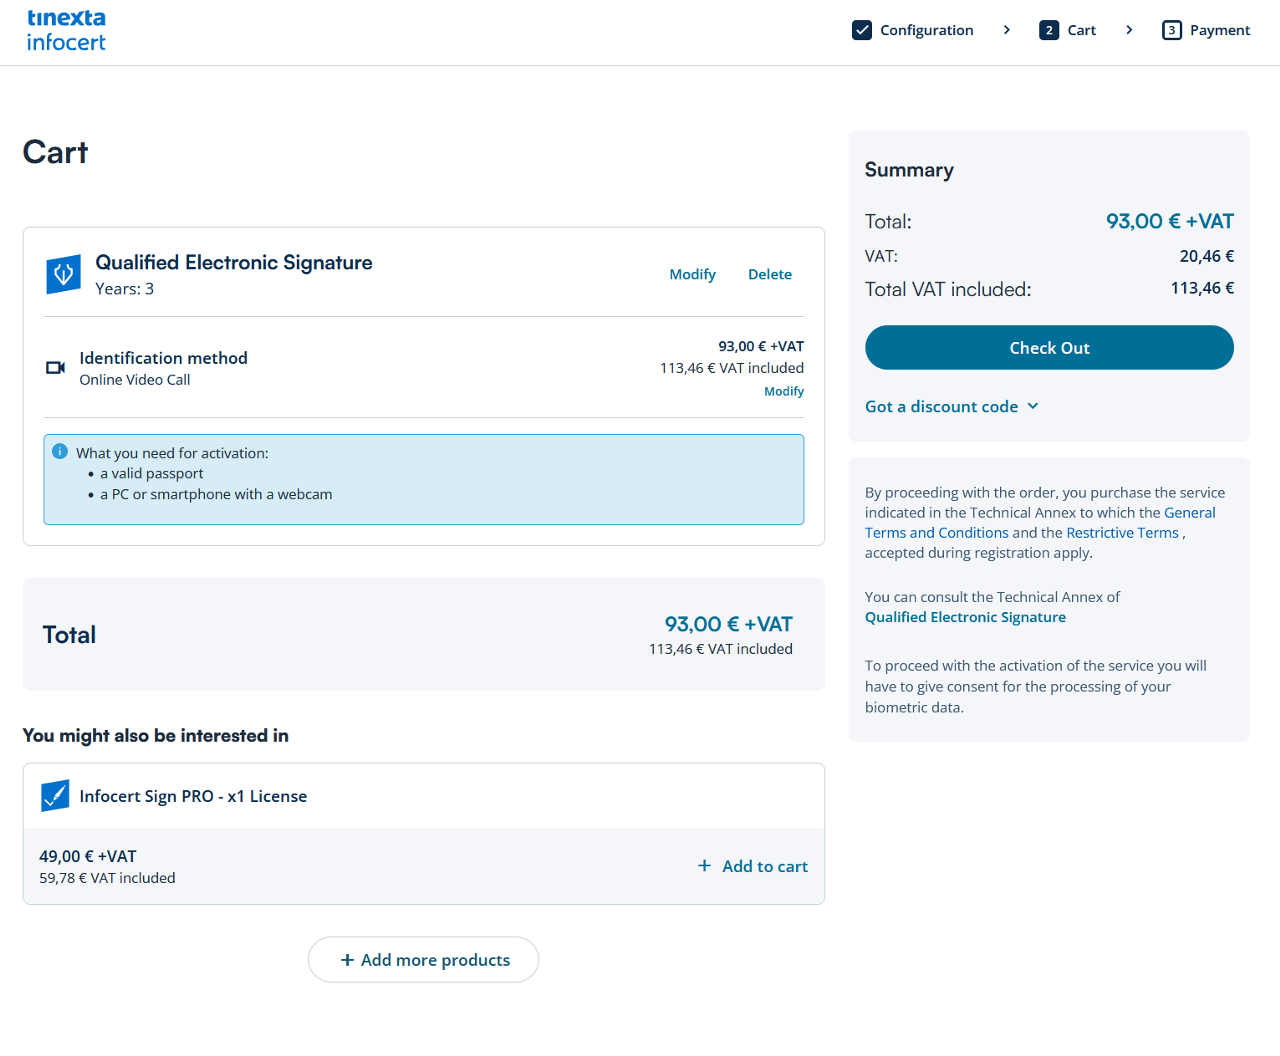
Payment
If required, you need to insert your billing data and choose your payment method (Credit card, PayPal). Once done, click on Complete Checkout.

Next step is to enter your payment details, proceed from the Billing Information section by clicking on + Add data.


After saving the data, choose the payment method and confirm from Complete Checkout.
Click the Go to Activation button to continue.
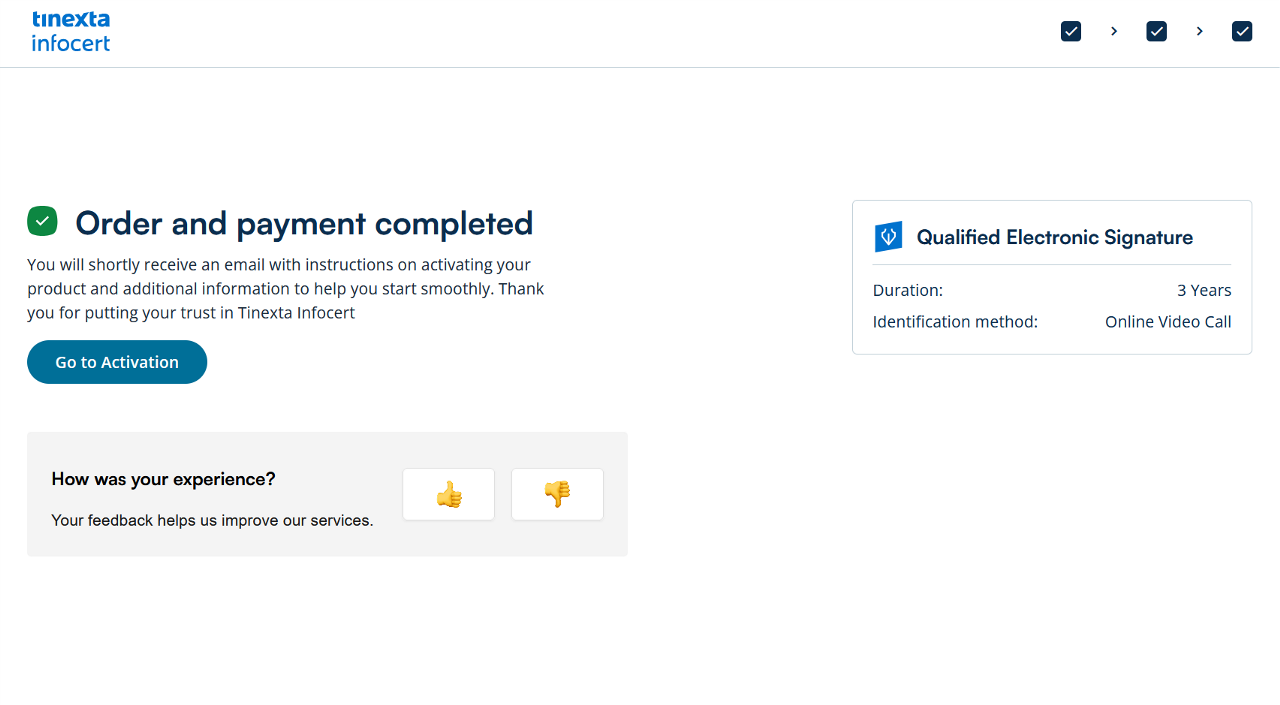
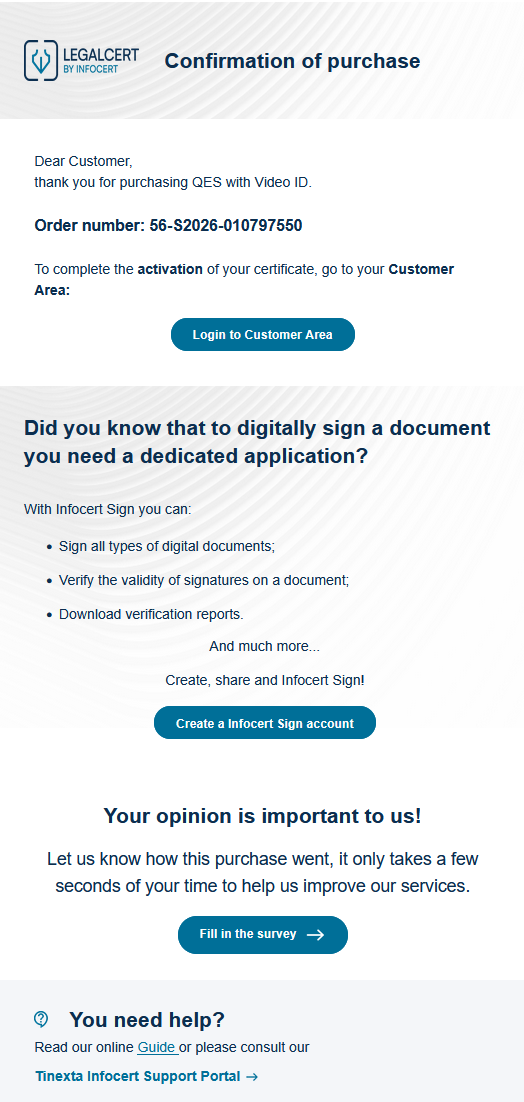
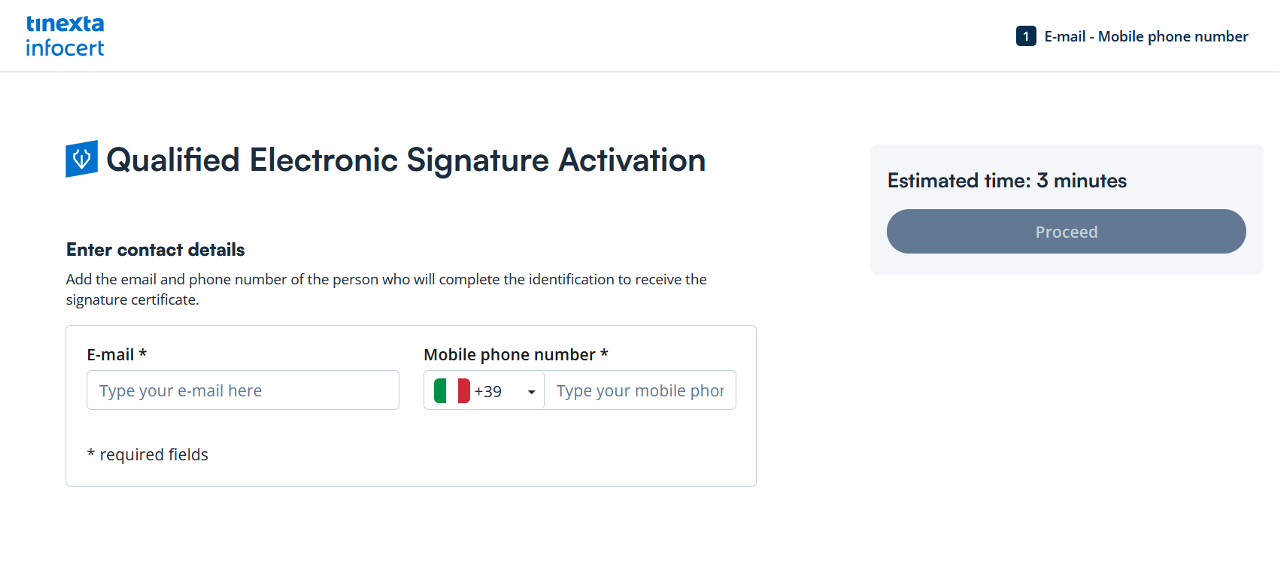
Check your email: you will find the purchase confirmation email with the order number for the service purchased (QES with Video ID) and the button to access your Customer Area of the Tinexta Infocert store.
After choosing the email address to which you want to associate the digital signature, click on the "Proceed" button.
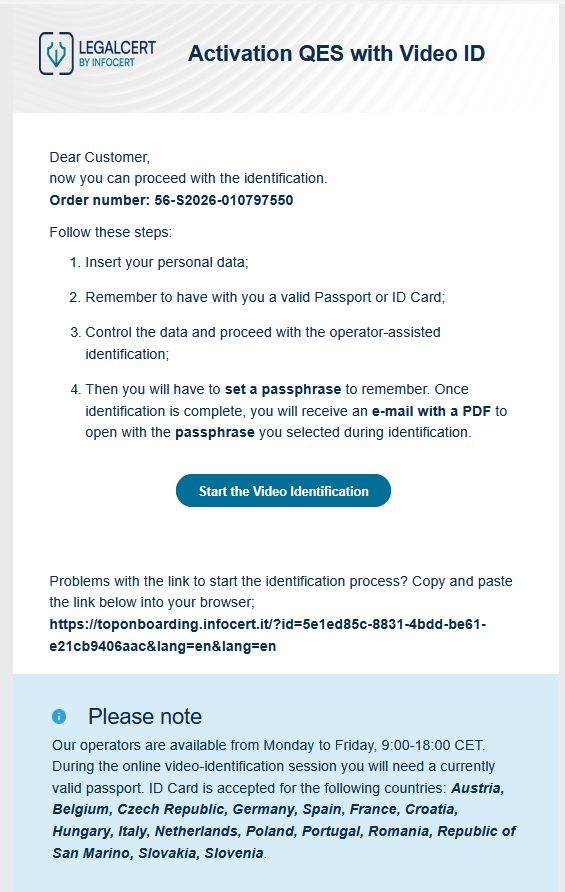
First phase of activation process completed.
Look at the mail to find the instructions to continue.

In the "Activation QES with Video ID" email you will find instructions for proceeding to the Identification phase with the Video Operator.
Click the Start the Video Identification button to continue.
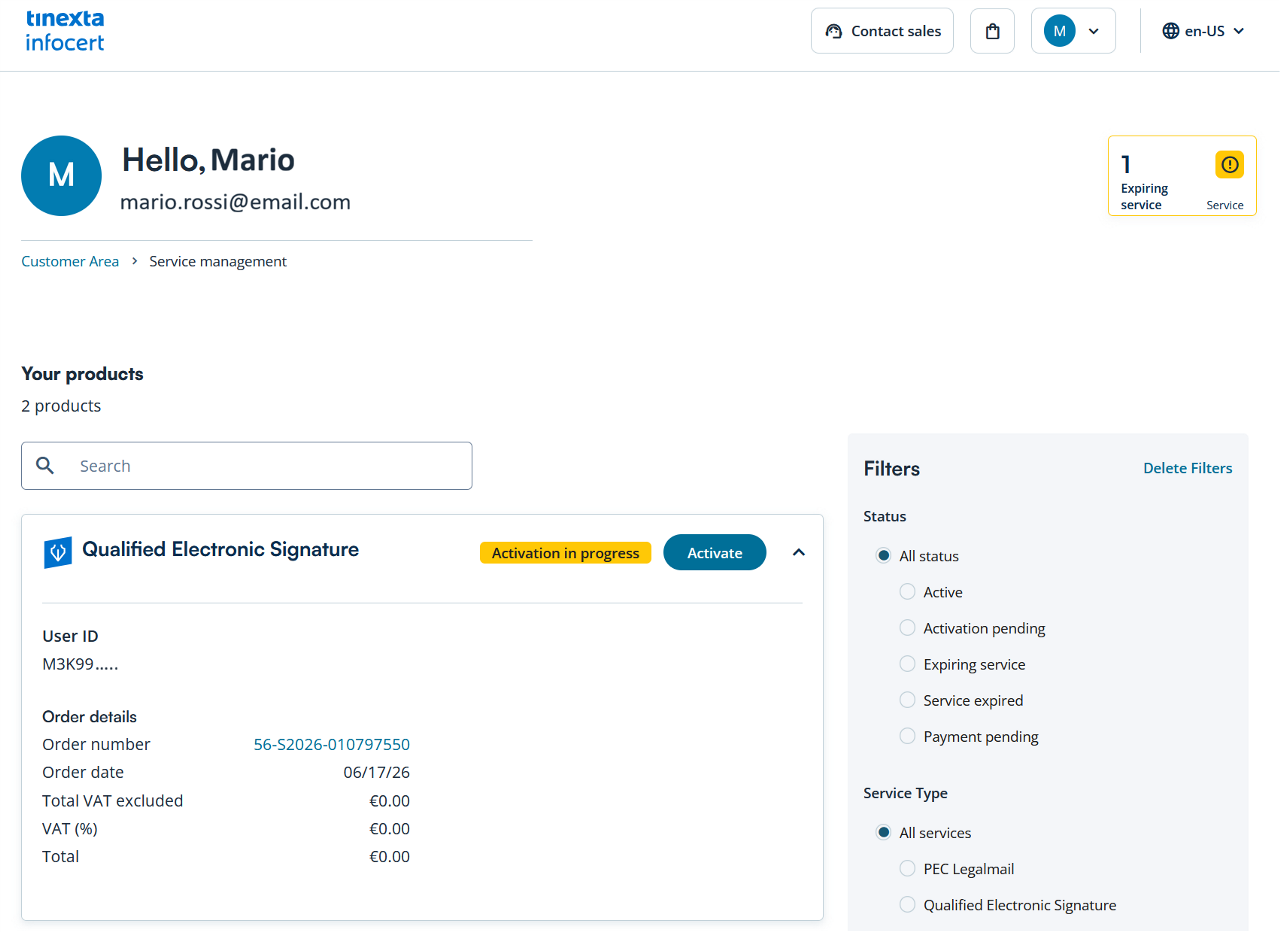
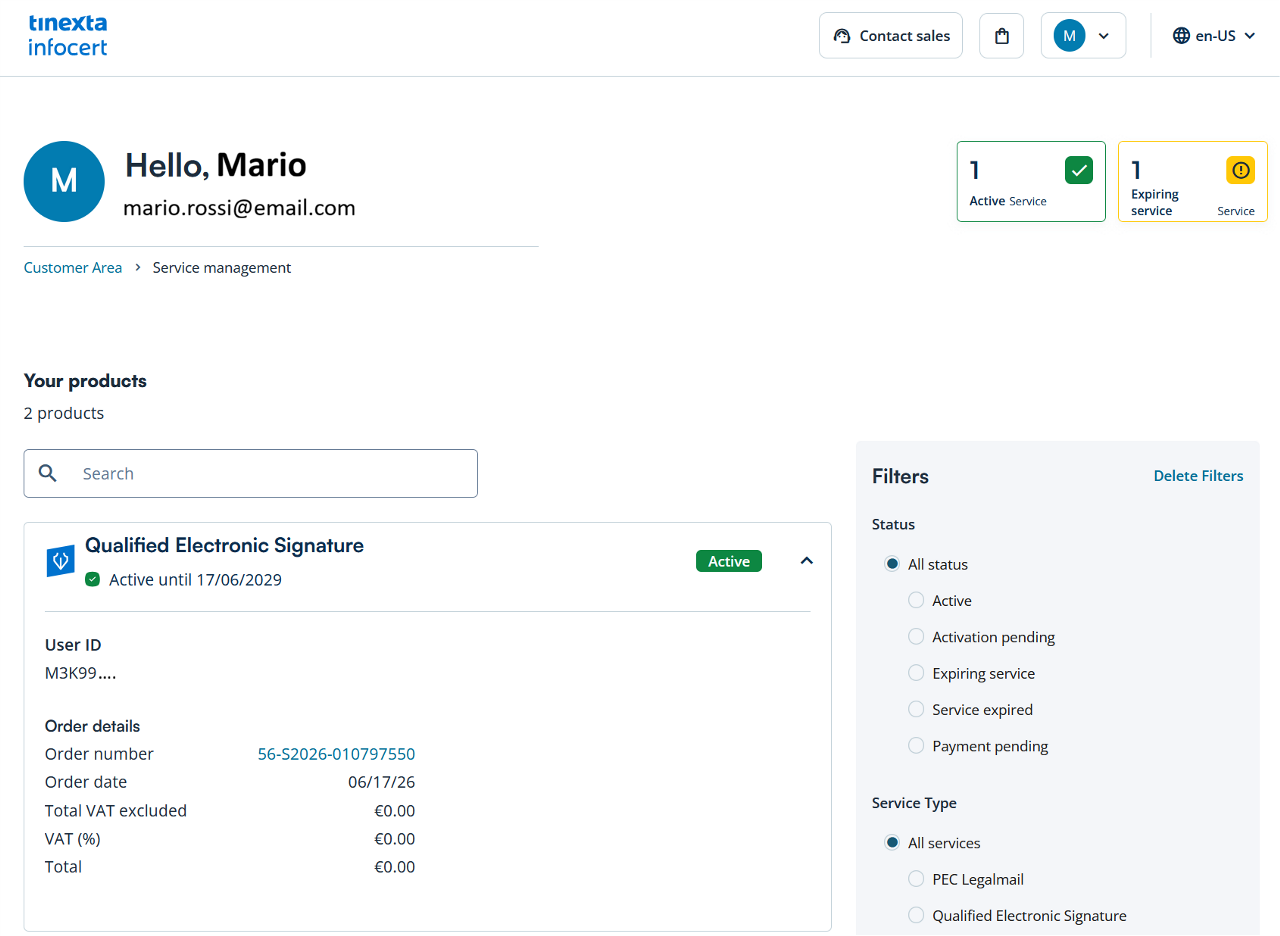
Customer Area - Service Management
If you log in to your customer area, you'll find the QES service you're about to activate under "Management Services."
Click the Activate button to begin the video recognition process.
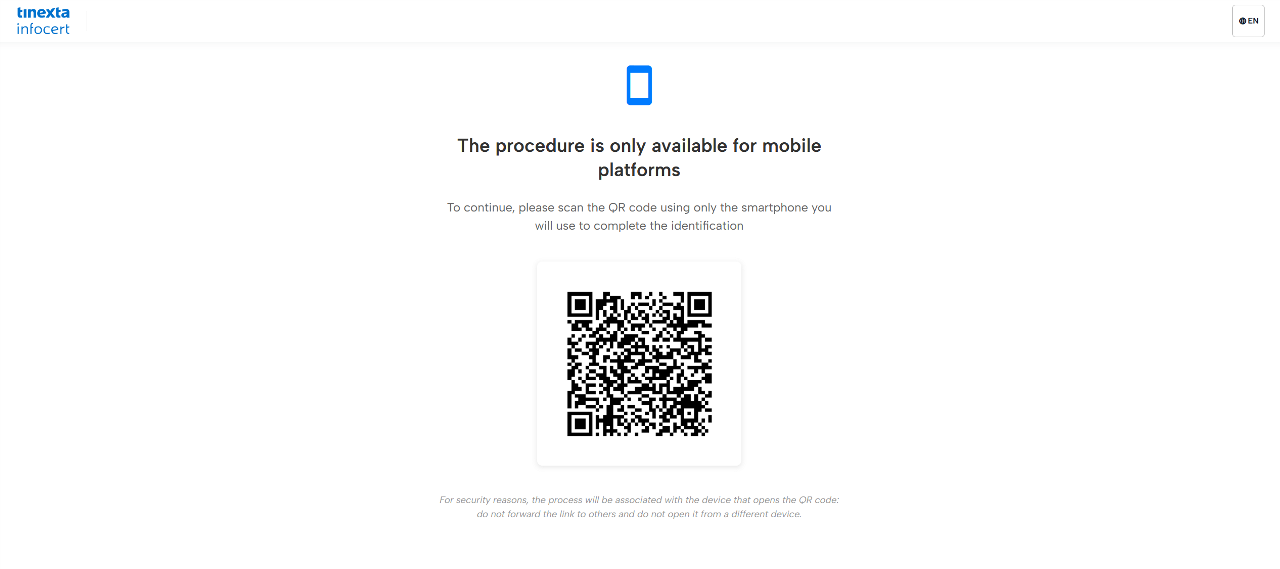
Registration and Video Identification Procedure
To proceed with the video identification procedure, you will need to use your smartphone and frame the QR code on your screen.
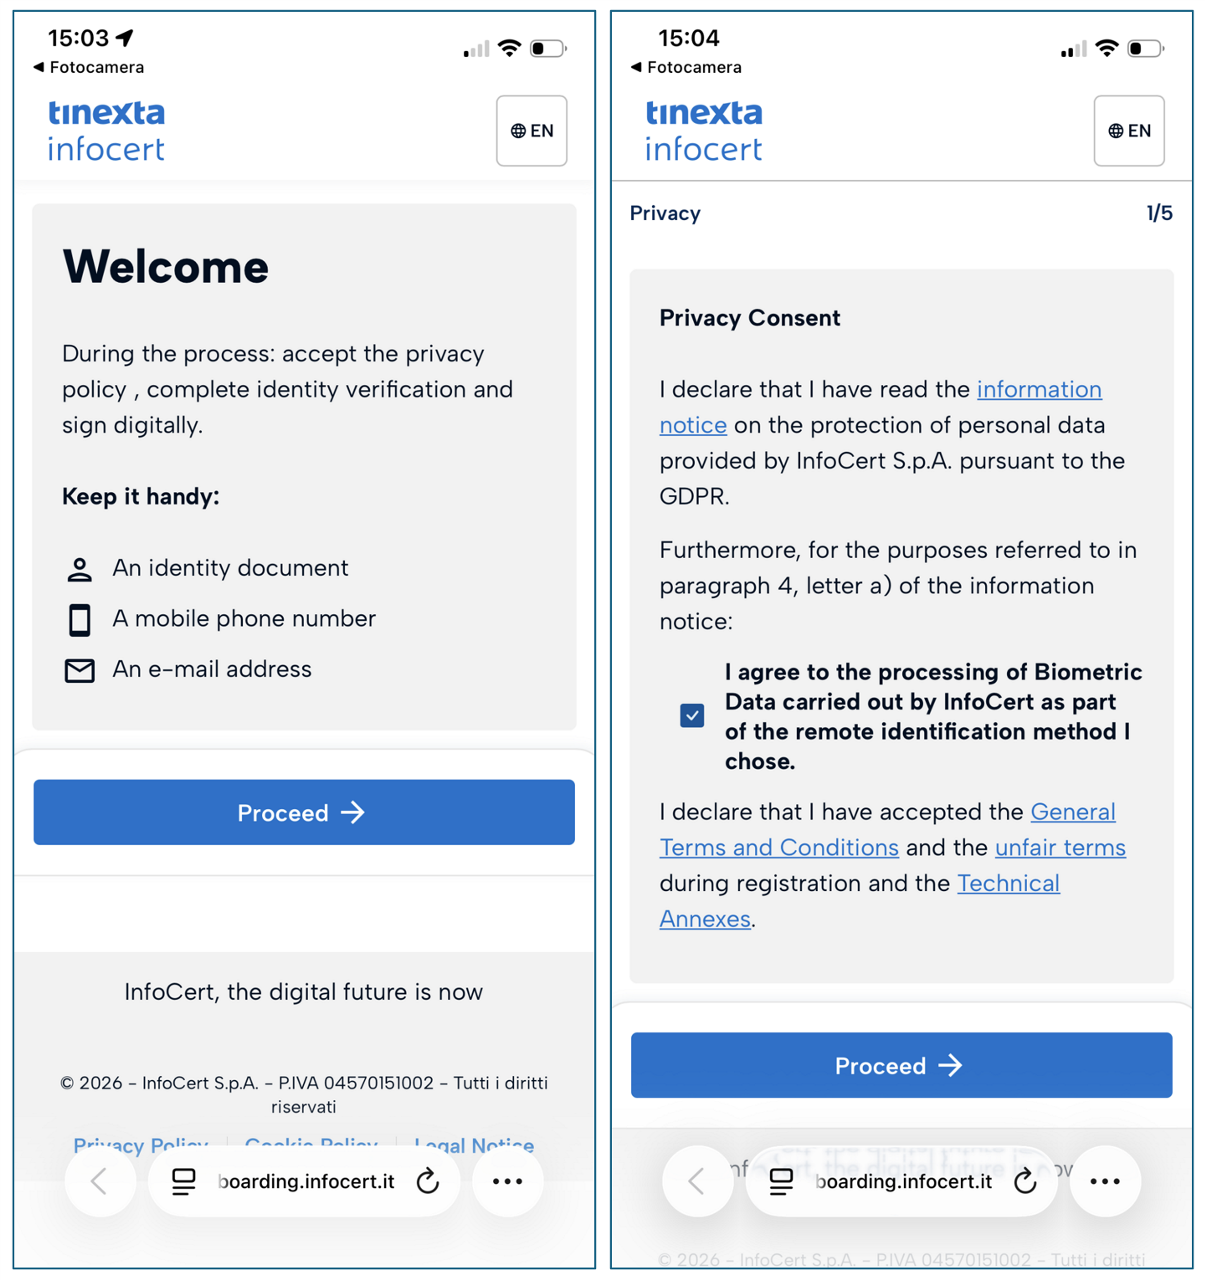
1. Privacy Consent
Keep it handy:
- An identity document
- A mobile phone number
- An e-mail address
Check the box ("I agree to the processing of Biometric Data (...)") to consent to privacy and accept the general terms for the identification procedure.
Click "Proceed".
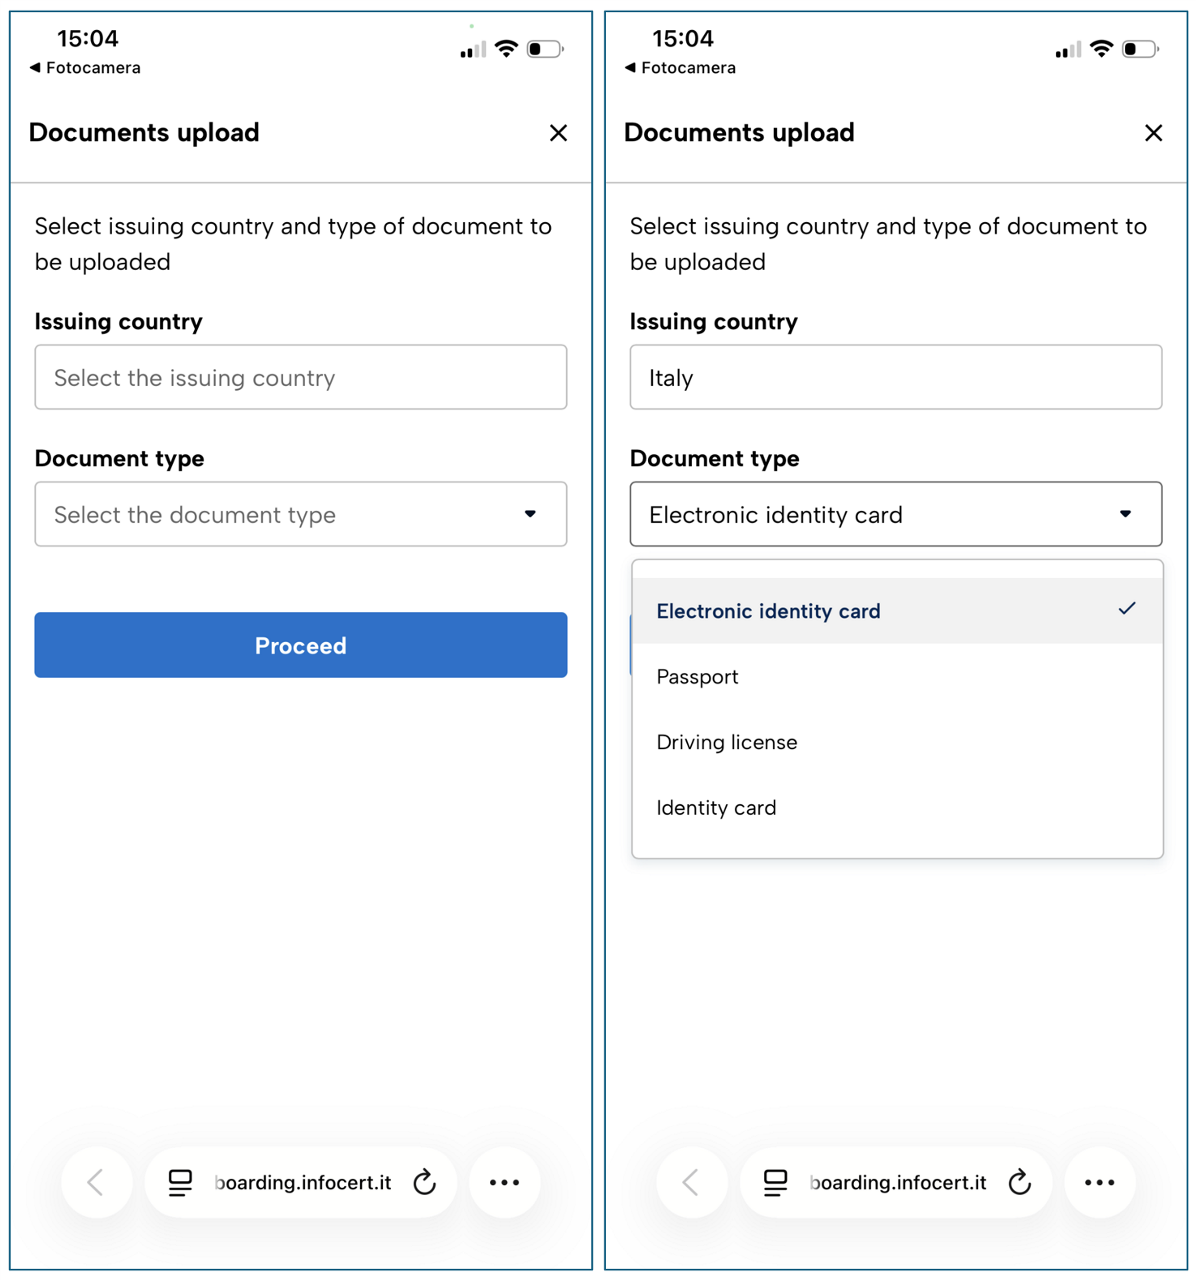
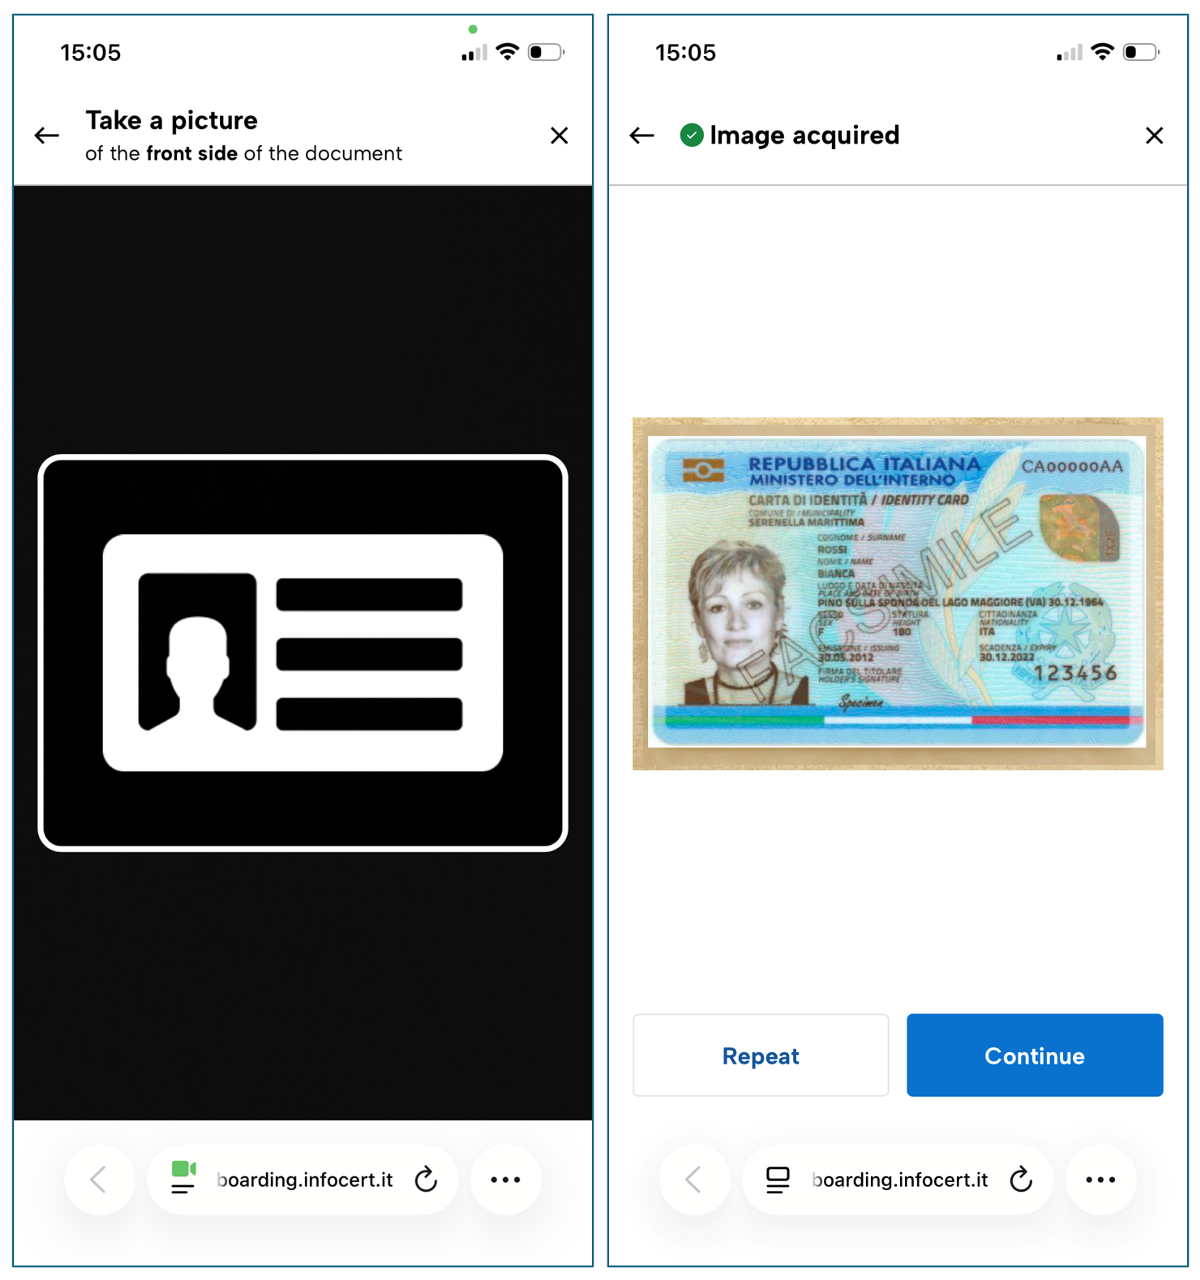
2. Document upload
Select your Country Document and the Type of Identity Document, available for your nationality.
At this stage you are asked to frame your document with your smartphone camera.
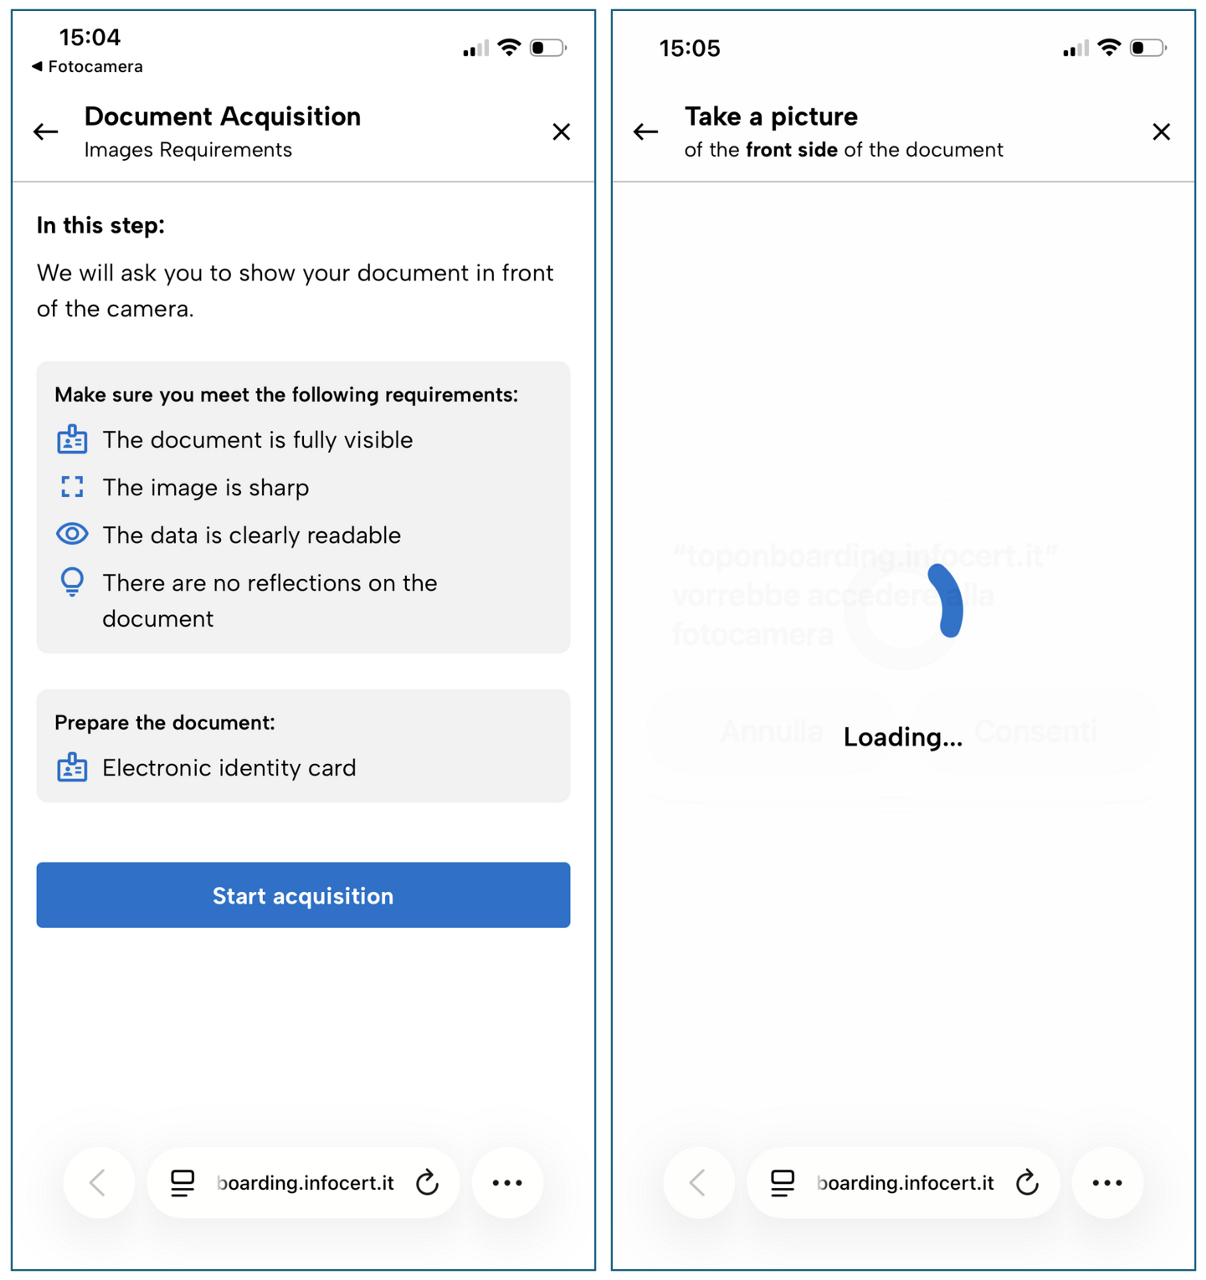
Scan the front of the document.
Now scan the back of the document.
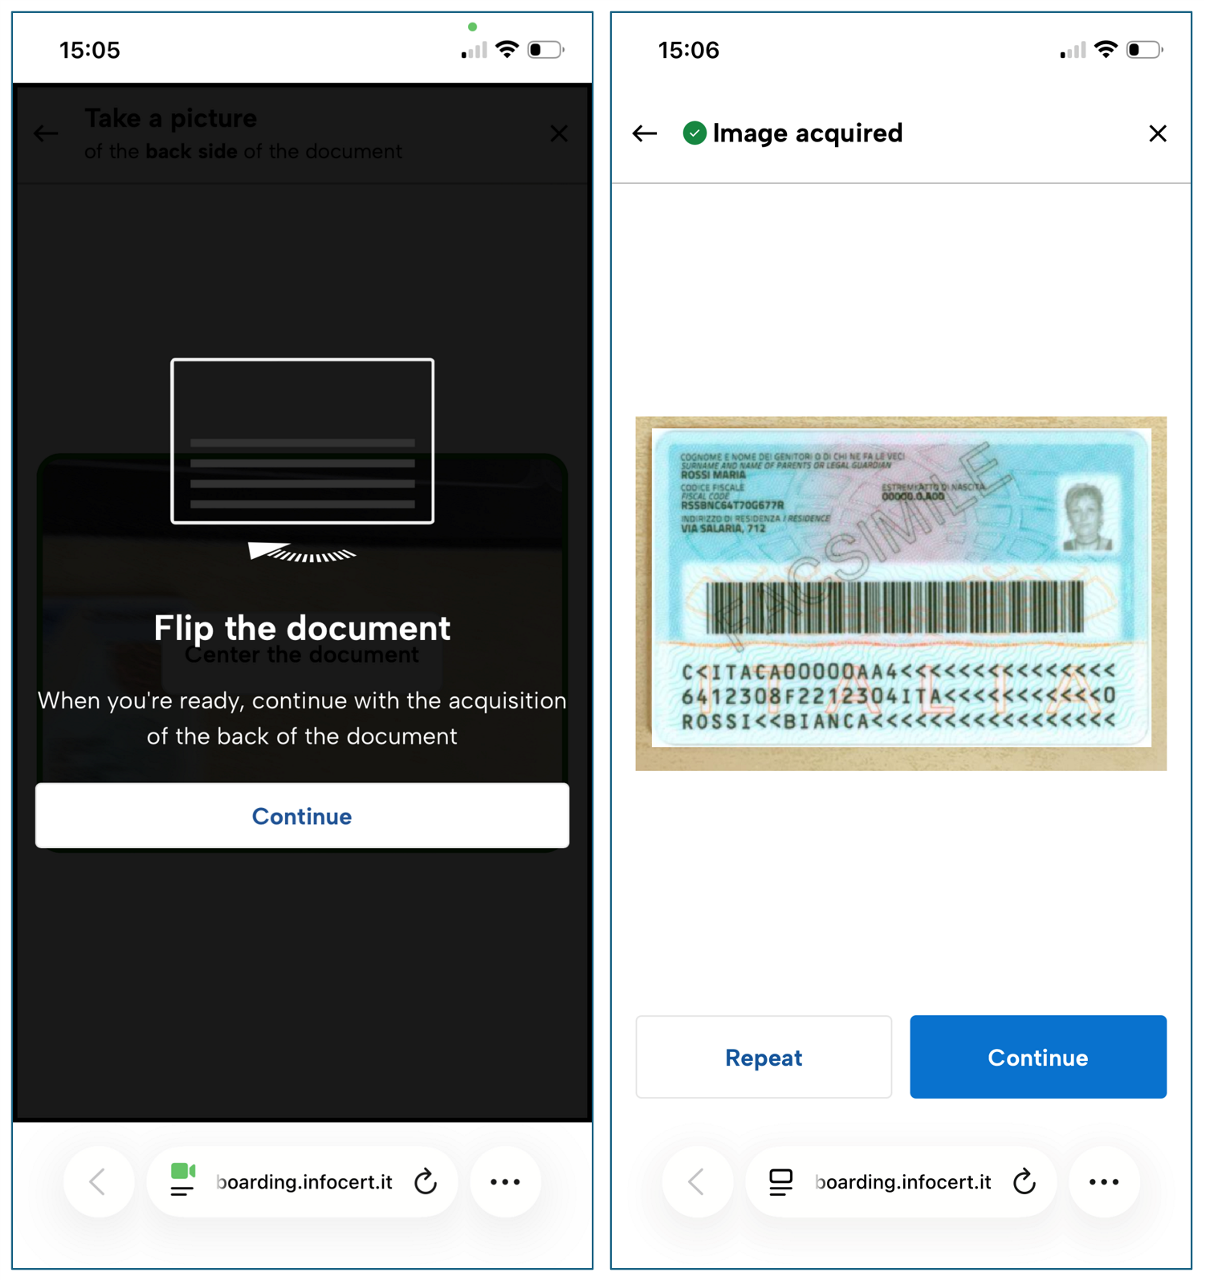
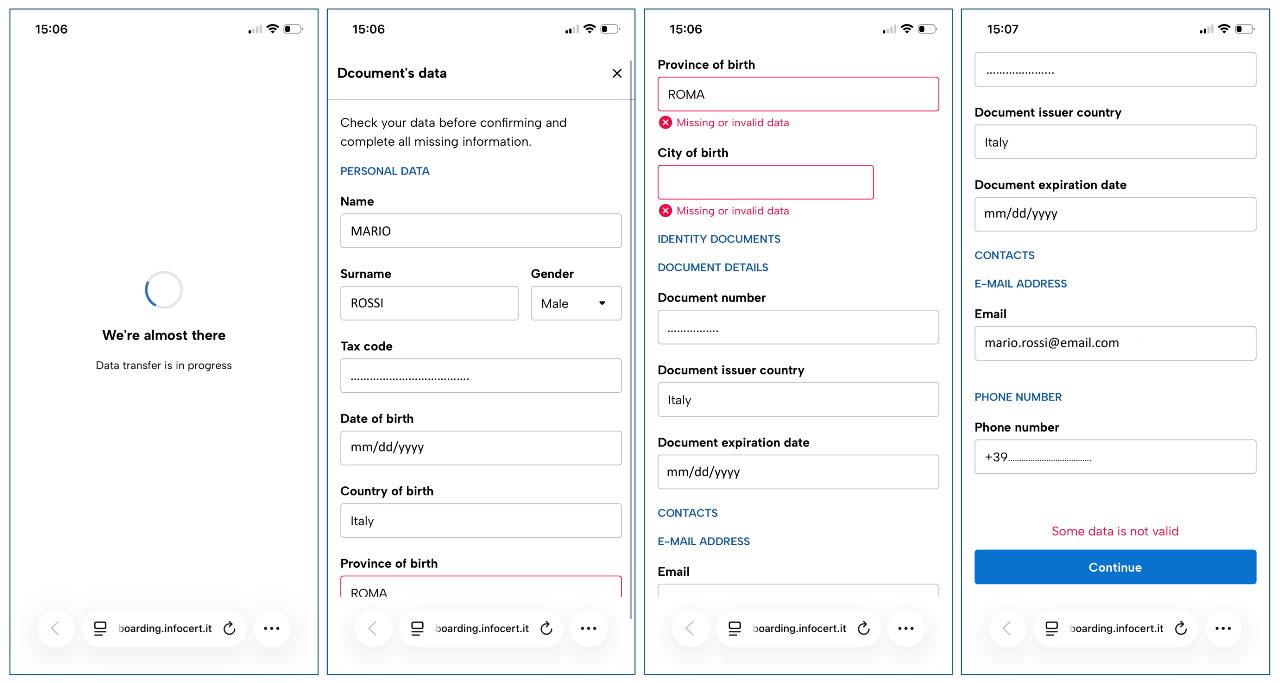
3. Check your data
Verify that the information retrieved from the system is correct and correct any errors before clicking Continue.
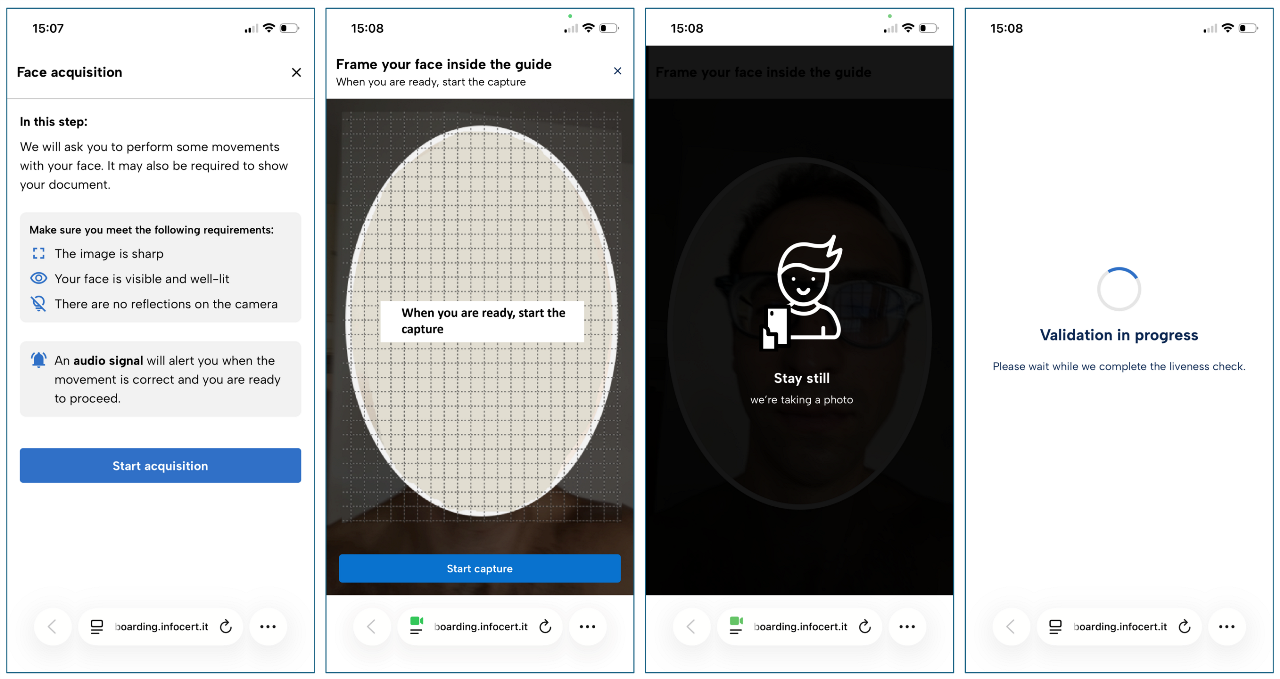
4. Face acquisition
In this step we will ask you to perform some movements with your face. It may also be requested to show your document.
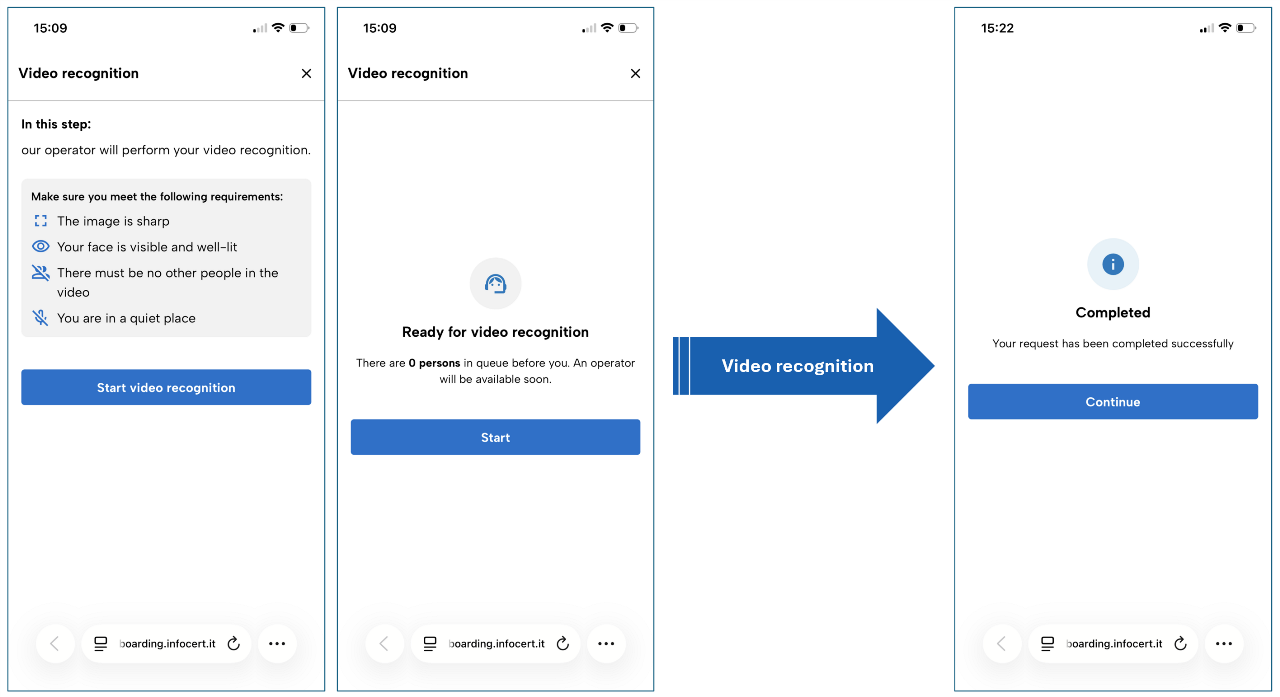
5. Video recognition
Get ready to perform video recognition using your smartphone's front-facing camera.
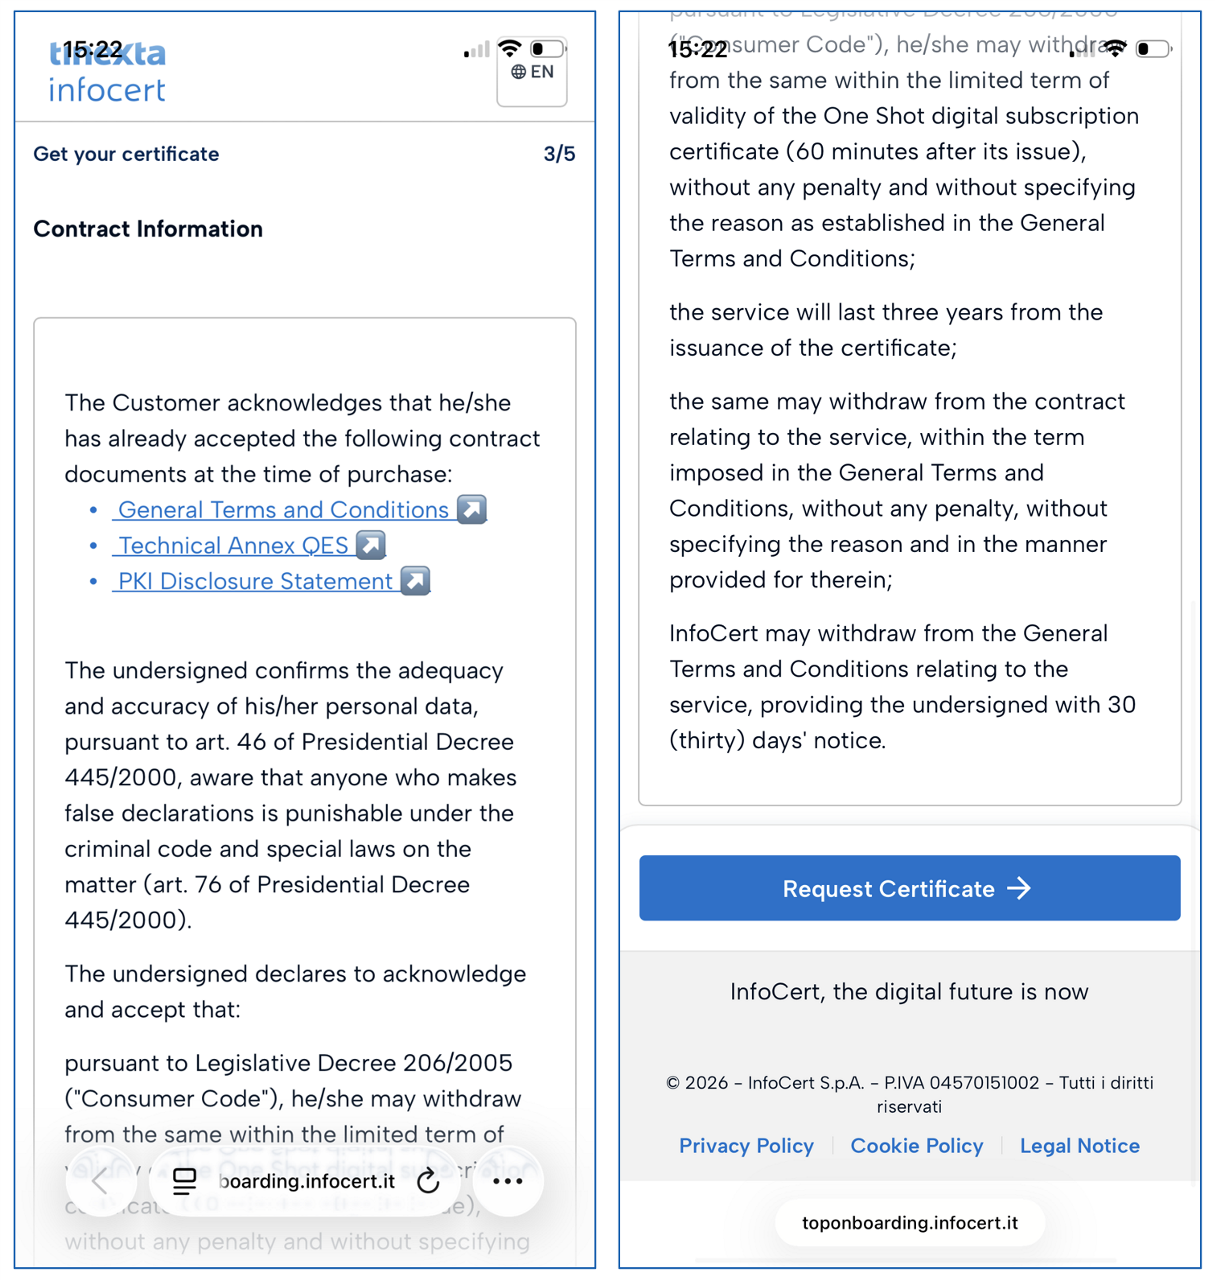
6. Contract information
Read the Contract Information and request a digital signature to complete the QES certificate application and registration process.
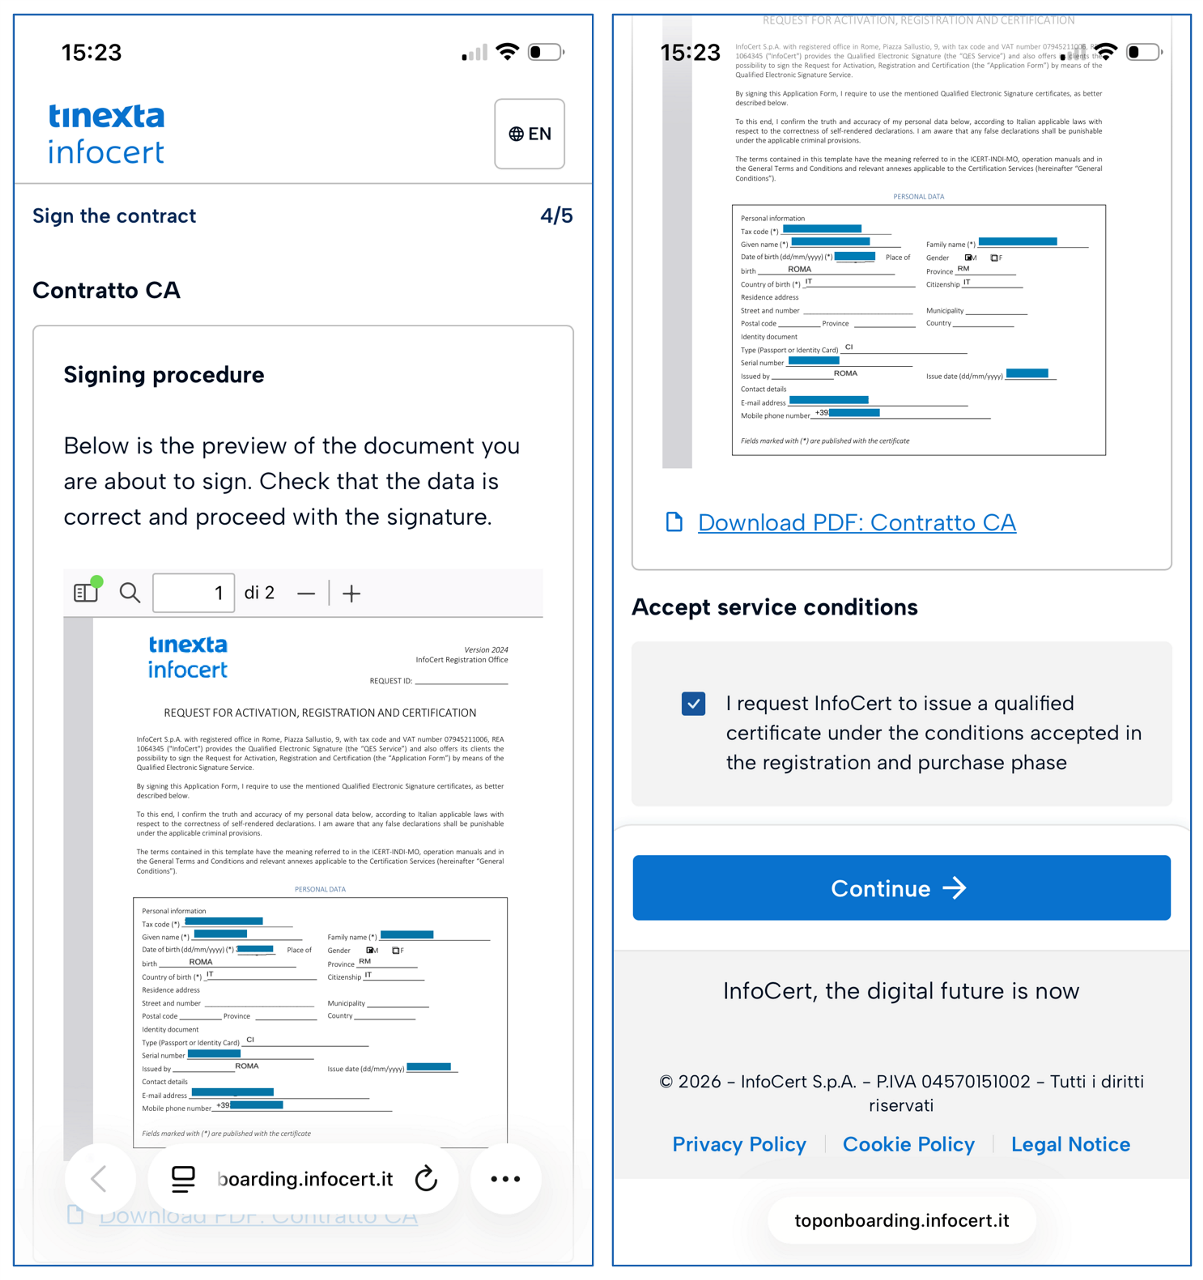
7. Signing procedure
Read the contract you are about to sign digitally and check the service conditions at the bottom.
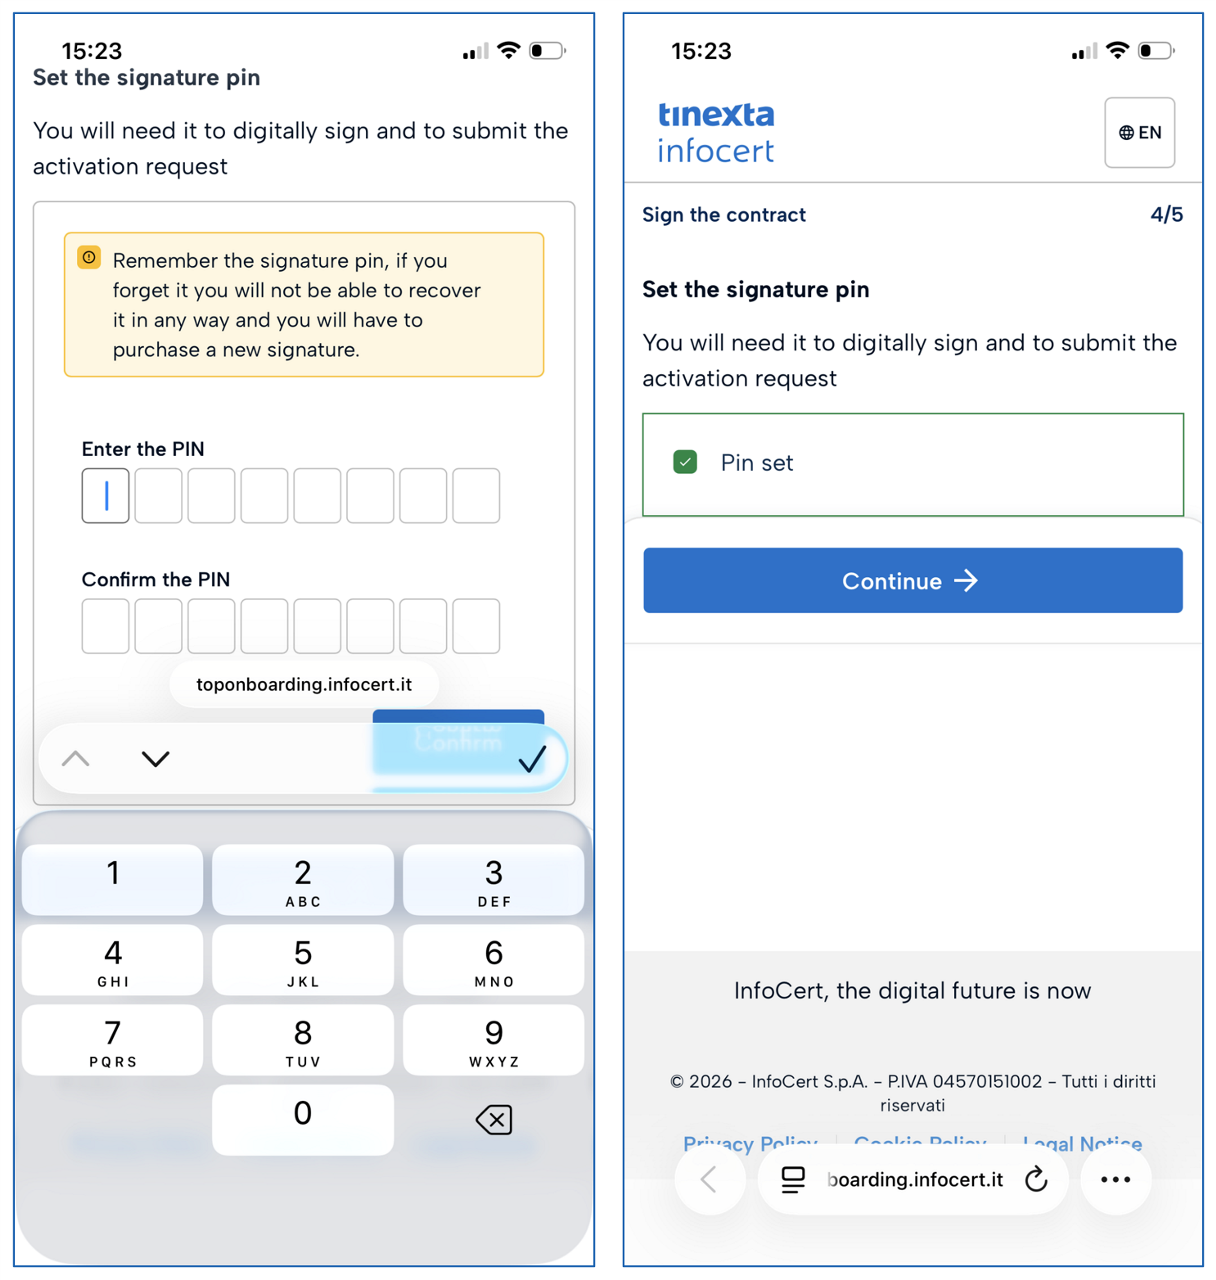
8. Set the signature PIN
Enter the PIN you will need in the future to use the QES signature and digitally sign your documents.
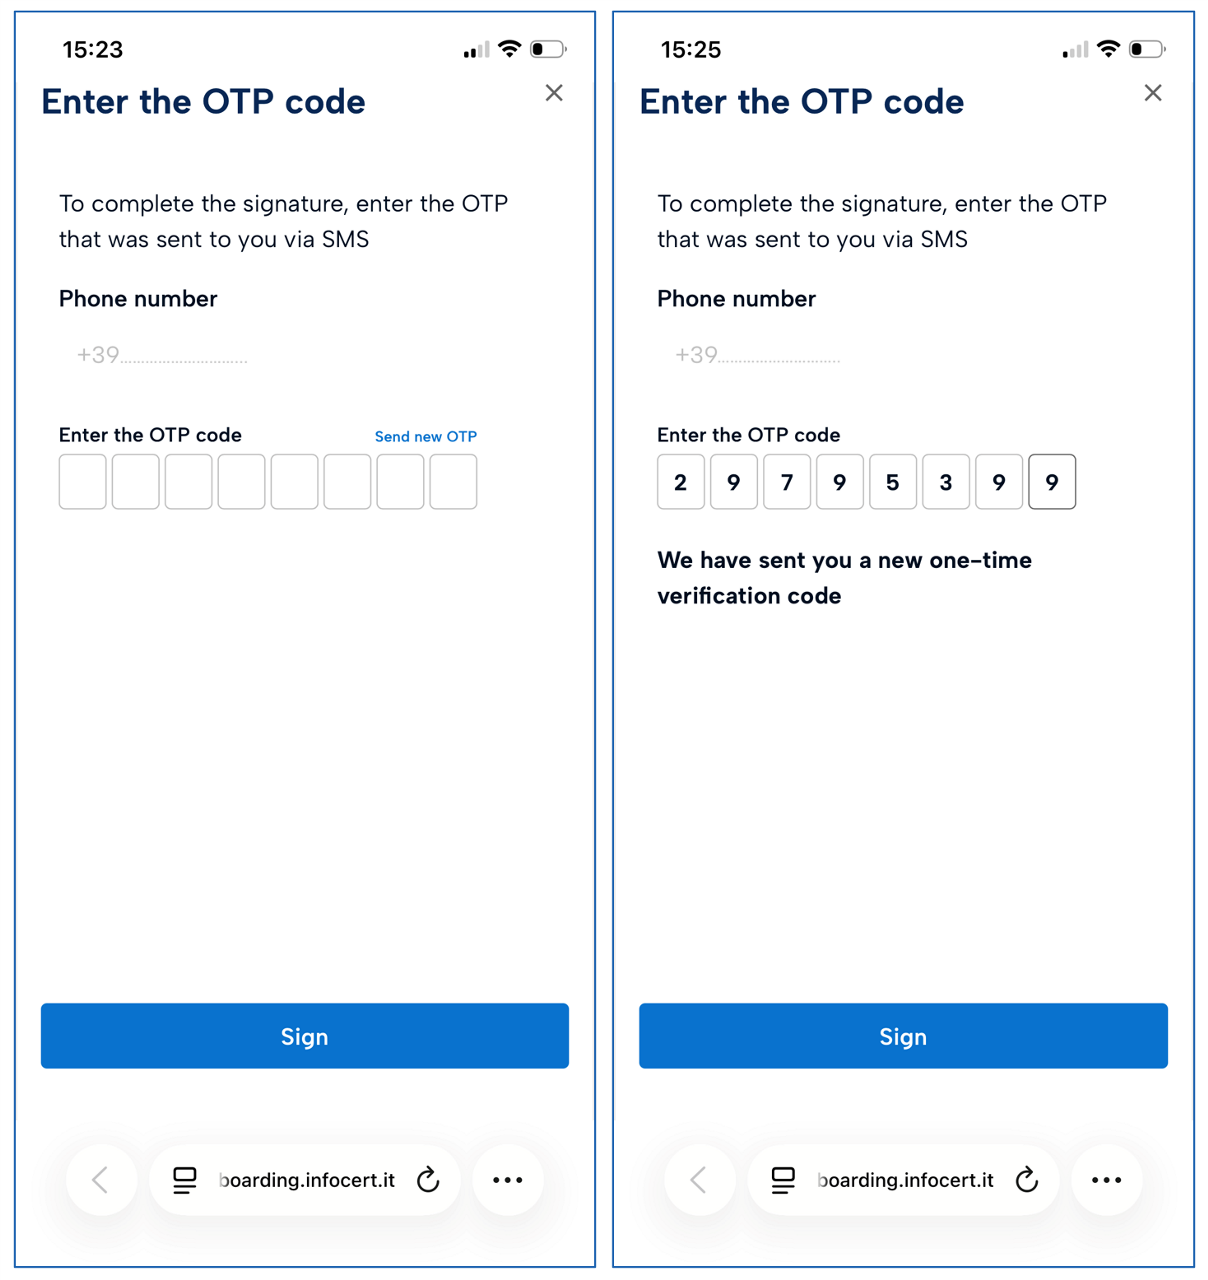
9. Enter the OTP code
To complete the identification request, enter the OTP that was sent to you via SMS.
10. Completed
An on-screen message will tell you that the identification process is complete.
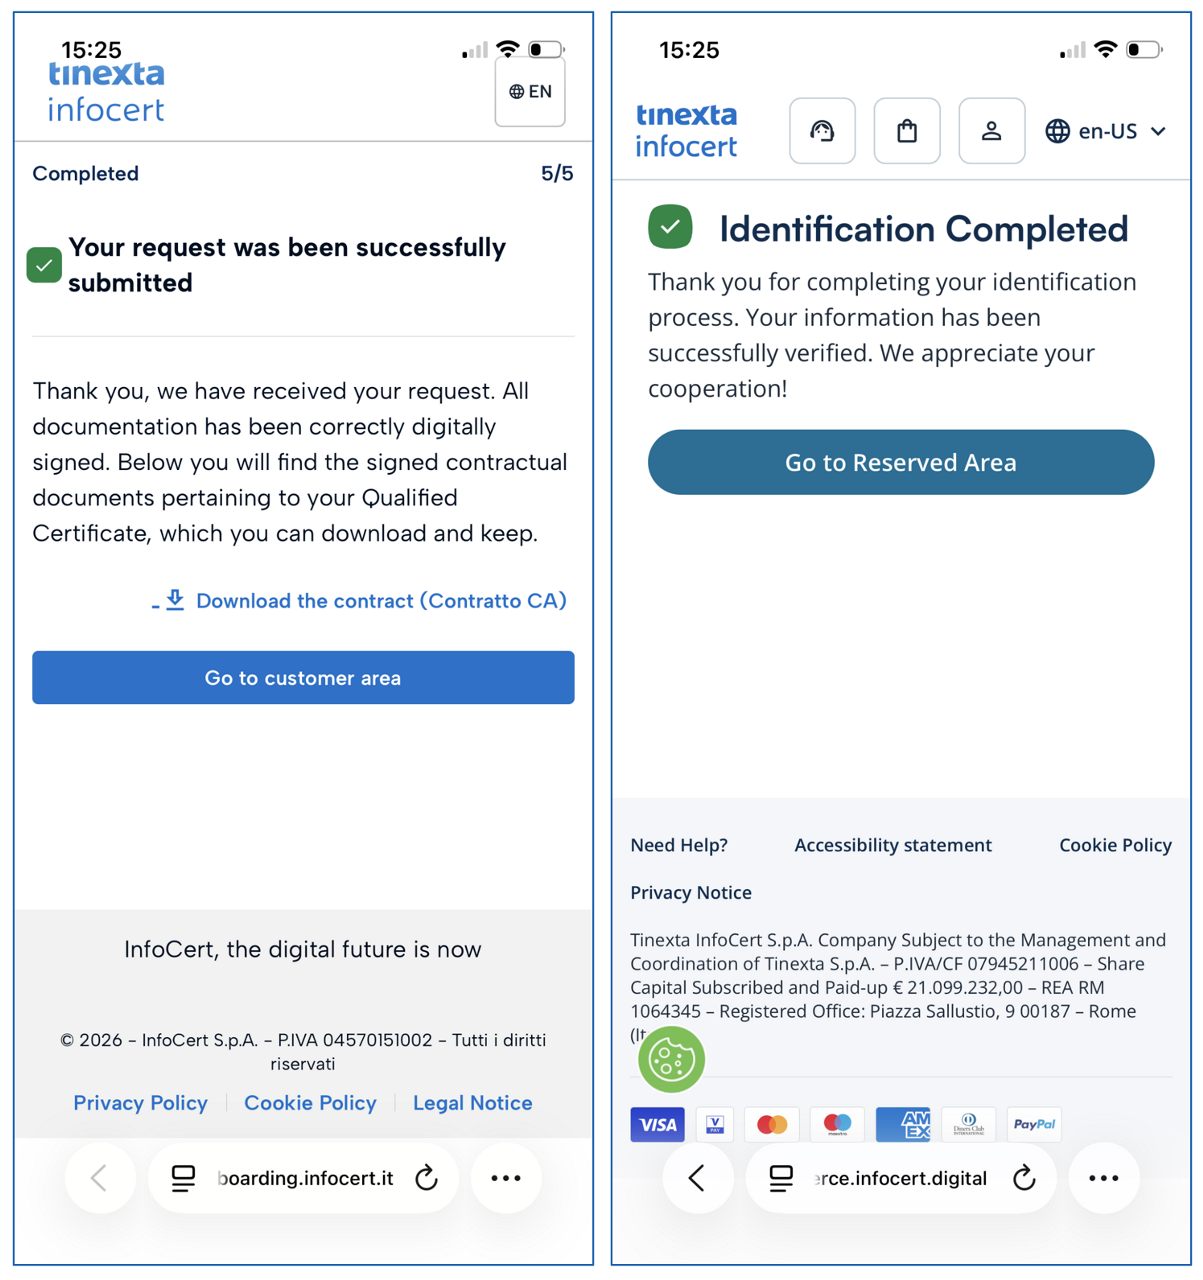
You will soon receive an email (Your certificate is active - QES Video ID) informing you that your QES signature has been activated.
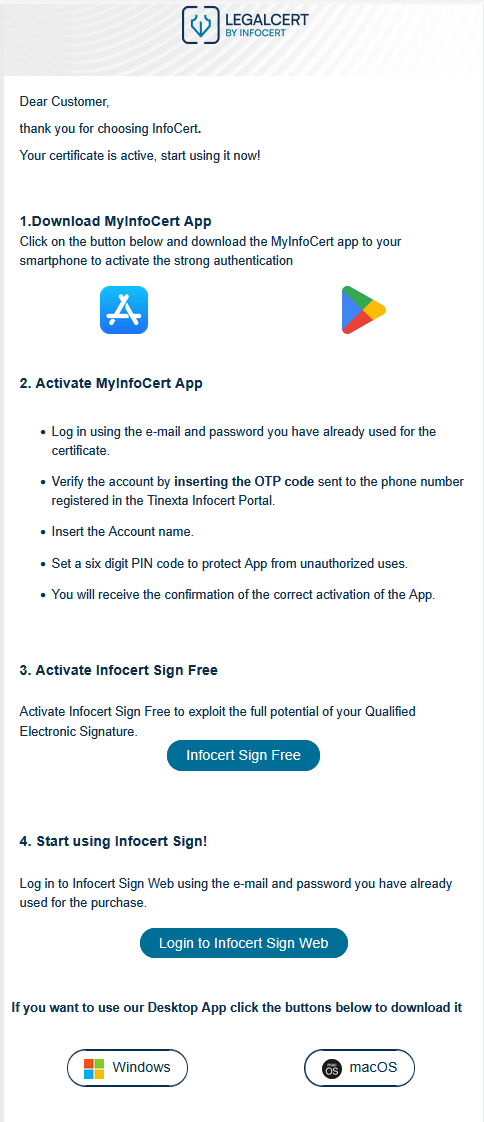
Please note: We recommend that you download the free Infocert Sign Desktop software immediately to use your active QES signing certificate.
When you return to your Customer Area you will see your active QES certificate.
My Sign
You can access the Tinexta Infocert signature portal called My Sign at any time to manage your QES signature certificate.

