
 Guide to requesting and activating a PEC Legalmail GOLD
On the Tinexta Infocert international e-commerce select Secure Communication. Choose PEC Legalmail Gold, scroll down the page, and click Buy Now.

As the first step, you will be asked to choose the PEC address you want to set up.
Enter the desired mailbox name (e.g., name,surname) and click Verify to verify whether the chosen name is available for creating your PEC account.

If the verification is successful (meaning the address you entered is available), a summary of your order will be displayed on the screen with all the relevant details.
Before clicking Add to Cart, you can customize your configuration—for example, extend the service for multiple years or increase the number of GB in the Security Archive.

On this screen, you have the option to add additional products to your cart, as well as Modify the configuration of the mailbox you are about to purchase or Delete the product from the cart.
By clicking the Sign in and Check Out button and selecting your preferred payment method (e.g., PayPal, Debit/Credit Card, etc.), you will be asked to create a Tinexta Infocert Account (or log in with an existing one) in order to complete the PEC service order.

Don’t Have a Tinexta Infocert Account?
If this is your first time purchasing a Tinexta Infocert service, you will need to create a new Tinexta Infocert account in order to proceed with the actual purchase of the service(s) you are interested in.
Already Have a Tinexta Infocert Account?
Enter the e-mail and password linked to your Tinexta Infocert Customer Area account and click Log In, or scan the QR code using the My Infocert app.

Fill in the required fields and click the Sign In button.
After logging in, you will receive a confirmation e-mail. Click Go to Activation.

You can now proceed with the activation of your PEC mailbox.
The following information will be displayed:
Enter an existing e-mail and create a password to access the PEC.

IMPORTANT: Save the Initial Access Password shown on the screen. You will need it for your first login to your Legalmail mailbox
Click the Proceed button and enter the OTP ...

... received at the contact e-mail you provided.

At this stage, you will need to enter the details that identify the service holder:

Click the Proceed button to continue with entering the next required details:

You will now proceed to the document upload stage for completing the activation request.
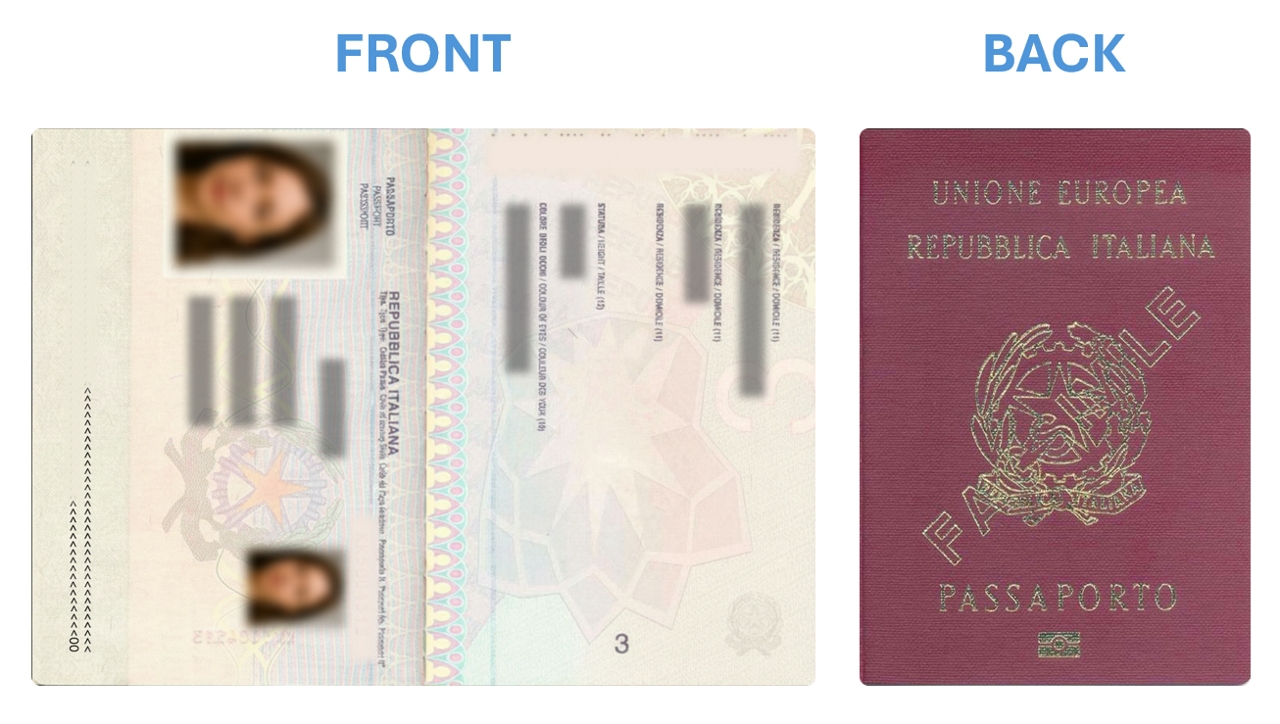
Enter the Country of issuance and the Document Type, which is automatically set (only a passport is accepted).
By clicking the Confirm button, you will need to manually upload color images of the document. You can choose to upload a single file or separate files.
To simplify the process, you can refer to the following examples showing the correct color images of the FRONT and BACK of the Passport.

Now, select the type of account holder to whom the PEC Legalmail Gold service will be registered.
Enter all the details of the company that will hold the PEC account.

Before completing the activation process, carefully review the information and contractual documents for service activation, then click on Proceed button and continue to the final step.

You will then be redirected to the private area of your Tinexta Infocert Account. Click on Go To Reserved Area, to check the activation status of your PEC mailbox.

Inside the Service Management section (within the Reserved Area), you will find detailed information about the requested mailbox and its current activation status.
If there are no issues with the previously uploaded documents, the activation of your PEC service will be completed shortly and the status will be Active.

The actual activation of the service is confirmed by receiving an e-mail: Legalmail is active. To log in to your PEC Legalmail Gold, click here.

Please remember that for your first login to the Legalmail mailbox, you must use the temporary password that you provided during the activation request.
Access your certified email inbox by clicking the "Accedi a PEC Legalmail" button.

Enter your PEC Legalmail GOLD credentials:
Click "Sign in".

"Before accessing the service, we ask you to enter your security information (*). This security information will allow us to verify your identity in case you forget your password."

(*) Enter your regular email address to recover your certified email account credentials if you lose them. To learn how to change this information, click HERE.
Data updated correctly.
Click "Continue".

Check your email: you should have received a message from "noreplay-identity@notify.infocert.it" informing you that at hh:mm on dd/mm/yyyy your password recovery information was successfully updated.


