 Guide to Signing Documents with GoSign (Desktop)
Start GoSign Desktop software and click on the Signature function in the home page.
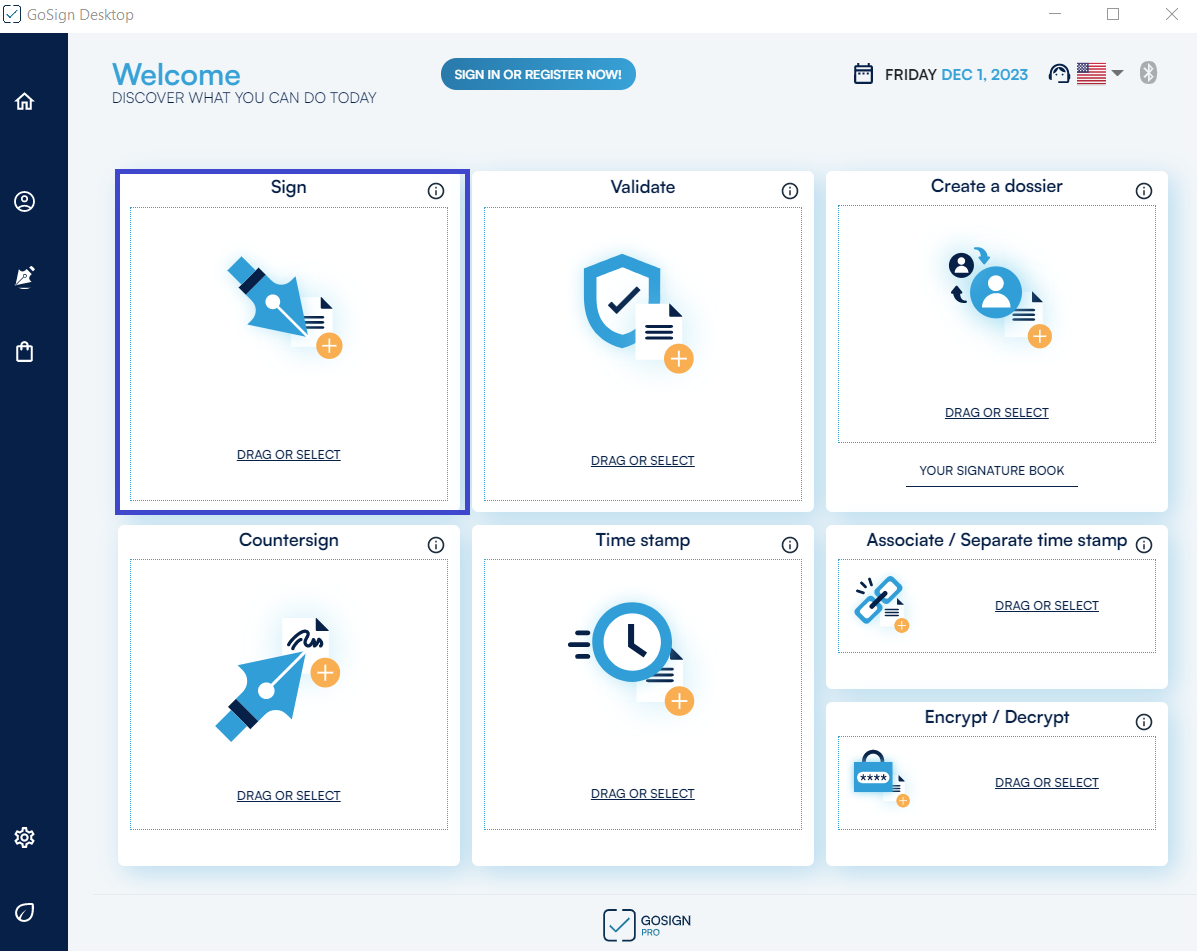
Select one or more documents at the same time (only in the PRO version) and to load them in the software for signing. You need the PRO license to sign .xml files.
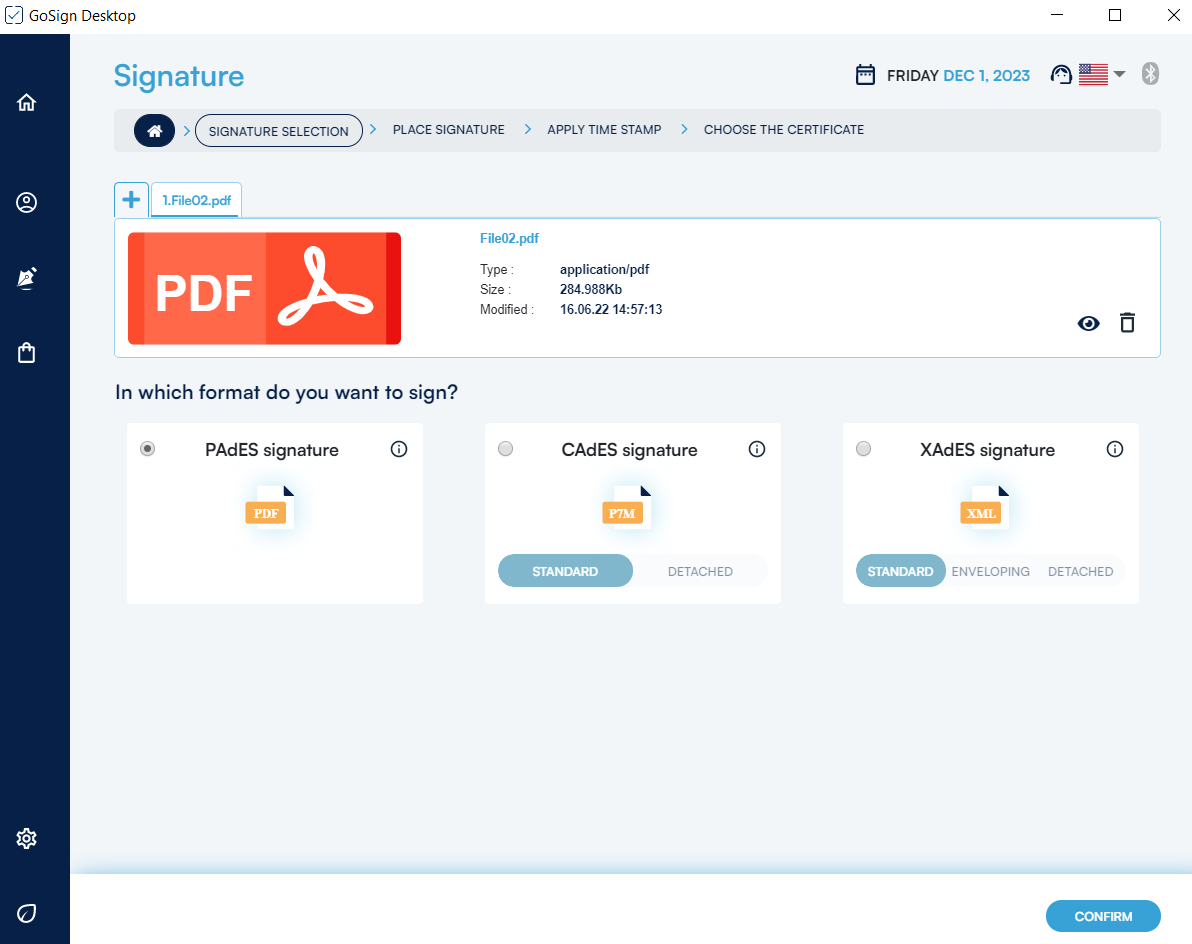
Once the document has been uploaded, GoSign Desktop displays its information (type, size, etc.). Click on the Eye icon to display the document, or on the Trash icon to delete it.
-FREE: Signing documents with a P7M signature
To create a document with the .p7m extension, choose the CAdES technology. Click on the CHOOSE button under CAdES signature.
-FREE: Signing documents with a PDF signature
If you selected a document with the .pdf extension, choose the PAdES technology. Click on the CHOOSE button under PAdES signature
-PRO: Signing documents with a XAdES signature
One of the advanced features offered by the GoSign Desktop PRO version is the possibility to sign documents in .xml format.
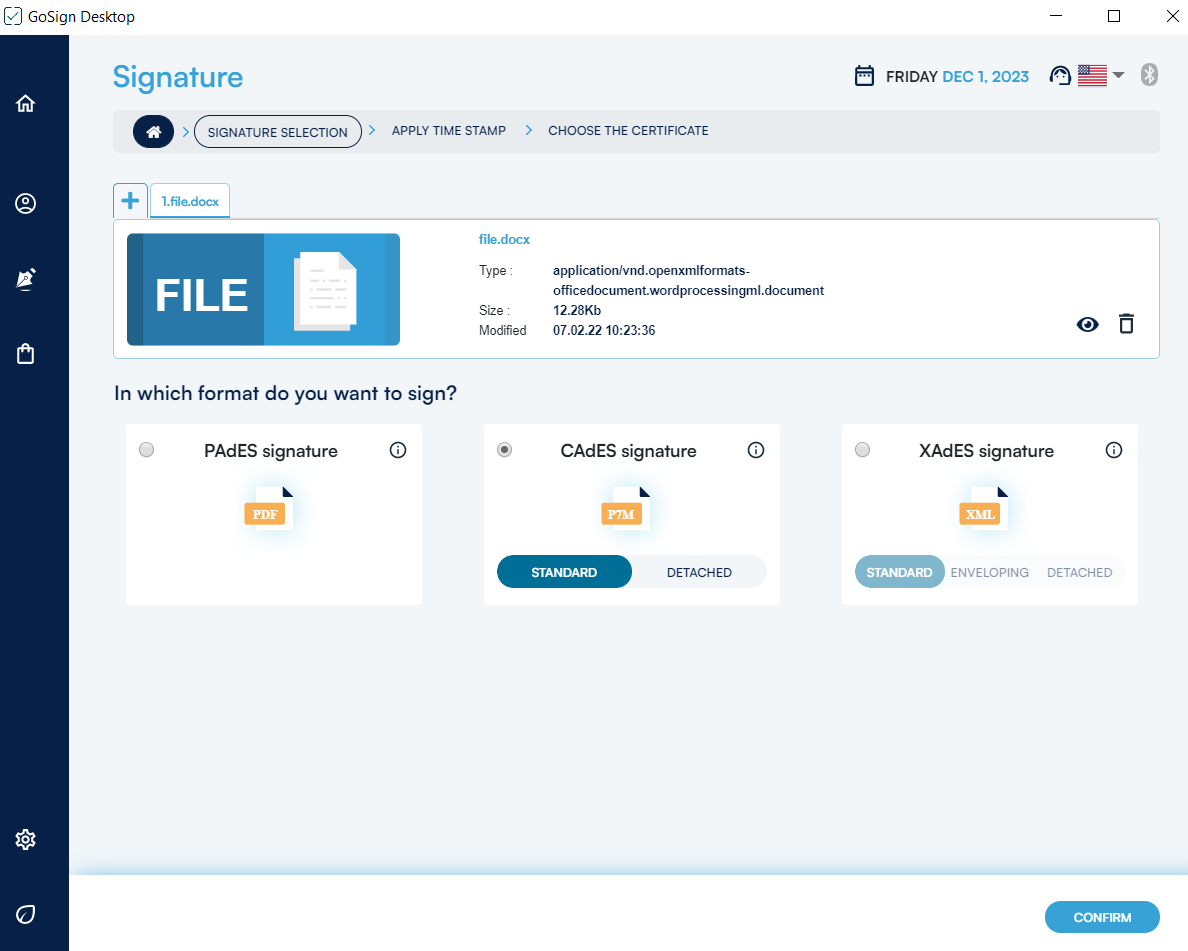
These documents can be signed in CAdES or XAdES mode. Click on the CHOOSE button under the format you want to use.
PRO: Selecting the signature format with a CAdES signature and XAdES signature.
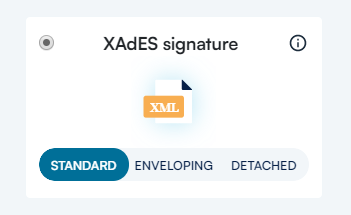
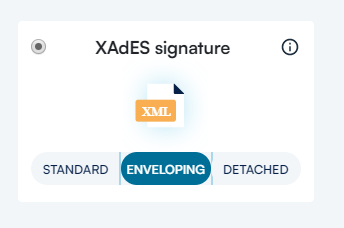
One of the features offered by the PRO version is the possibility to select the type of signature format you want on your document. This possibility is offered for CAdES and XAdES signatures.
Possible signature formats are:

Note: If you save the signed file in this mode, you will also need to upload the original document with the signature file in order to be able the check the document using the Verify function.
If you choose PAdES as the signature technology, GoSign Desktop gives you the option of making the signature visible in the document. To do this, switch on DISPLAY SIGNATURE IN THE DOCUMENT.
It is very important to remember that this graphic symbol has no legal value and is not your digital signature.
The image of your signature is displayed in the signature box. By default, it is the image uploaded in the Configure part of the Your signatures section.
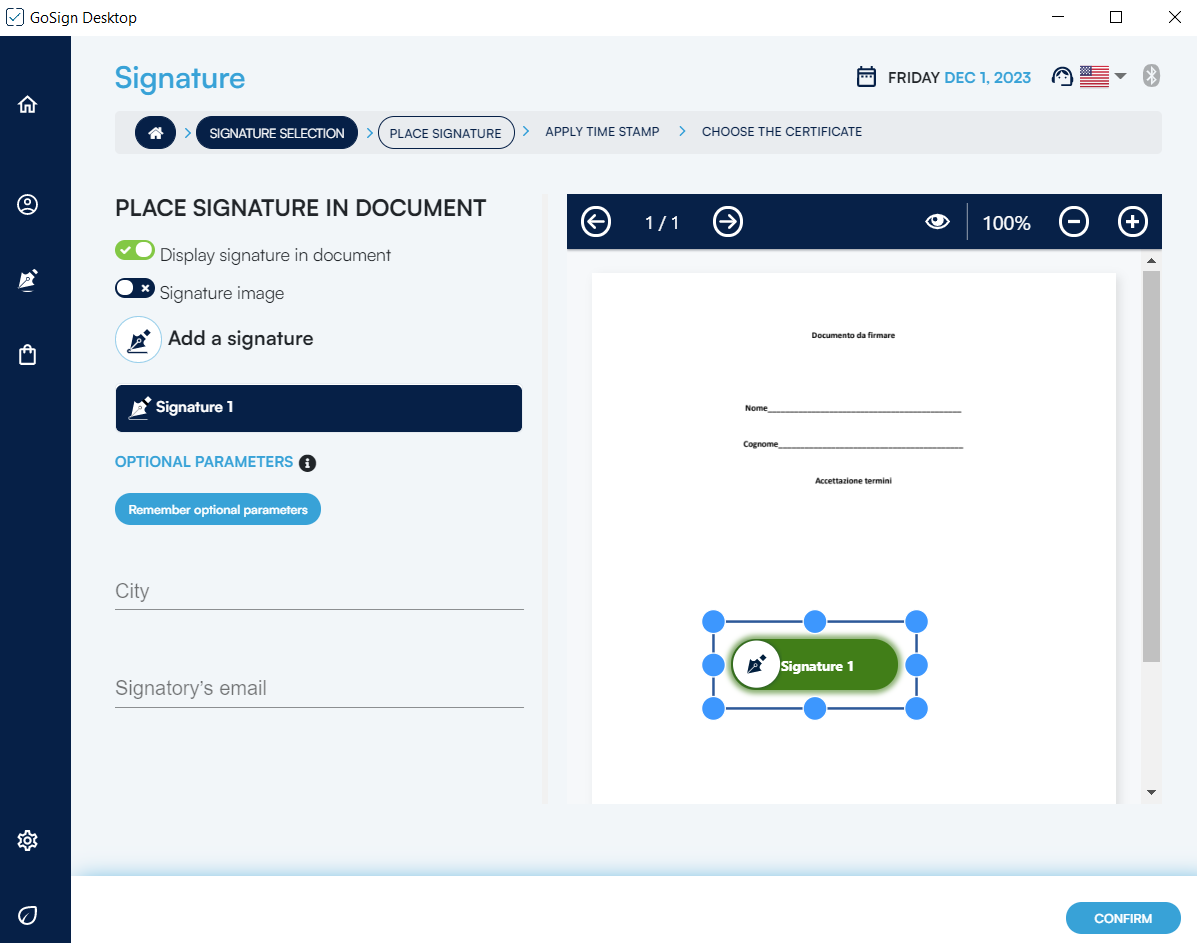
You can add additional information:
Reason for digitally signing the document, e.g.: acceptance of the contractual clauses, acceptance of unfair clauses, consent to personal data processing, etc.;
The signature’s location;
Email of the person signing.
You can also add more signature boxes. Simply double-click on the PDF preview. To change the signature image, click on BROWSE... in the signature box. To remove a signature, click on the Trash icon. When doing this, you will have to double click on the document preview to apply the signature to the document, otherwise, you will not be able to sign.
If you are using a PRO license, you will be asked whether you want to insert a signature image for each uploaded document. To switch from document to document, click on Next file.
Once you have chosen or positioned the signature (if using a PAdES signature technology) you can decide whether to time stamp the document. The time stamp will be in PAdES-T format.
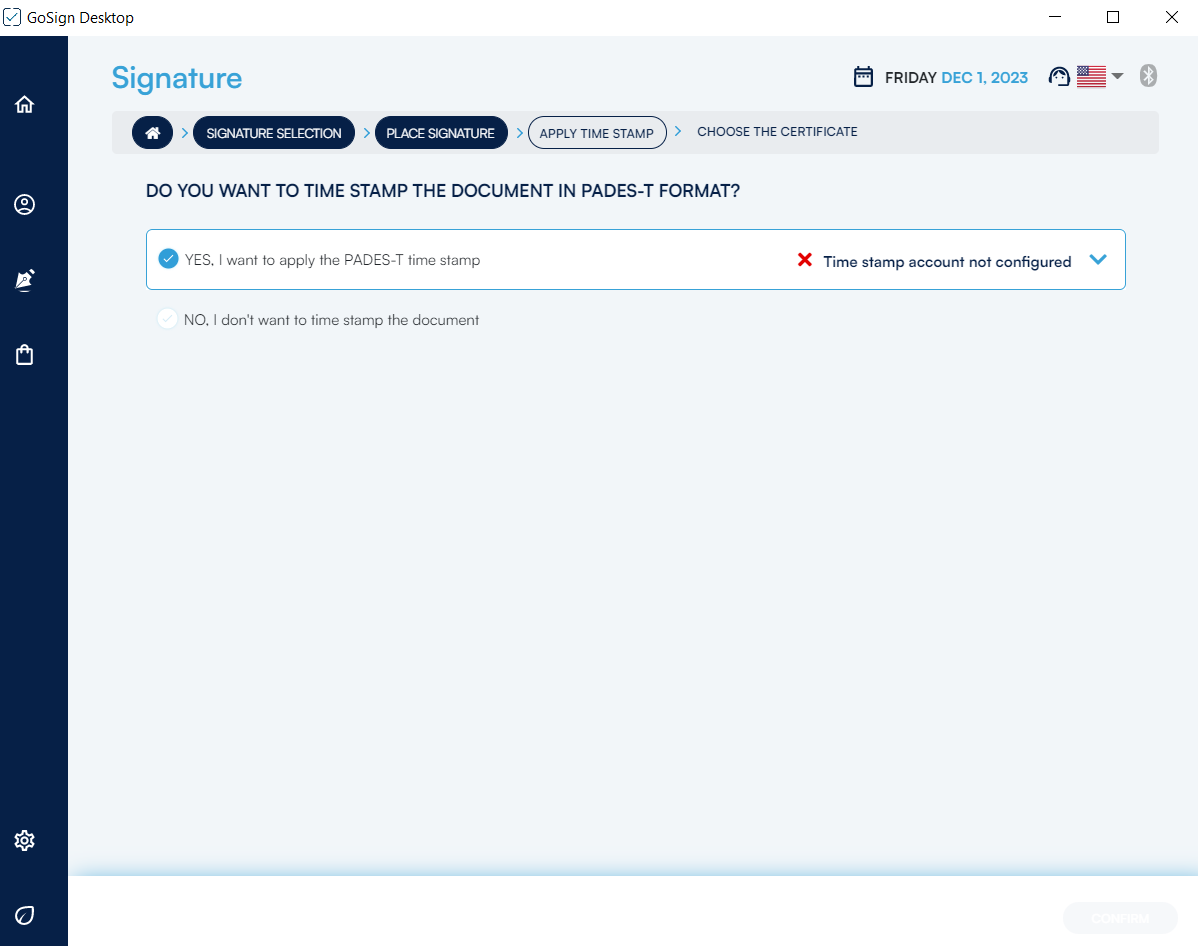
To apply a time stamp, your account needs to be configured to contain time stamps. If your account hasn’t been configured in this way, click on Configure your account. The CONFIGURE menu (Gear icon) will open in the Time stamp section.
With the PRO license, all documents in the Signature process are time stamped.
Once you have decided whether you want a time stamp, click on Continue.
With a certificate on wireless key
After you select the Signature with device option using a Wireless Key, you can sign the document.
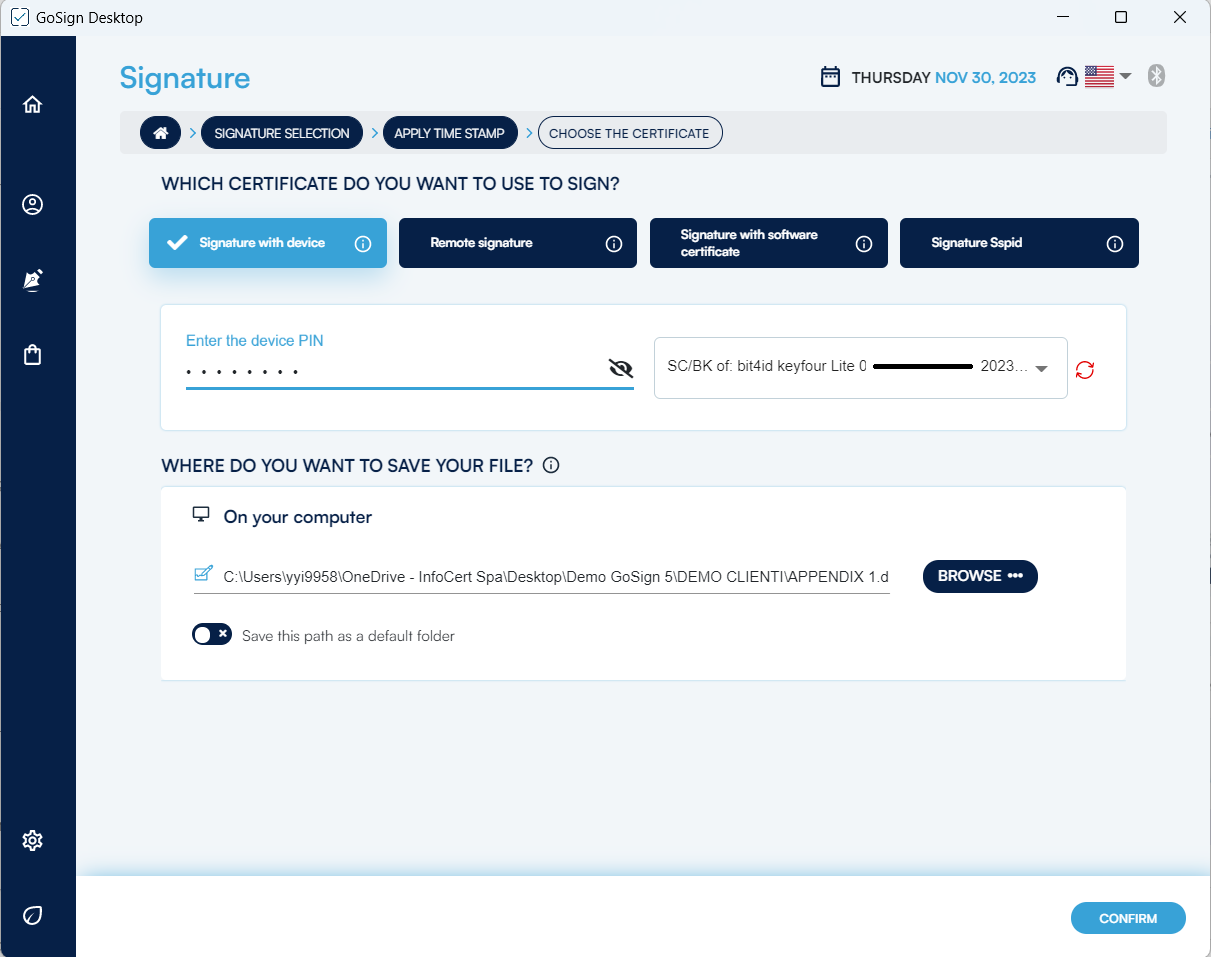
Enter the device’s security PIN in the Enter device PIN field and select the device from the drop-down menu.
If no device is detected, click on the Refresh icon to search for a signature device connected to your computer. If one is found, its name will be displayed in the menu. By default, GoSign Desktop suggests a path in the Save field, overwriting the original file with the signed document.
If you choose to overwrite the original document, you will be asked to confirm.
Otherwise, click on Browse to change the destination of the signed document and rename it if you wish.
Once you have chosen the destination for the document, click on OK to finish overwriting the document.
With a remote certificate or a QES
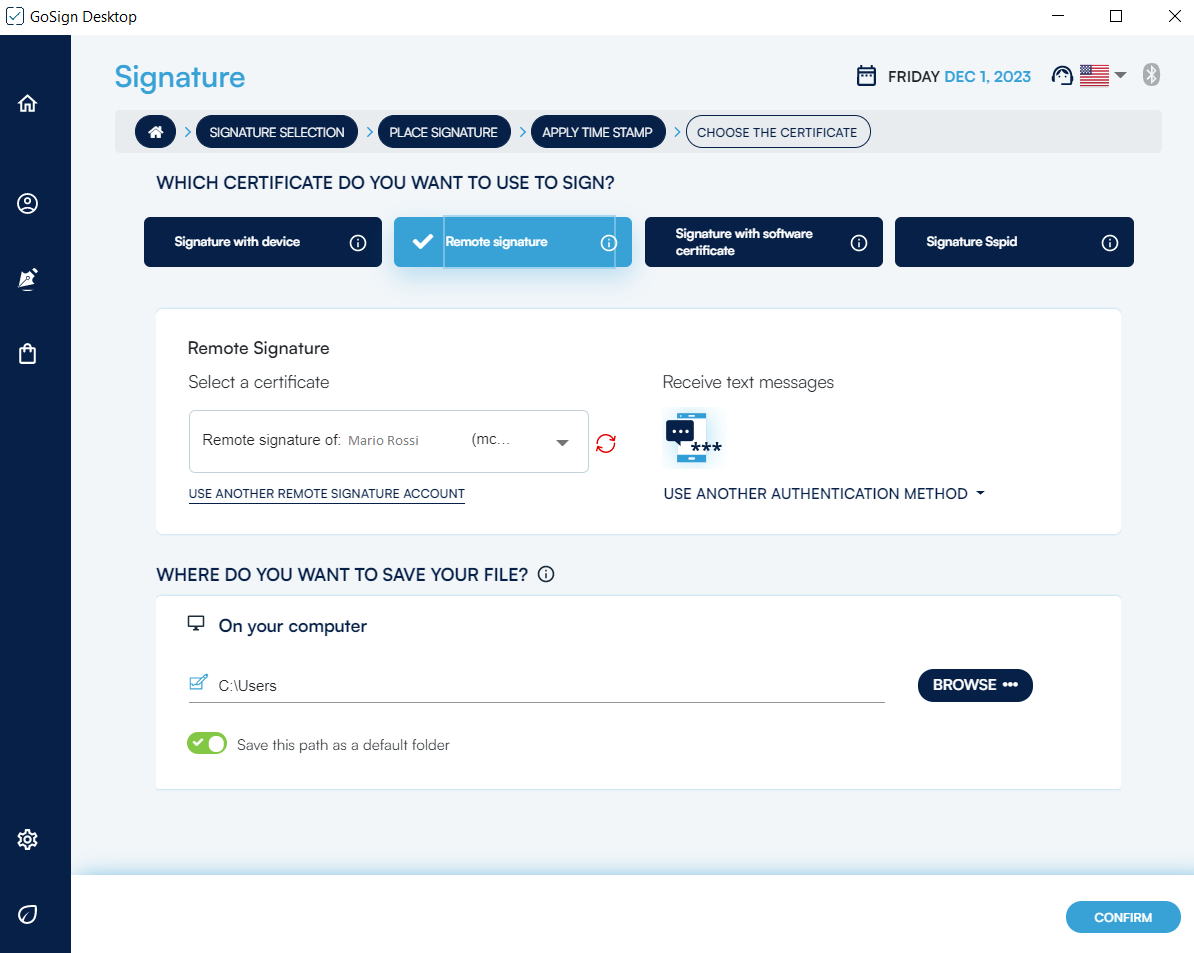
After you select the Remote signature option, you can sign the document.
With a software certificate
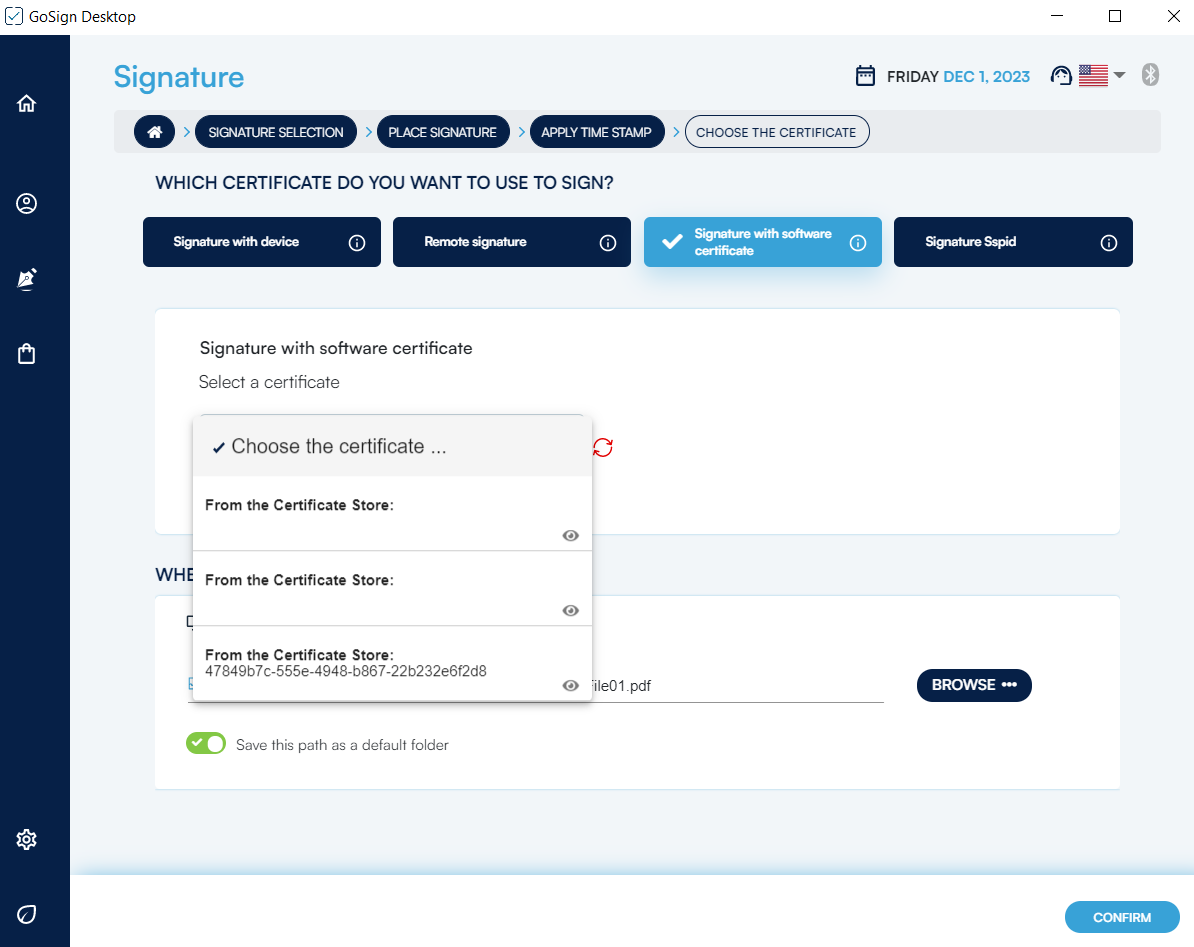
After you select the software certificate option, you can sign the document.
You select the account that you want to use for remote signing in the drop-down menu on the left-hand side.
You choose the authentication method in the drop-down menu on the right-hand side. The options are:
Receive text message --> This method can be used when you entered your cell phone number when the Remote Signature certificate was issued. An OTP code will be sent by text message and will be requested after the remote signature PIN has been entered.
Notification in App --> Notification will be sent to the app. When you click on it, the app PIN will be requested, and then the remote signature PIN to confirm remote signature.
Scan QR Code --> A QR Code is displayed on the screen. When you scan it via the App, it authorises the signature.
Generate OTP --> You are prompted to enter the remote signature PIN. Go to the OTP section of the app, and enter the app PIN to display an OTP code.
Authentication methods are possible via the MyInfocert smartphone app, which needs to be configured for remote signature credentials.
In the drop-down menu, choose the P12 certificate that you want to use to sign the document. (If not already configured, click on Configure your account to open the Configure side menu in the Your signatures section. Here, you can add a software signature certificate in the appropriate section).
Like the other methods, GoSign Desktop suggests a path in the Save field, overwriting the original file with the signed document.
When you click on Confirm, you will be prompted for the certificate password in a pop-up window.
GoSign Desktop will confirm that signing is complete in the last screen of the Signature process.
The type of signature and the certificate used are displayed here.
Click on View file to open the signed document.
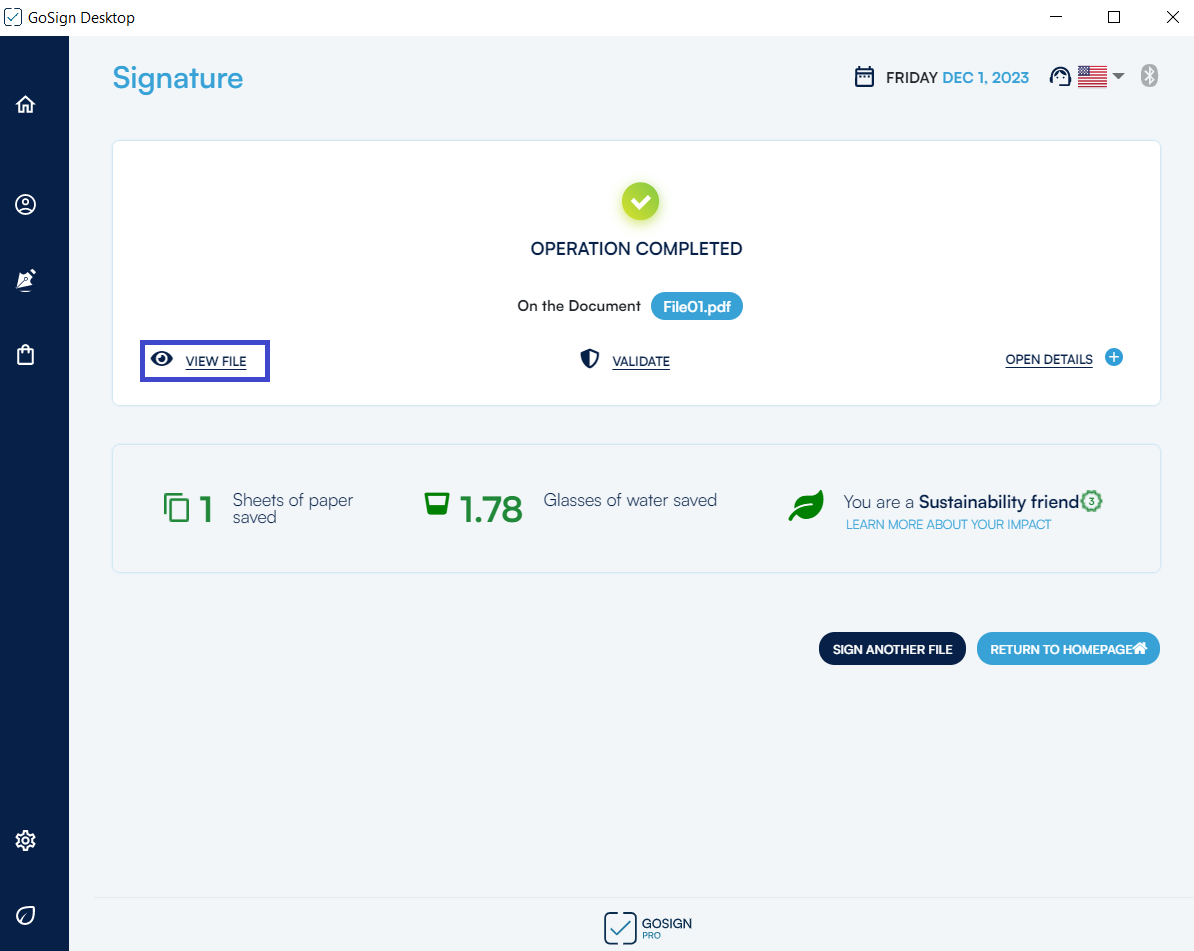
You can now sign a new document by returning to the first screen of the Signature function and choosing a new document, or you can return to the home page.
Digital signatures have evolved considerably over the years: from a technological viewpoint but, above all, from a regulatory viewpoint. This means that we may now have to deal with documents signed using certificates issued under a regulation different from the current one and with validity influenced by the rules in force at the time of issue.
GoSign Desktop uses different coloured icons to make recognising these different file types more intuitive.
Click on the Check function on the home page to select the document or documents (with an active PRO license) to be checked and to load them in the software.
Once you have uploaded the document you want to verify, there are three possible scenarios:
Verification with a Light Green check mark
The Light Green check mark indicates that the document has been correctly loaded by the software, that signature and/or time stamp verification has been done and signatures and/or time stamps have been found.
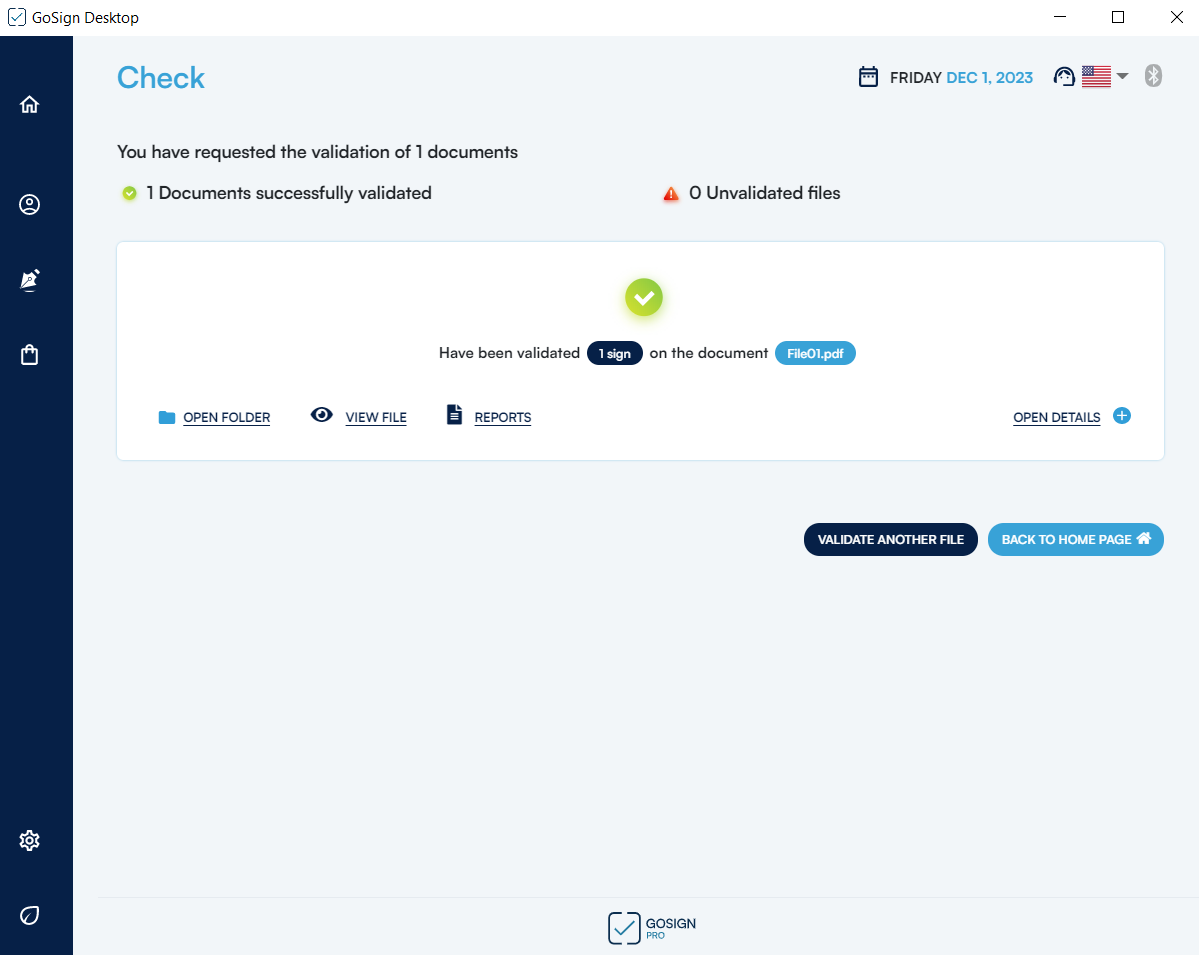
Verification with a Orange check mark
The Orange check mark indicates that the document has been correctly loaded by the software, that signature and/or time stamp verification has been done, but no signatures or time stamps have been found in the document.
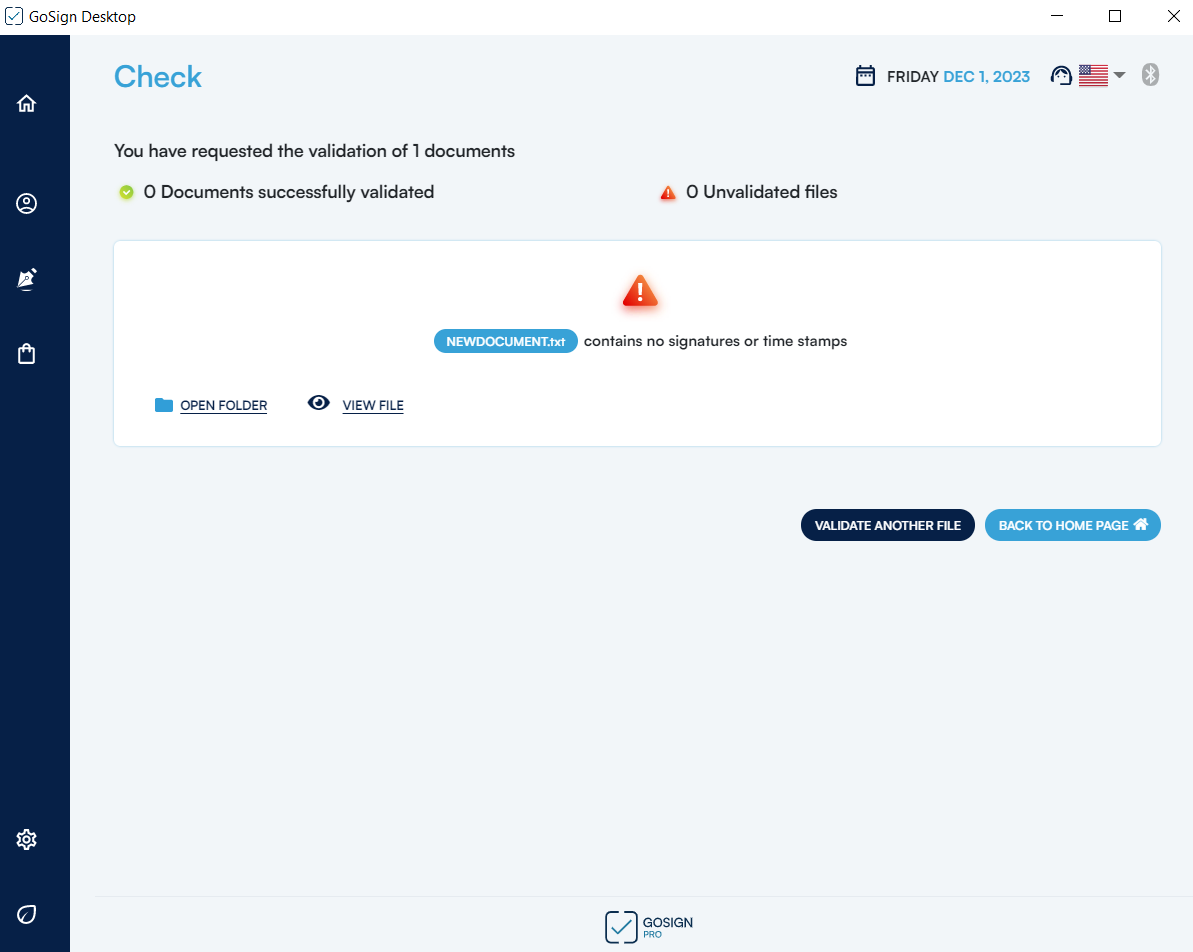
Verification with a Danger icon
The Danger icon indicates that there was a connection error while the software was retrieving the document and the signatures and/or time stamps attached to the document could not be verified.
When you click on the OPEN DETAILS section, all of the signatures and time stamps contained in the document are displayed with different colours, indicating whether they have been fully verified, partially verified or not verified.
Click on the Eye icon to open a pop-up window providing more information about the signature, signatory and the certificate used for signing. The information also includes the update date of the CRL, the list providing information on certificates that have been revoked, suspended or expired.
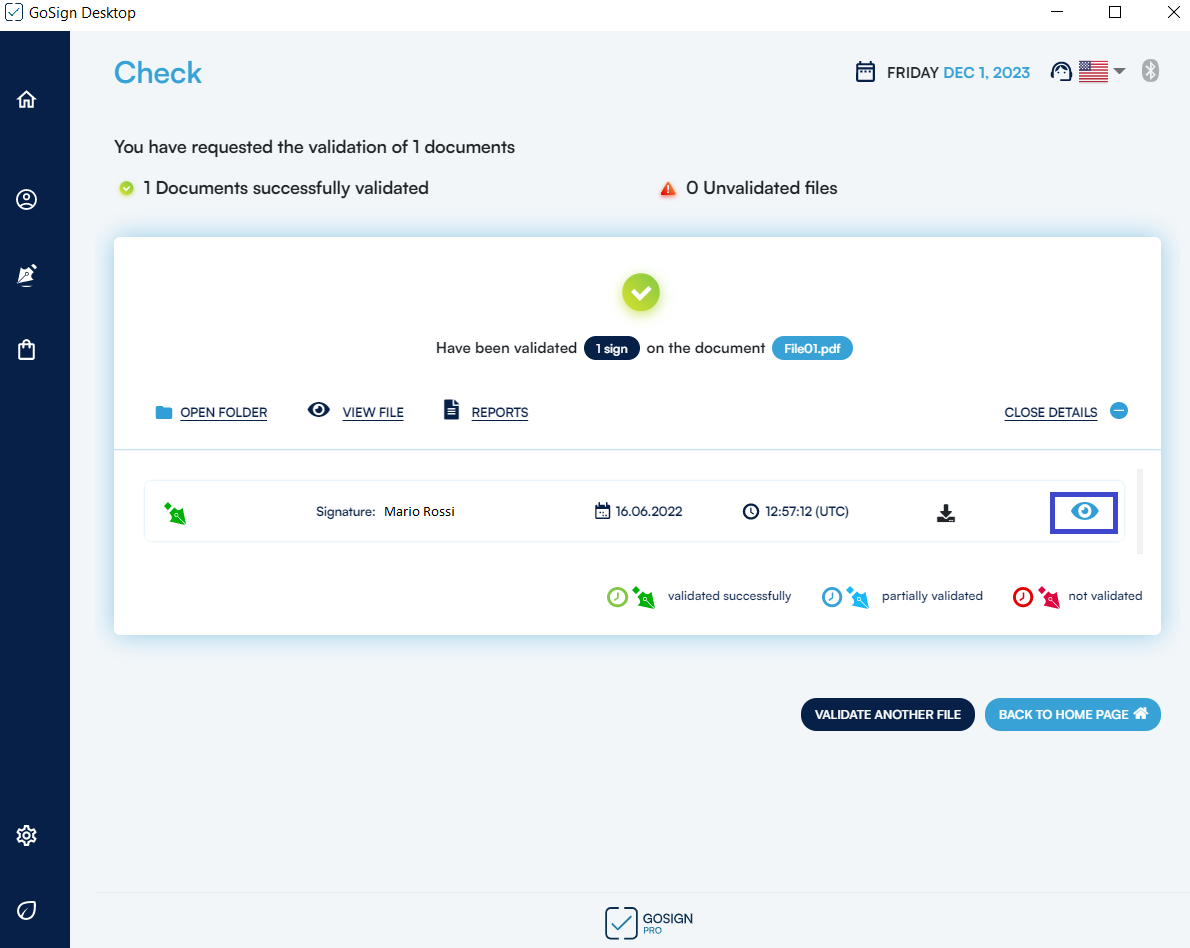
The information provided depends on the type of document:
If you select a document signed in PDF (PAdES standard) mode, you will get more information about the signature, signatory and the certificate used for signing, as well as about the PDF signature: reason, place of signature, signatory contact information. If there is also a time stamp, time validation information is also provided.
If you select a document time stamped in .m7m format, it includes both the signed electronic document and its time stamp, which has a .tsr extension. This is why you do not need to select the file to associate with the time stamp during verification.
PRO: If you select a document signed in XML (XADES standard) mode, you will receive more information about the signature, signatory and the certificate used for signing, as well as details about the XML signature: date of signature as from workstation.
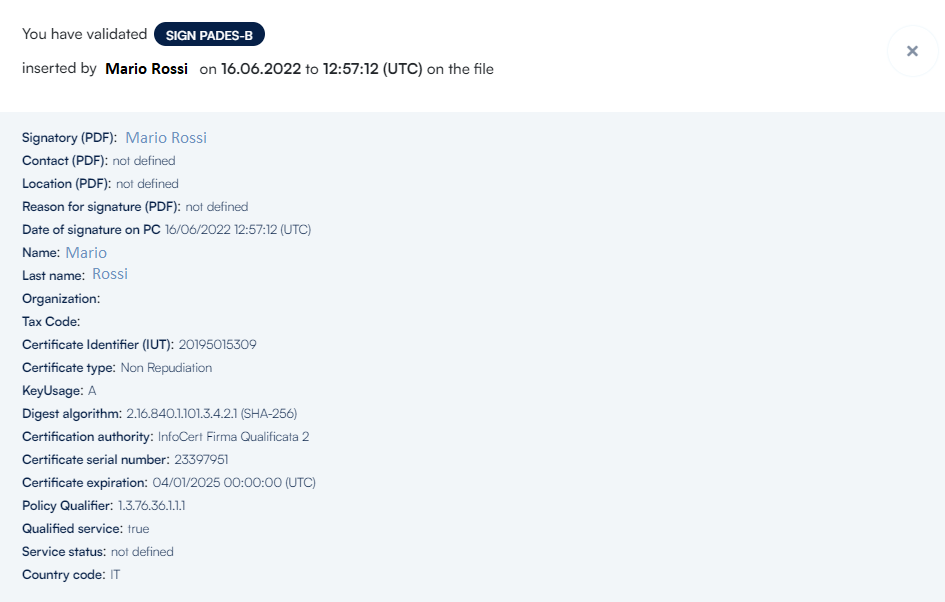
When the signatures and/or time stamp inside the documents are verified, the following results are possible:
Verification with Green icons
The green Signature/Time Stamp icon indicates that the digital signatures and/or time stamps attached to the document are fully valid in accordance with current legislation.
Therefore, the document has full legal value in both Italy and European Union member countries, under Italian Legislative Decree 82 of 7 March 2005 (Digital Administration Code) as subsequently amended and supplemented, and under Regulation (EU) N°910/2014 (eIDAS Regulation).
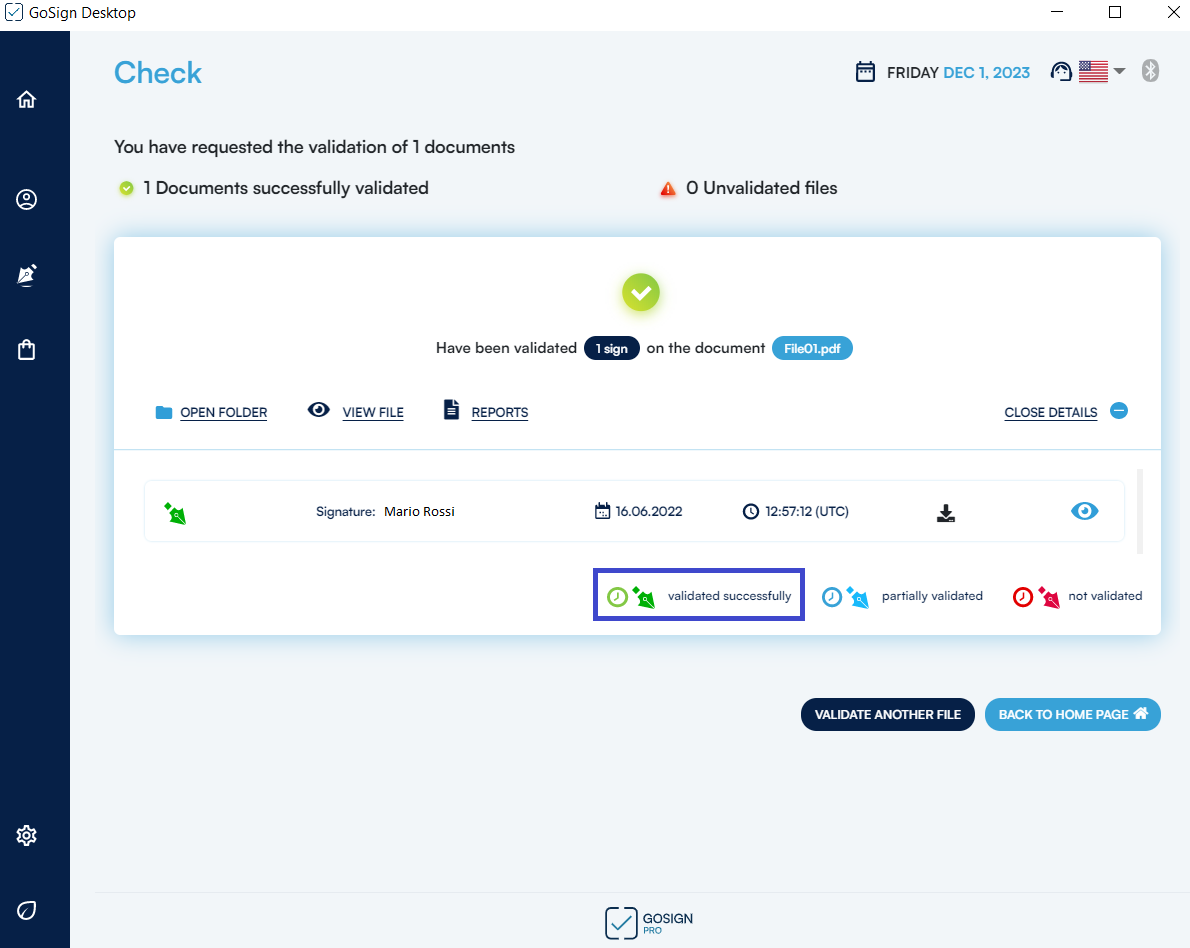
Verification with Light Blue icons
The light blue Signature/Time Stamp icon indicates that:
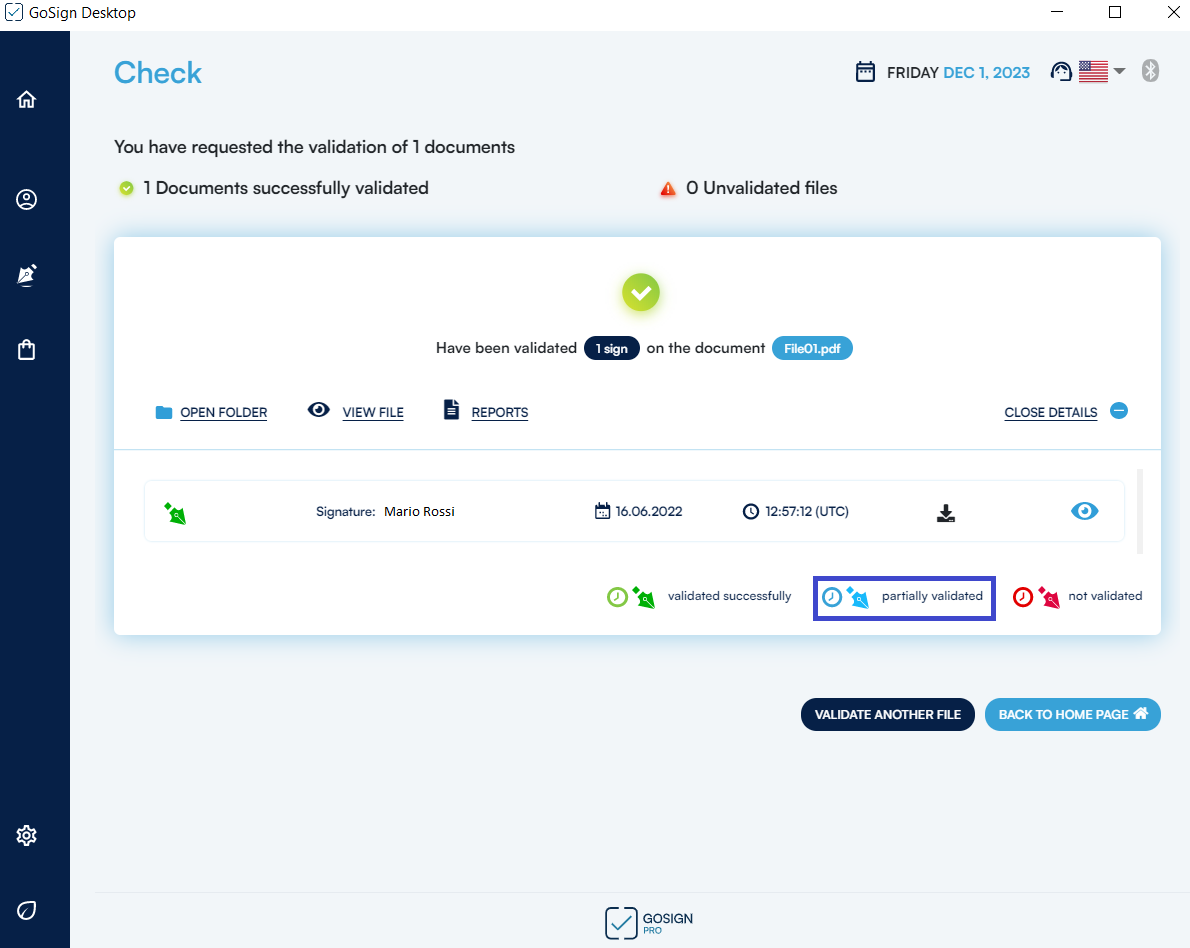
Verification with Red icons
The Red Signature/Time Stamp icon indicates that the document was verified using only the Root Certificate in the signature and not the CRL that each Trust Service Provider (TSP or Certifier) is required to make public to allow verification of the document.
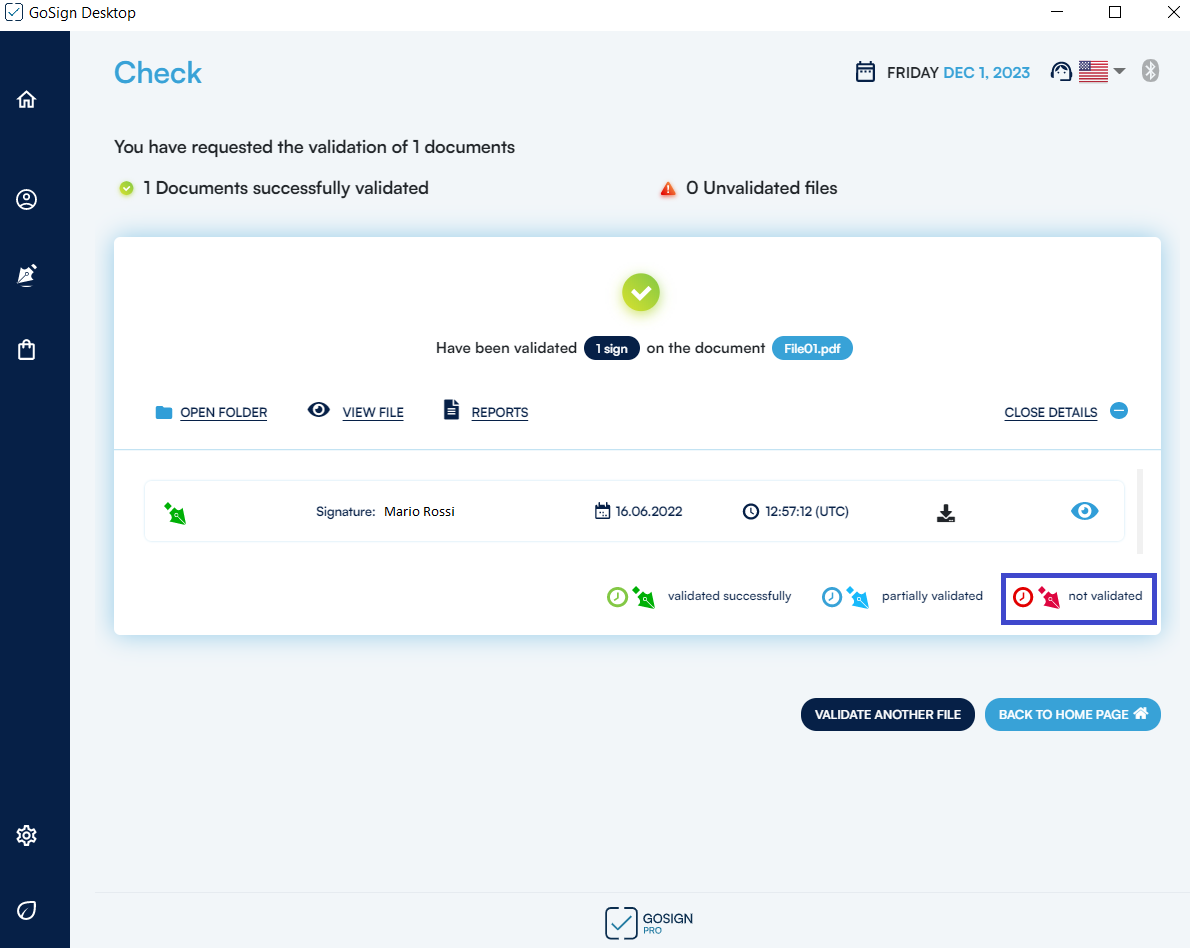
Once verification is complete, click on the File icon next to the Report link to generate a verification report. A browser page is displayed, indicating:
GoSign Desktop provides a TIME STAMP function allowing you to time stamp documents, even at a later date, so that a document can be time stamped even if it hasn’t been signed yet. Once the document has been selected, GoSign Desktop displays its information (type, size, etc.). Click on the Eye icon to display the document, or on the Trash icon to delete it.
The three types of time stamp that can be applied to the document (or documents, with the PRO license) are shown in the bottom part of the screen.
Three time stamp technologies are available:
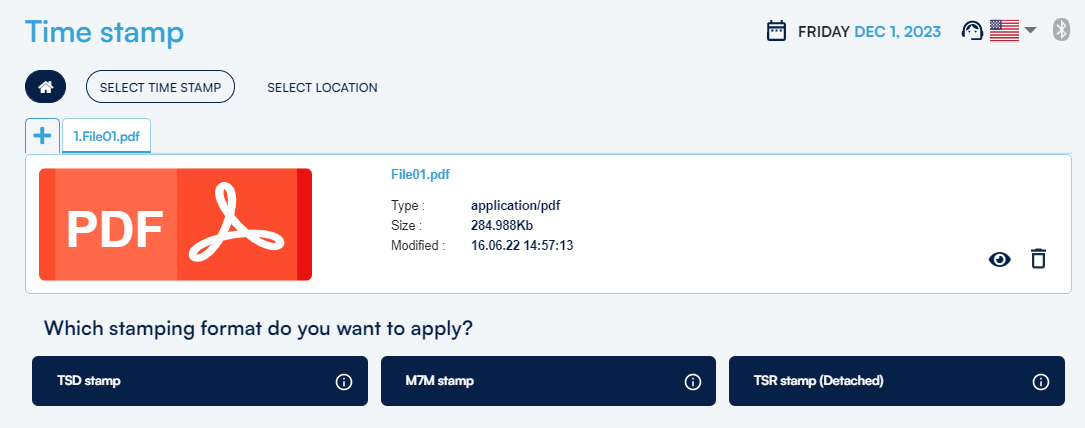
Once you have decided which type of time stamp you want to apply, click on CHOOSE under that type. Data on the status of the time stamps that are still available and the time stamps linked to your account that have already been used is shown at the bottom of the screen. However, if you have not already configured your account, you will be prompted to enter the time stamp certificate account credentials and redirected to the TIME STAMPS section in the CONFIGURE menu (Gear icon).
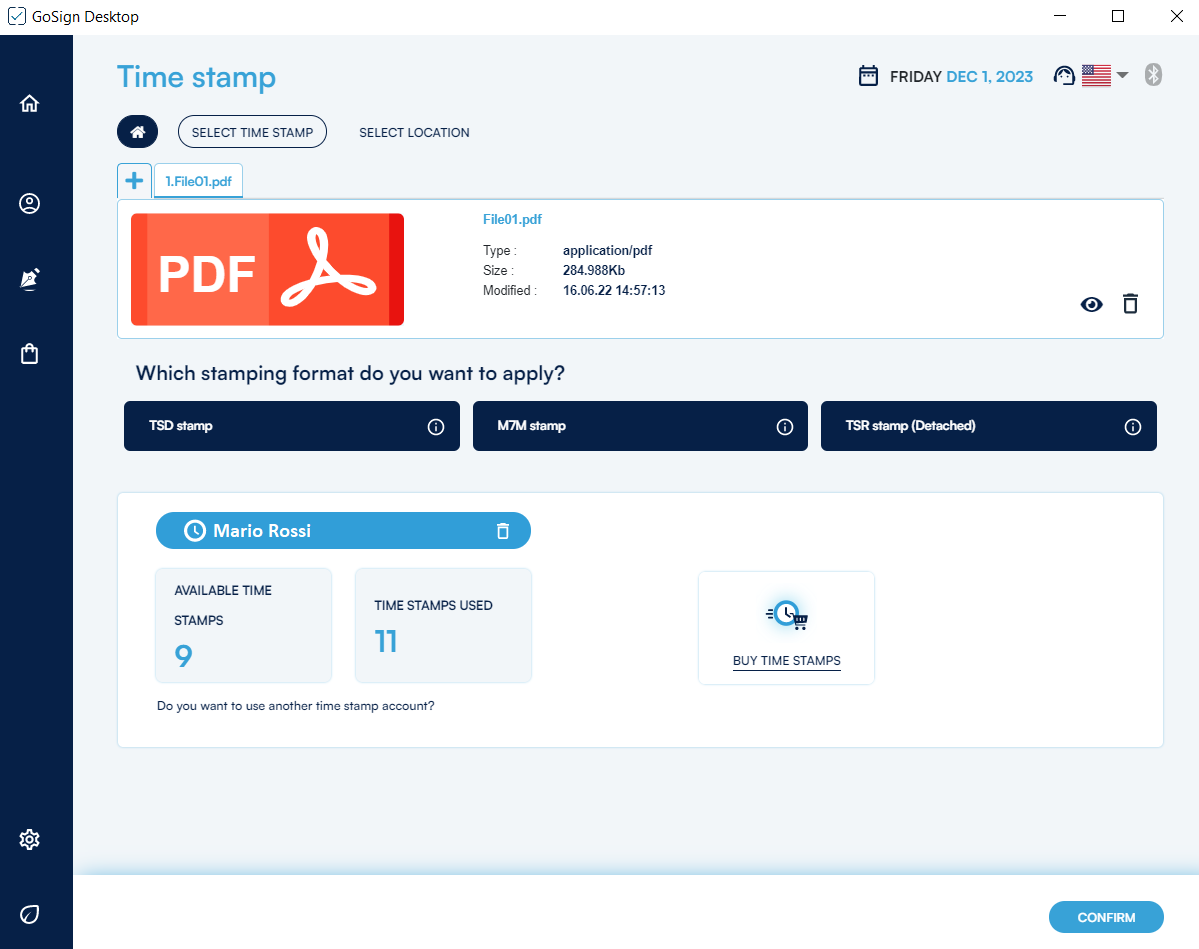
Once the software has checked that you have enough time stamps available to stamp the document (or documents if you are stamping more than one), click on CONFIRM, then choose a location to save the time-stamped document. By default, the path suggested is the source folder of the time-stamped file.
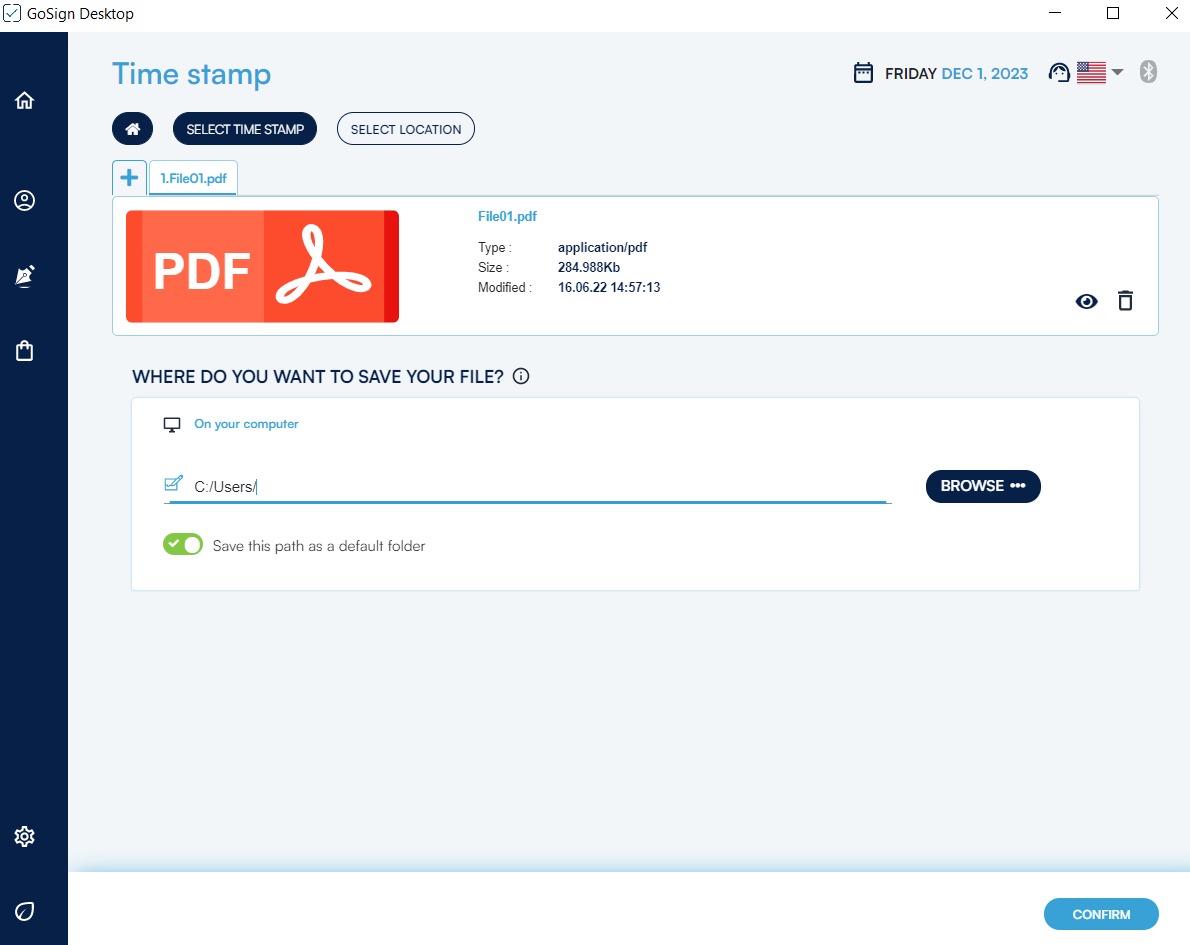
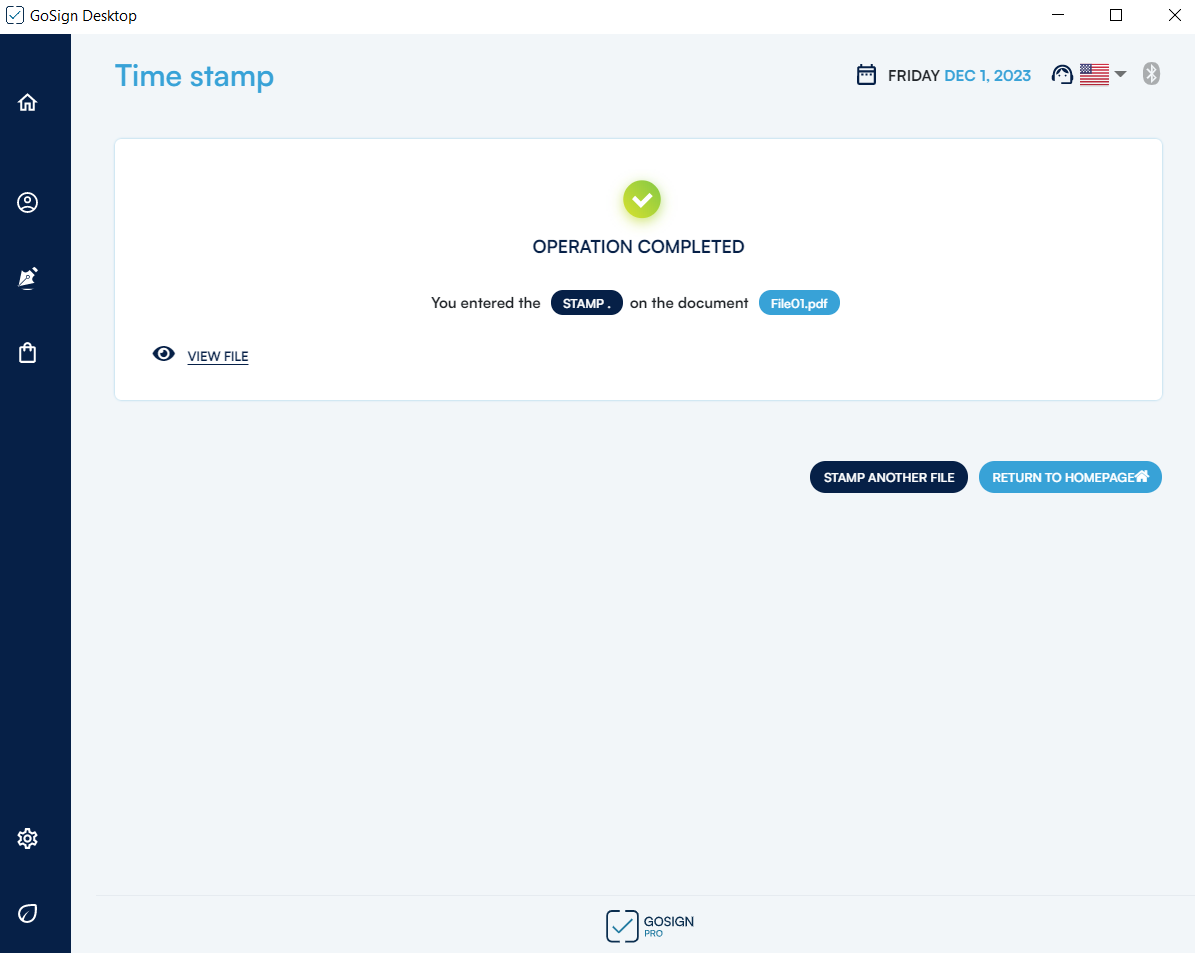
To complete the Time Stamping process, click on CONFIRM. In the last screen, GoSign Desktop will confirm that time stamping was successful.
