 How to use a Qualified Electronic Signature (QES) with GoSign
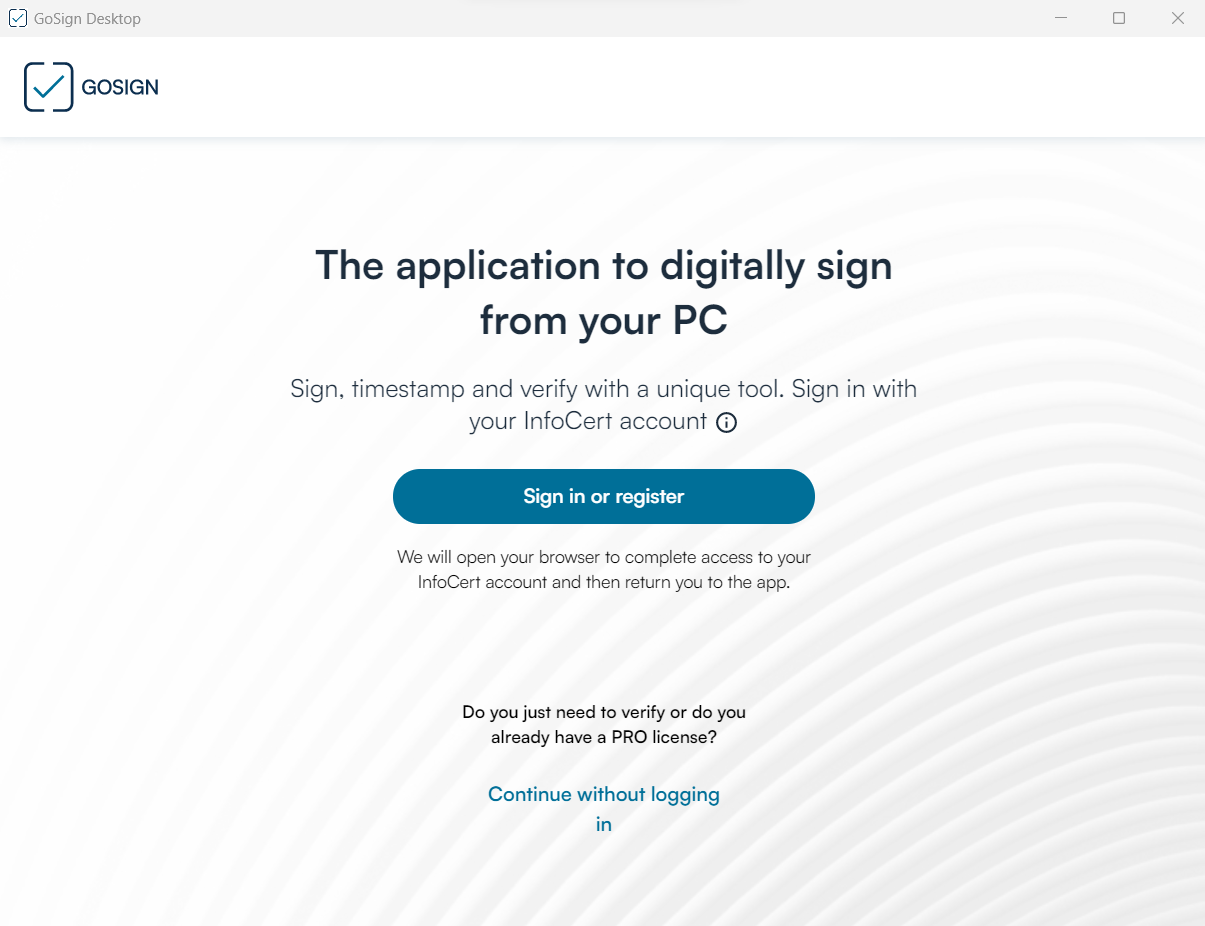
When starting GoSign Desktop, you will be asked to log in with your QES signature credentials, then use your username and password and click on the "Sign in" button.
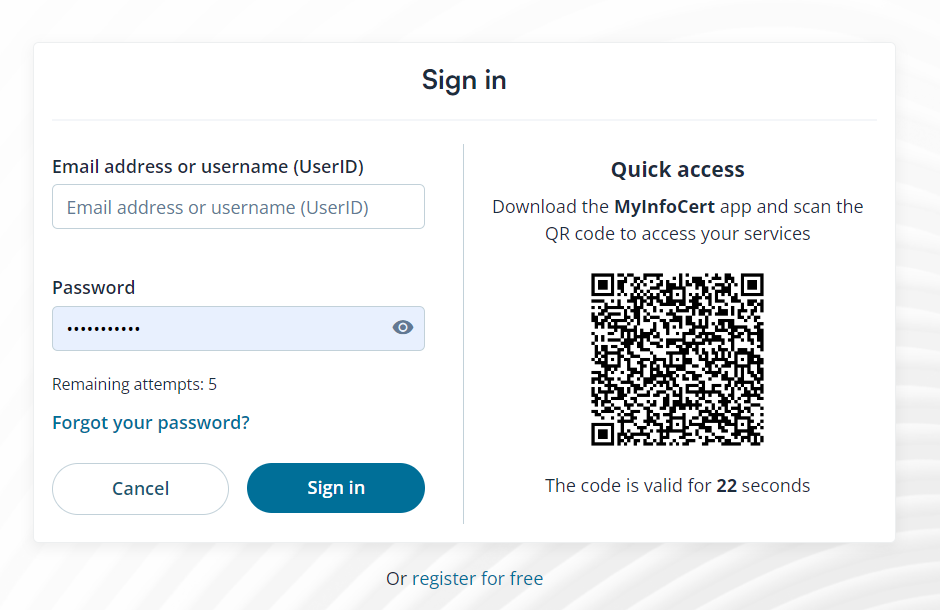
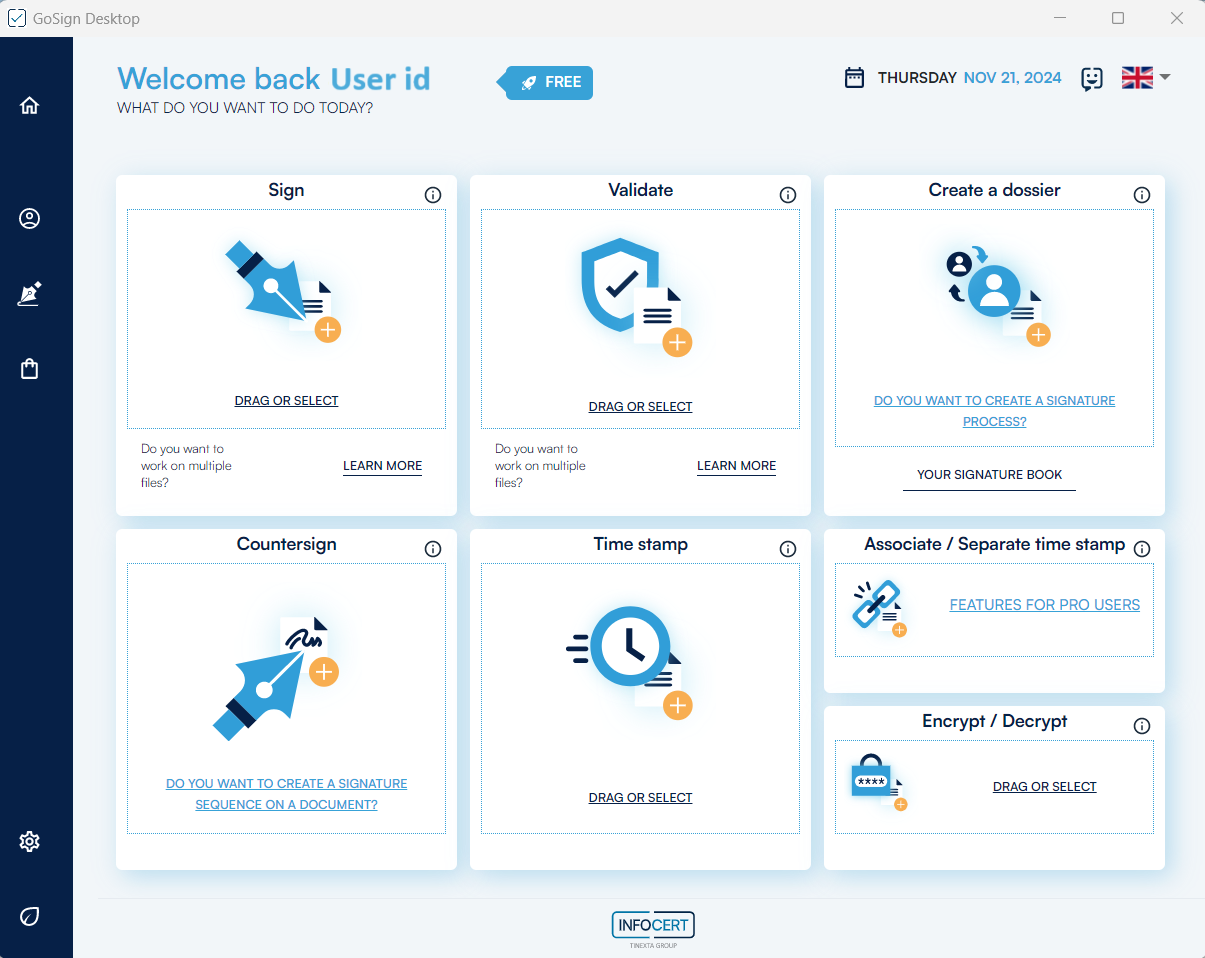
By entering the signature credentials, the signature certificate will already be present in the software GoSign Desktop.
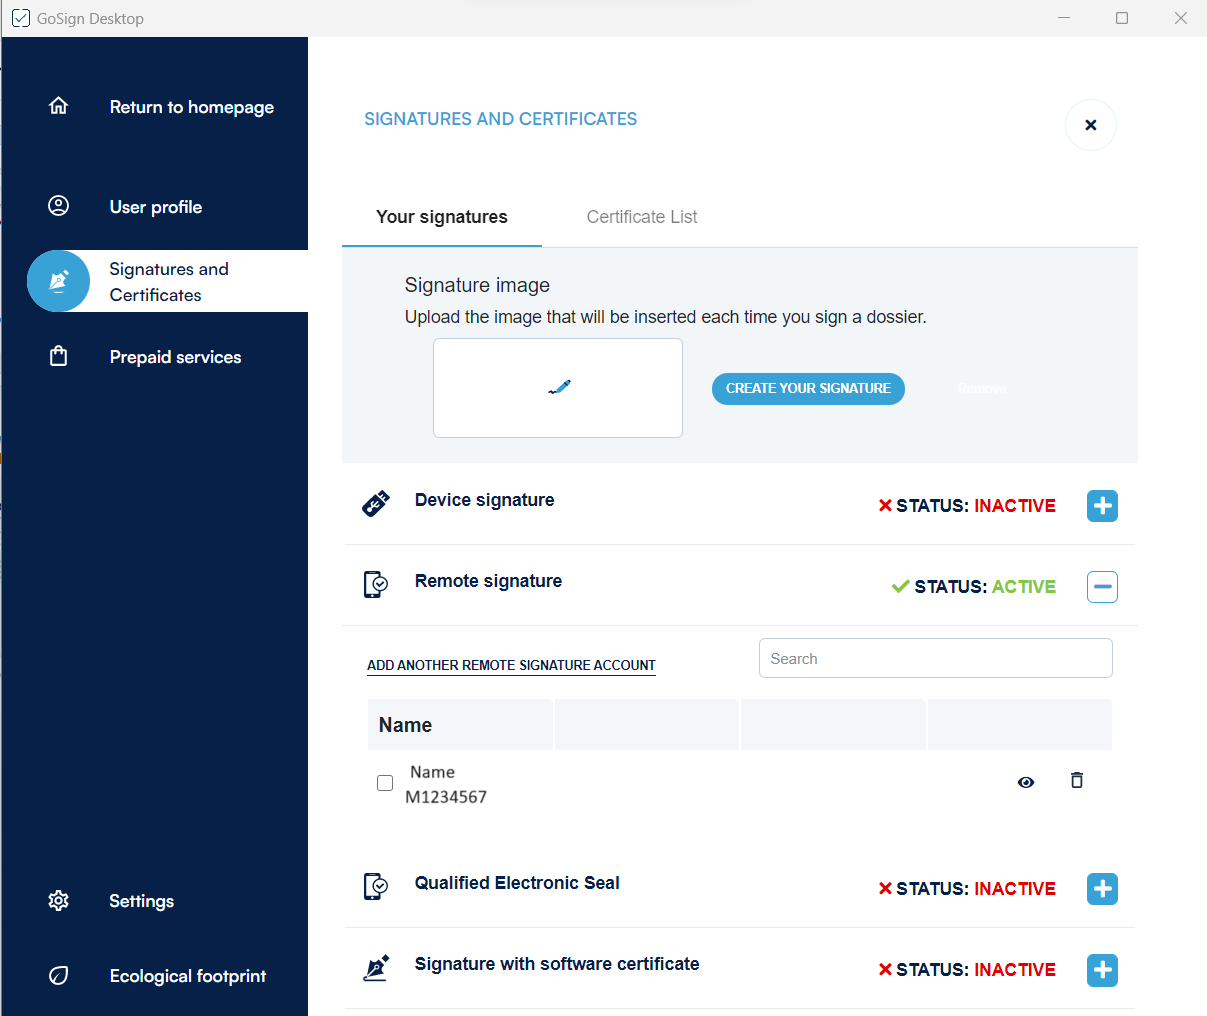
If, on the other hand, the first access is made with different credentials, it will be necessary to add the QES certificate.
In the side menu, you can find the Signatures and Certificates section.
In the Remote Signing section, you can specify the credentials for your QES signature by clicking on the "+" icon and clicking on Add.
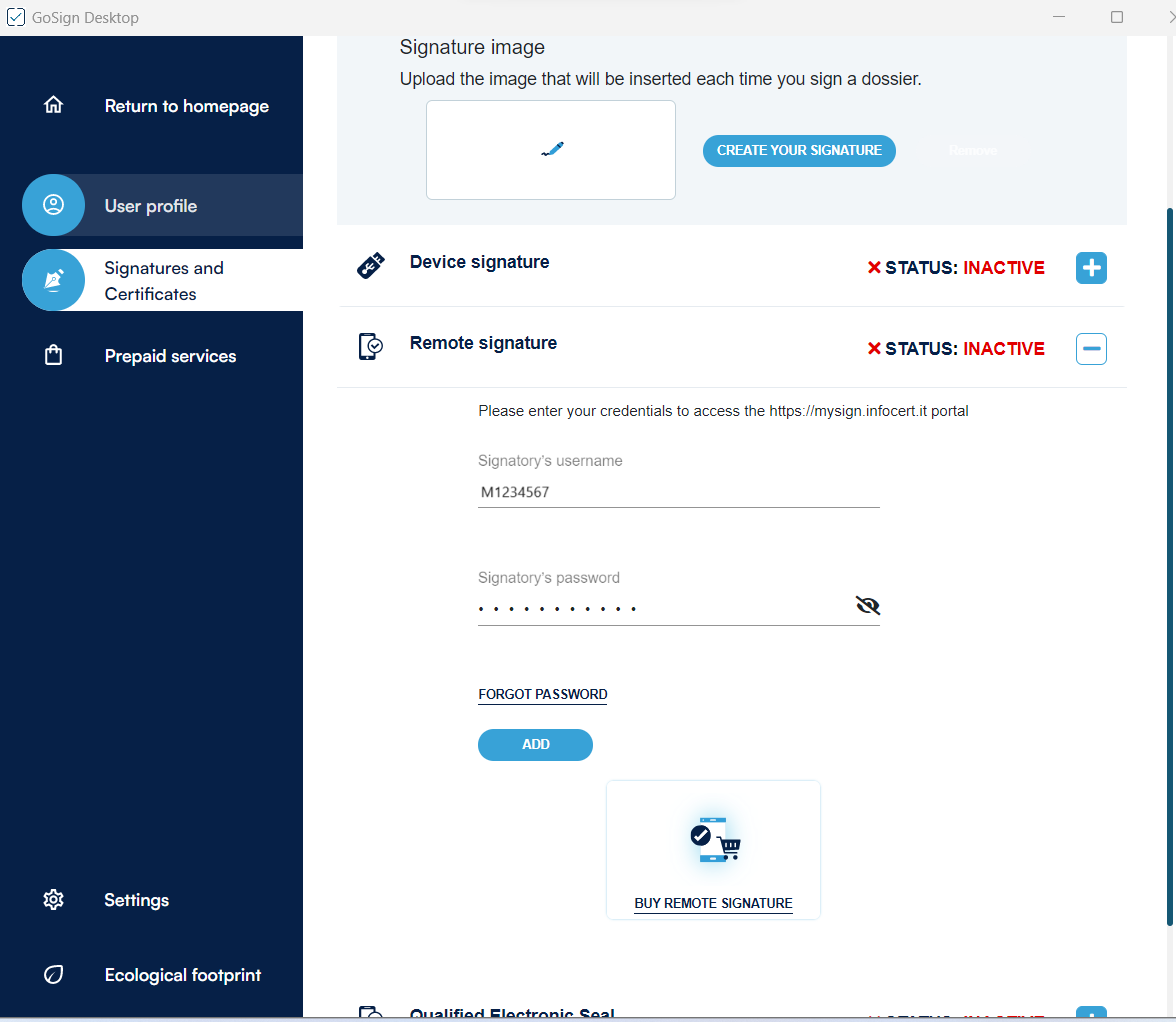
GoSign Desktop provides a Sign function on the home page that allows you to select the document to be signed and to recall it within the software.
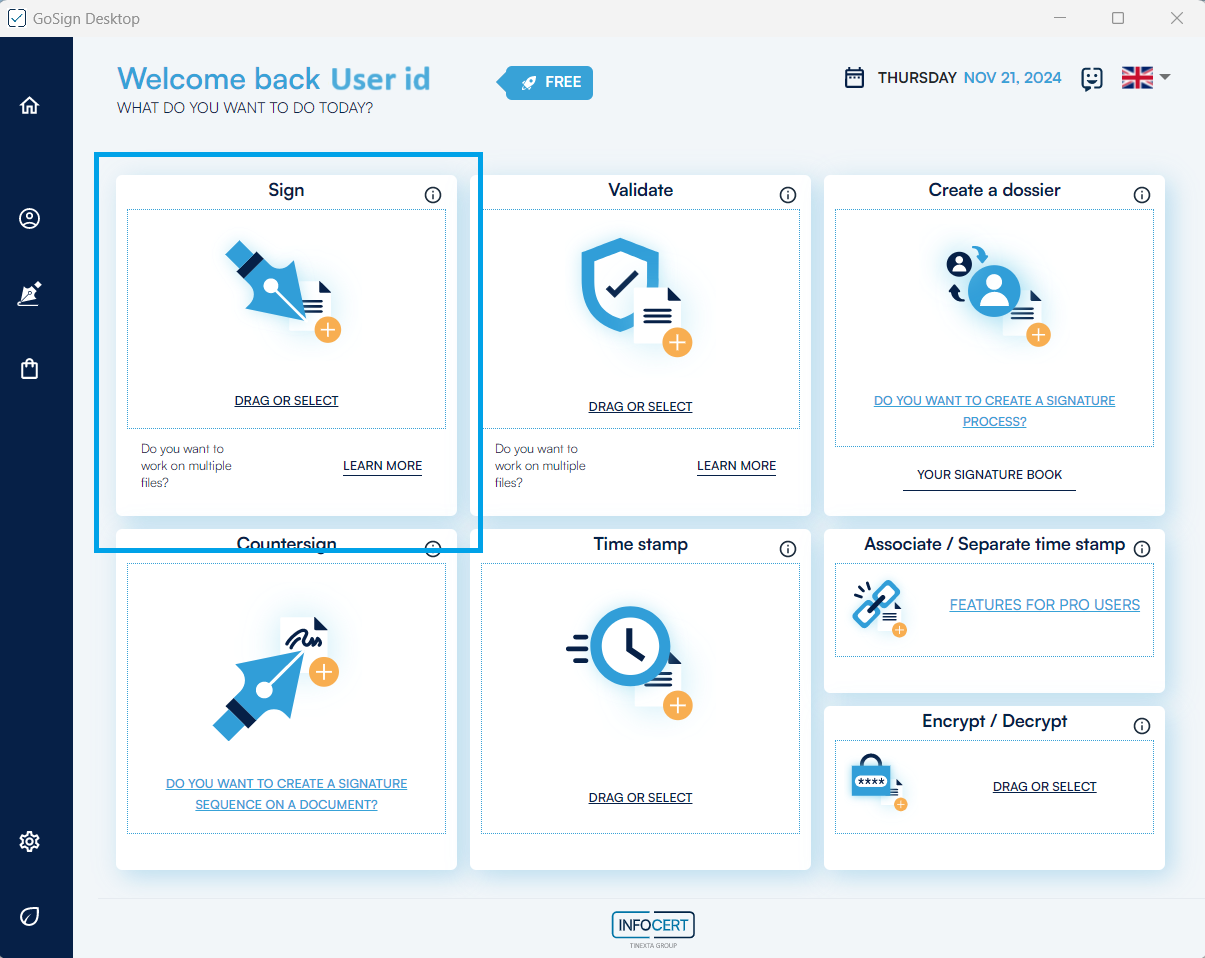
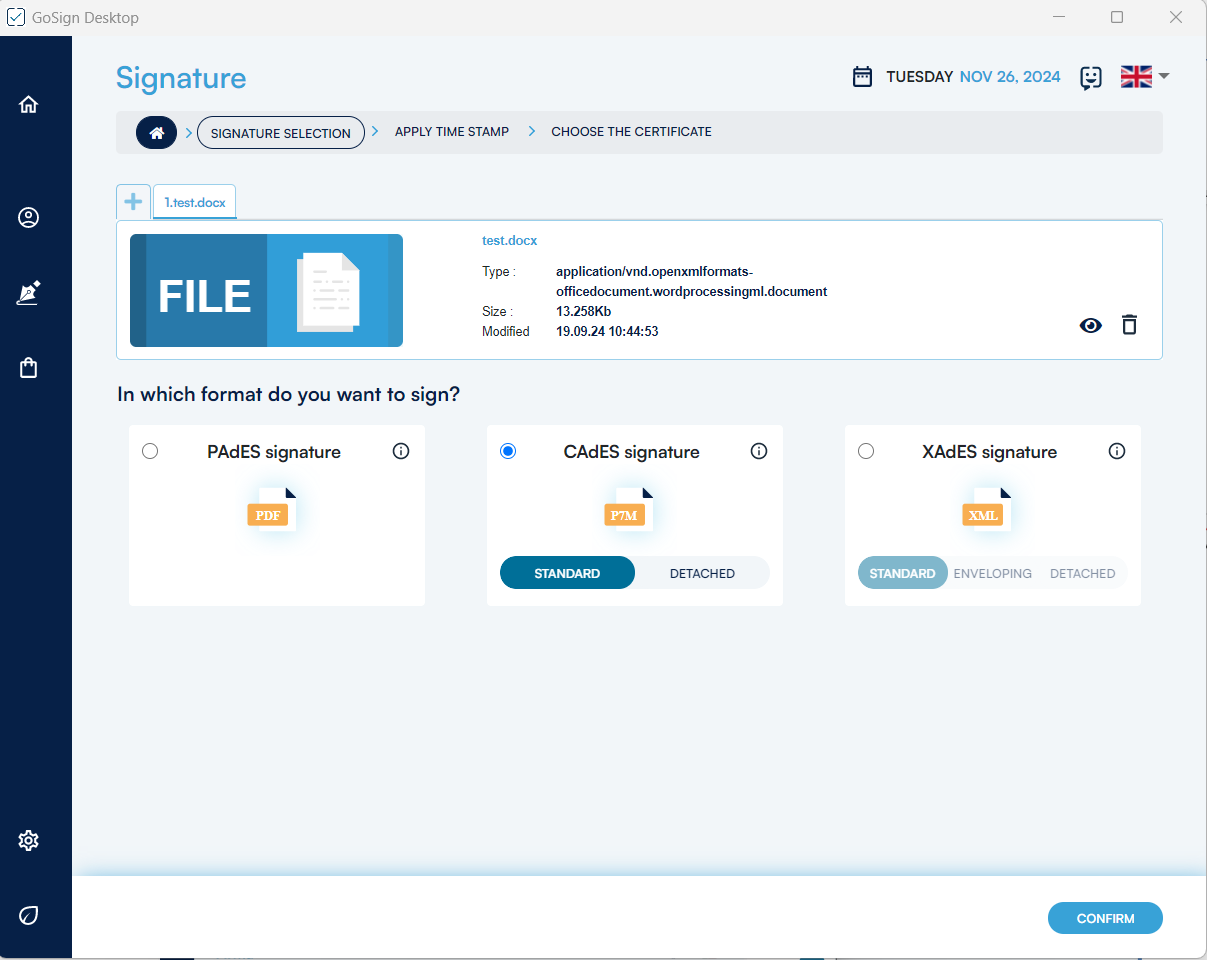
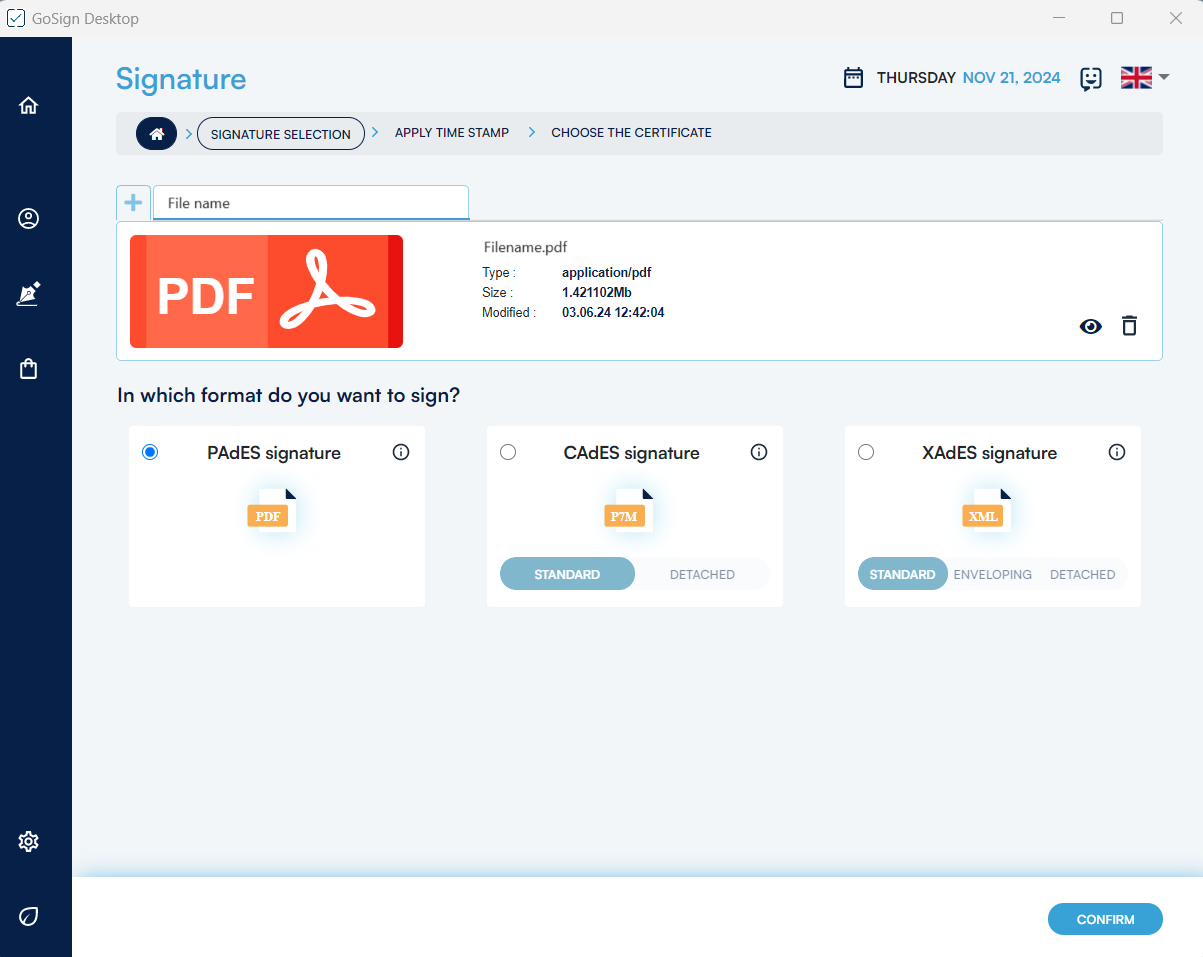
Once you have selected the file to be signed, or dragged it into the appropriate section, GoSign Desktop displays the document details (type, size, etc.) and, if necessary, you can view the document by clicking the "Open Document" button (indicated by the eye icon) or delete the file using the Delete function (indicated by the trash can icon).
At the bottom of the screen, you can see the technologies with which you can sign documents. To produce a document with a .p7m extension, you must choose the CAdES technology and proceed by clicking on the "Confirm" button.
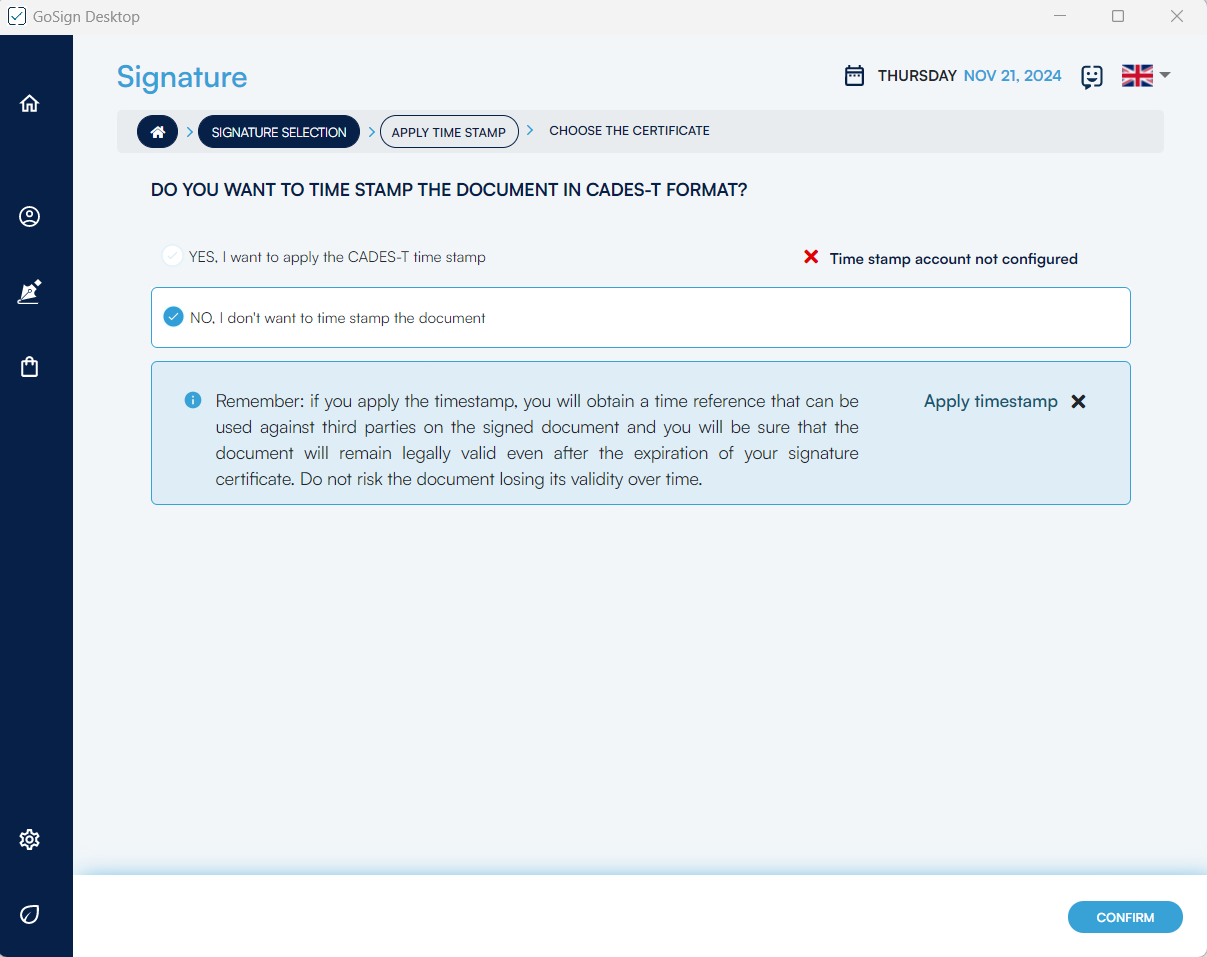
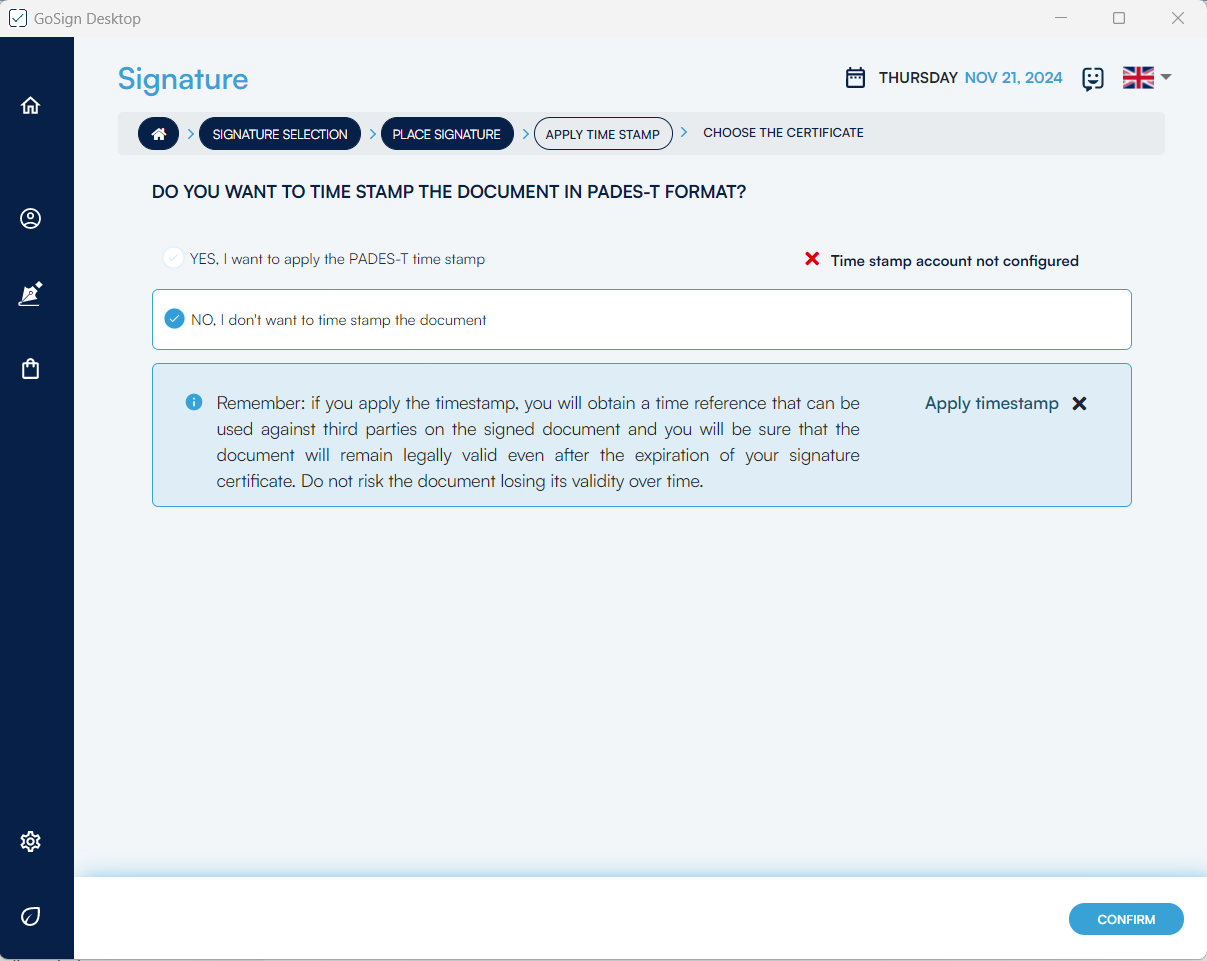
Once you have chosen the signature format, GoSign Desktop asks whether or not you want to apply the time stamp to the file you are digitally signing. This stamp will be in PADES-T format.
To apply a Stamp, an account containing the time stamps must be configured. If it has not already been configured, it can be added by clicking on the side menu Services on demand in the Timestamps section.
Once you have chosen whether or not you want to affix a time stamp, you must press the "Confirm" button to proceed to the next step.
In the next section, you can choose which certificate to use:
By default, GoSign Desktop proposes a possible path as a save destination, which coincides with the overwriting of the original file, which will then be replaced by the signed document.
If you choose to overwrite the original document, you will be asked to confirm the operation. Otherwise, through the Browse button, it will be possible to change the destination of the signed document with the possibility of renaming it.
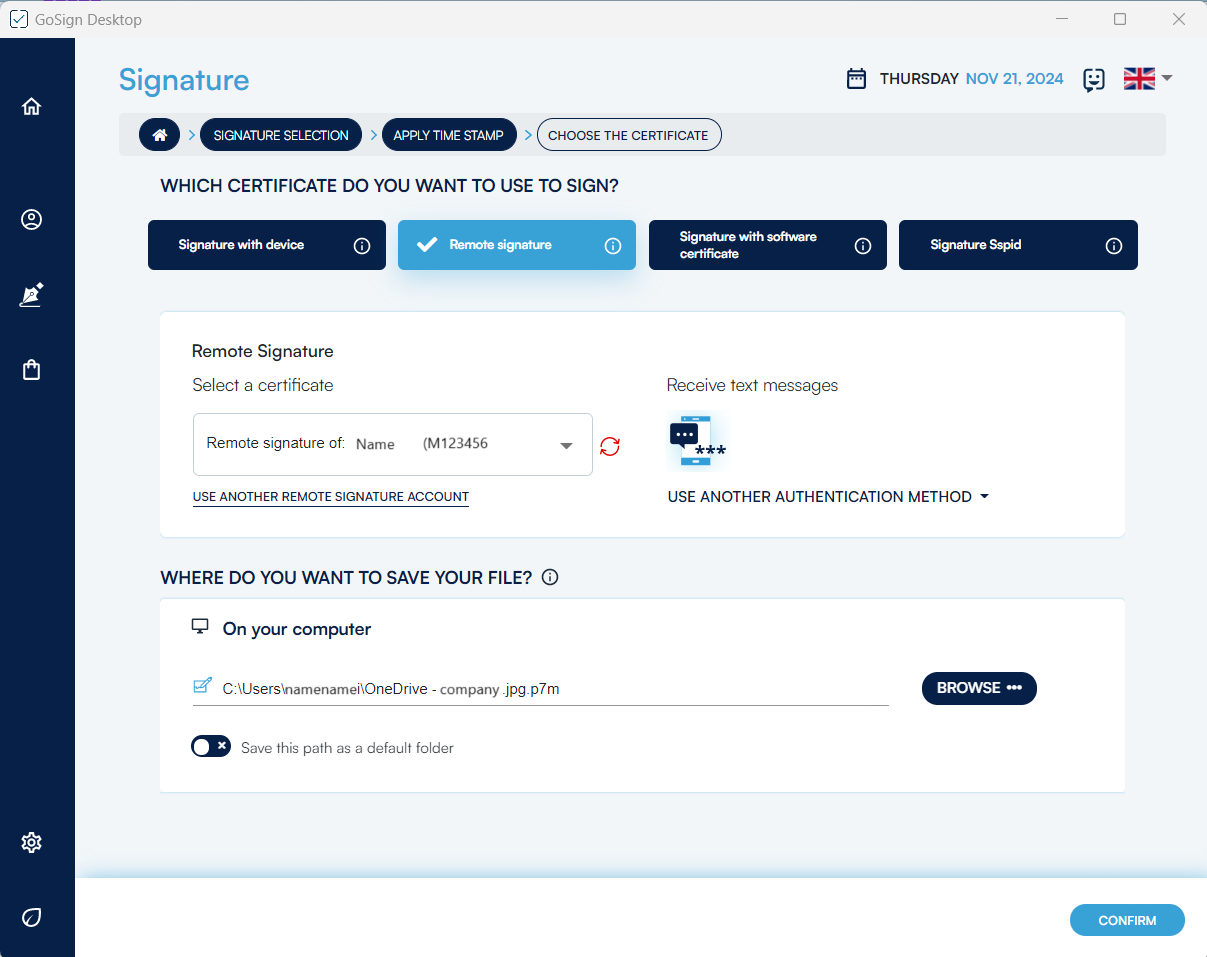
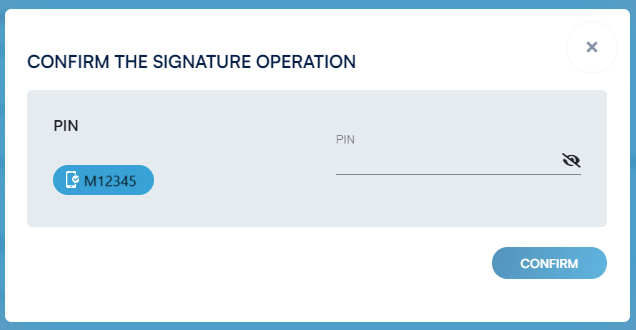
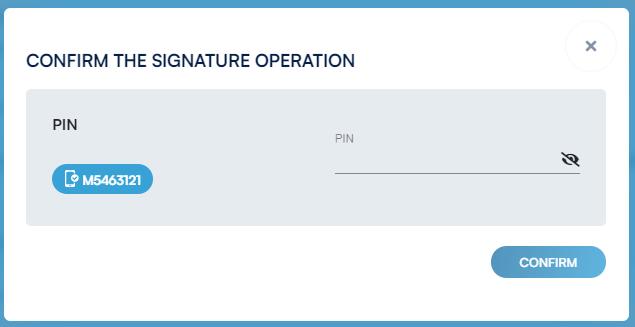
A click on the Confirm button will allow you to enter the signing PIN of your certificate.
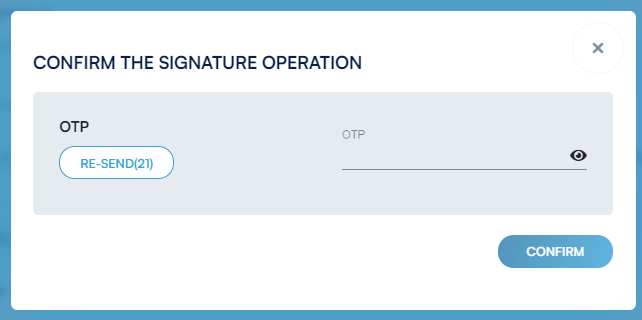
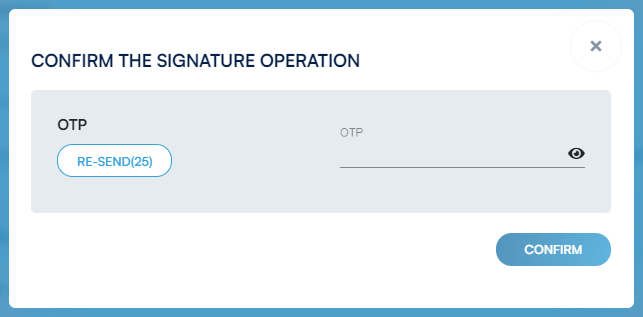
A click on the Confirm button advances the document signing process. All that remains is to retrieve the OTP code.
At the time of issue, the remote signature certificate was paired with your mobile phone, so the OTP code will arrive via SMS.
The Re-send button allows you to request it if it has not been received or if you have not had time to type it. The sender of the SMS message is InfoCert; the text of the message indicates the date of the request, the time of generation of the OTP Code and the code itself, of 8 digits, which must be reported in the available field, taking care to type them correctly.
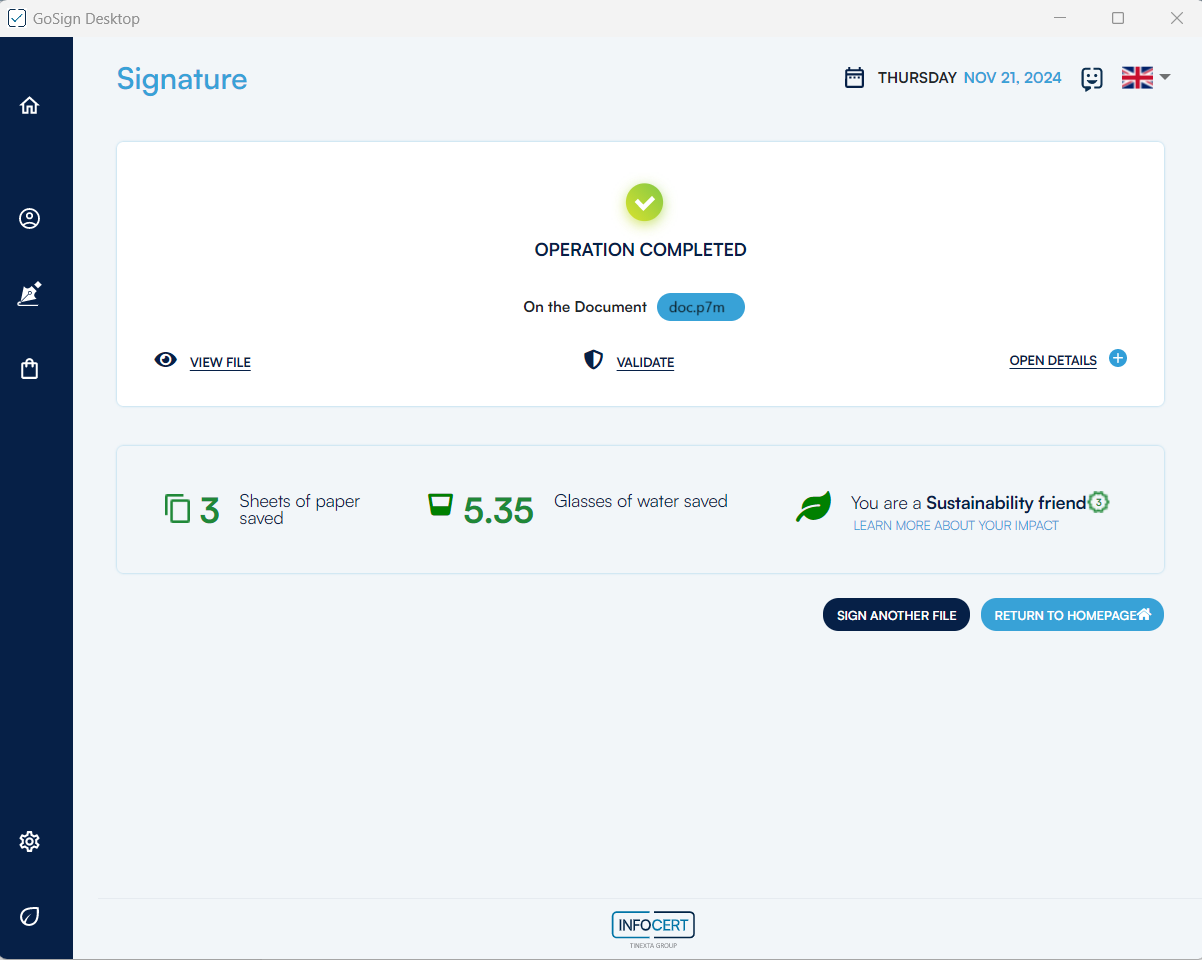
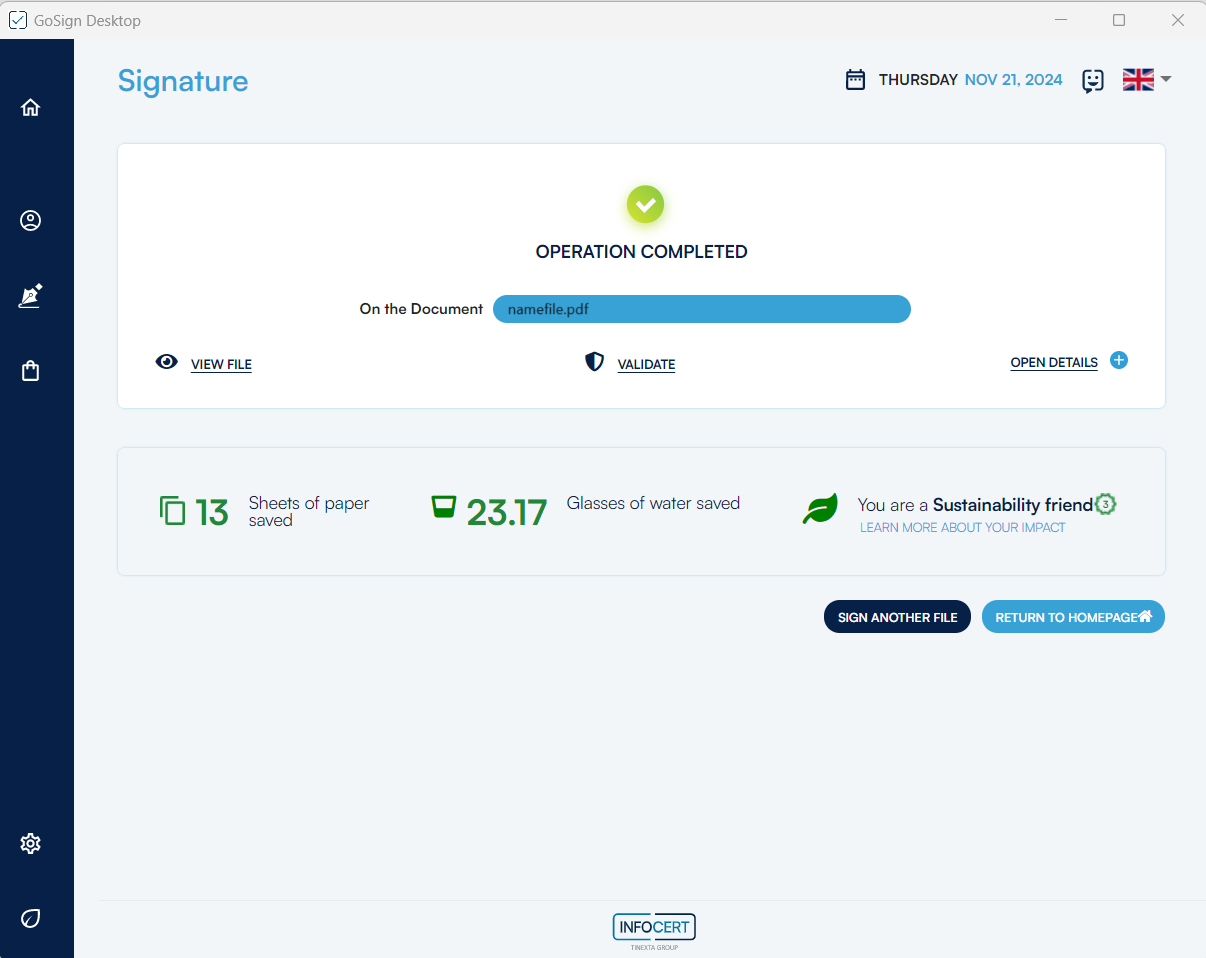
At the end of the signing process, which takes a few seconds, GoSign Desktop will confirm that the activity has been successfully completed.
GoSign Desktop provides the Sign option on the home page that allows you to select the document to be signed and to recall it within the software.

Once you have selected the file to be signed, or dragged into the appropriate section, GoSign Desktop will present the details of the document (type, size, etc.) and, if necessary, you can view the document by pressing the "Open Document" button (indicated by the eye icon) or delete the file using the "Delete" function (indicated by the trash can icon).
At the bottom of the screen, you can see the technologies with which you can sign documents. To produce a document with an extension .pdf, the PAdES technology must be chosen and you can proceed by clicking on the "Confirm" button under the word PADeS signature. However, it is also possible to sign the document in CAdES mode by using the option provided.
The QES Signature process continues with the ability to create your own signature and make it visible within the document. This is possible by activating the 2 options: "Enable and double click to add a signature" and "Signature image".
The signature box will display the image of the signature you have chosen, by default it is the image uploaded in the Signatures and Certificates section on the dedicated Your signatures page.
By enabling the "Enable and double click to add a signature" option, it will be mandatory to apply the signature on the document preview, otherwise it will not be possible to continue the Signature process.
Otherwise, you would still get a .pdf document signed according to the PAdES standard, but without any information about the signature visible on the document.
Proceed by clicking on the "Confirm" button.
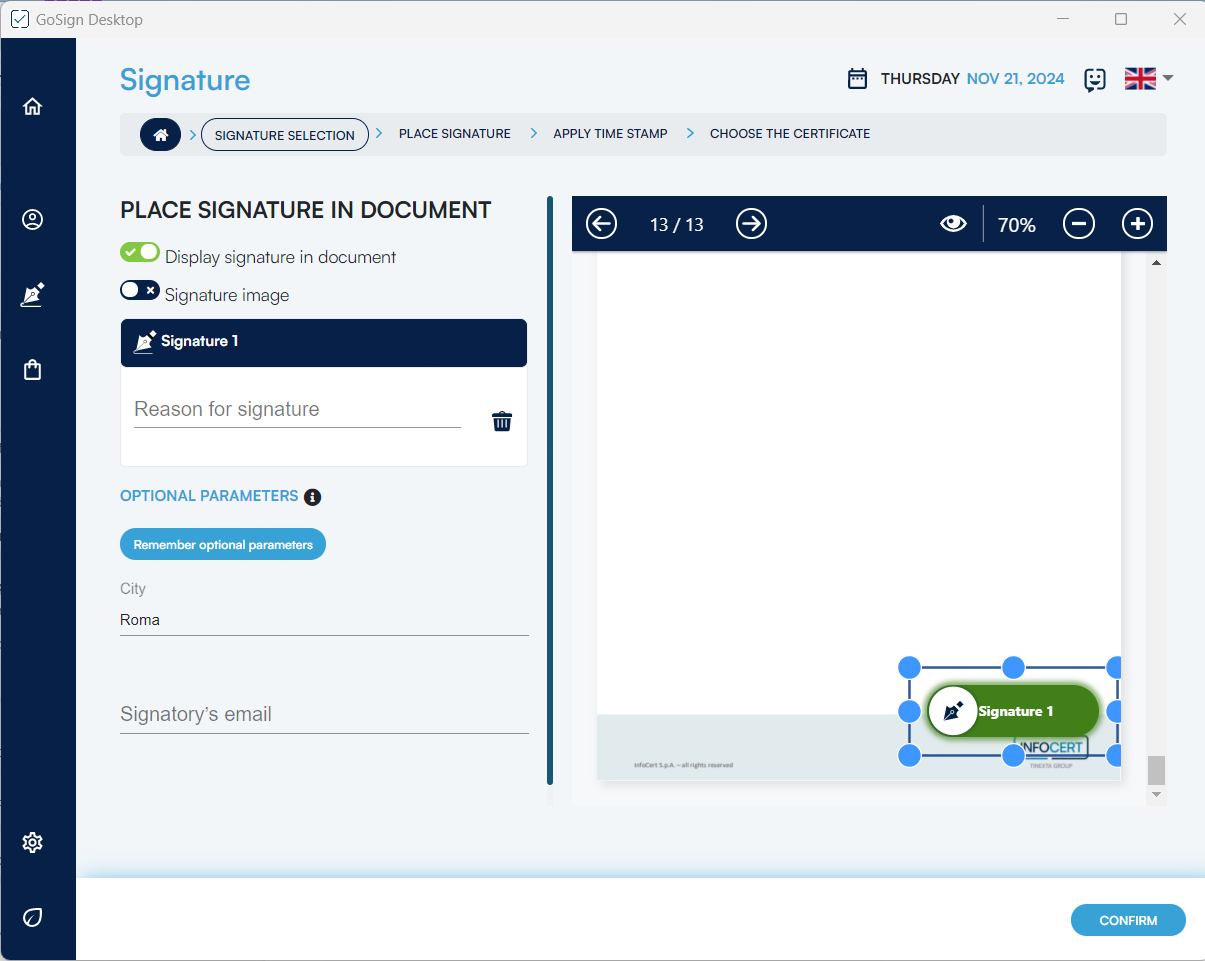
Finally, the Optional Parameters allow you to enrich the signature process with information regarding:
Proceed by clicking on the "Confirm" button.
Once you've chosen your signature format, GoSign Desktop asks whether or not you want to apply timestamps to the file you're digitally signing. This brand will be in PADES-T format.
For the application of a Brand it is necessary that an account containing the timestamps is configured, if it has not already been configured you can add it by clicking on the side menu Metered services in the Timestamps section.
Once you have chosen whether or not you want to put a time stamp, you need to press the "Confirm" button to proceed to the next step.
NB: It is very important to keep in mind that this graphic sign has no legal value and is in no way my digital signature.
After selecting the remote signing certificate option, you can proceed with signing the document.
By default, GoSign Desktop proposes a possible path as a save destination, which coincides with the overwriting of the original file and thus being replaced by the signed document.
If you choose to overwrite the original document, you will be asked to confirm the operation.
Otherwise, through the "Browse" button, it will be possible to change the destination of the signed document with the possibility of renaming it.
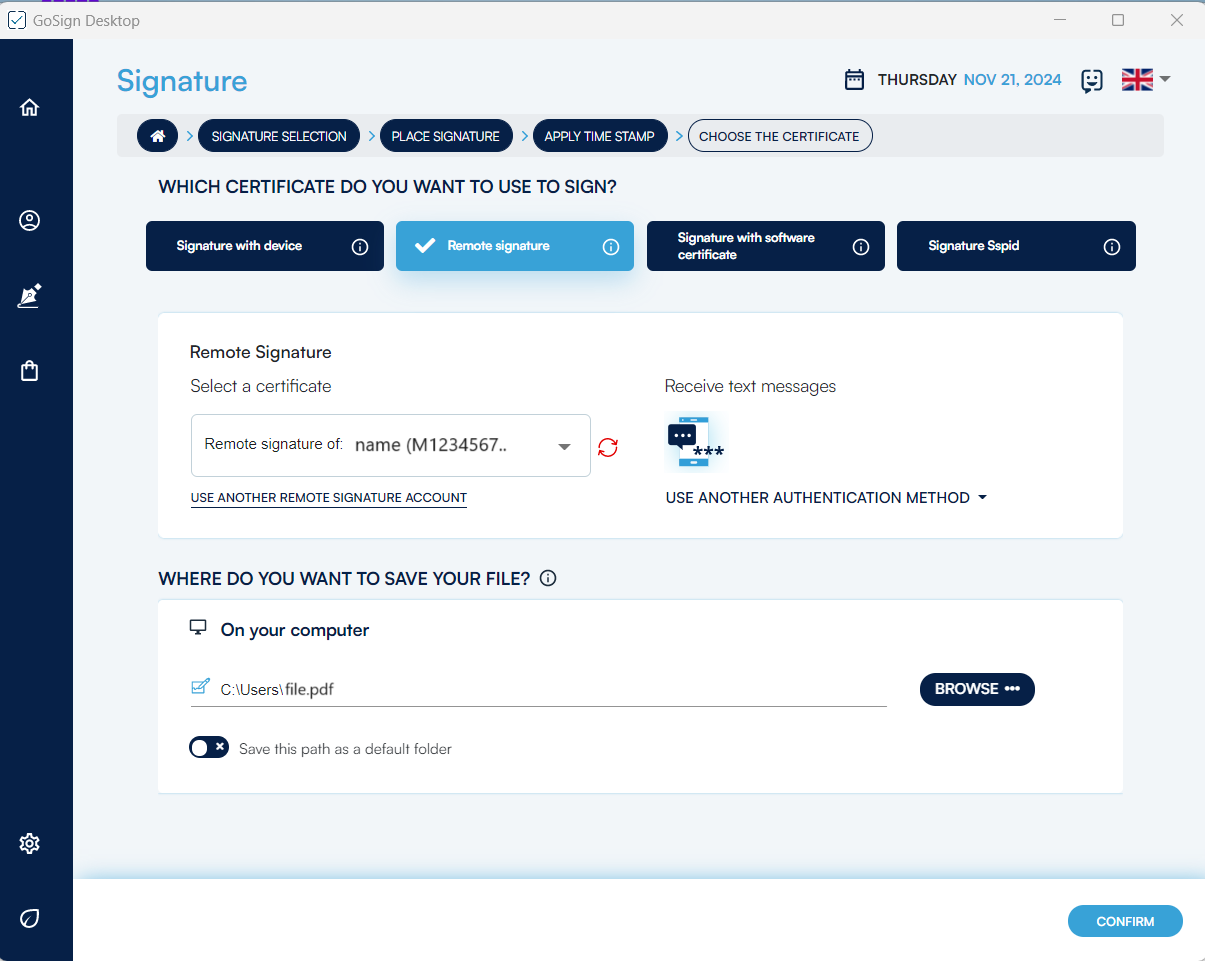
A click on the Confirm button will lead to enter the signing PIN of your certificate.
A click on the Confirm button advances the document signing process. All that remains is to retrieve the OTP code.
At the time of issue, the QES signing certificate was paired with your mobile phone, so the OTP code will arrive via SMS. The Re-send button allows you to request it if it has not been received or if you have not had time to type it.
The sender of the SMS message is InfoCert; the text of the message indicates the date of the request, the time of generation of the OTP Code and the code itself, of 8 digits, which can be reported in the available field, taking care to type them correctly.
At the end of the signing process, which takes a few seconds, GoSign Desktop will Confirm that the activity has been successfully completed.
By clicking on the "Open Details" button, you can get more information about the signature you have just entered.
To access GoSign Web you need to use GoSign account or create it in the login page.
To continue, you will need to click on the Submit button.

At first access, you must confirm the required fields (Last name and Email).
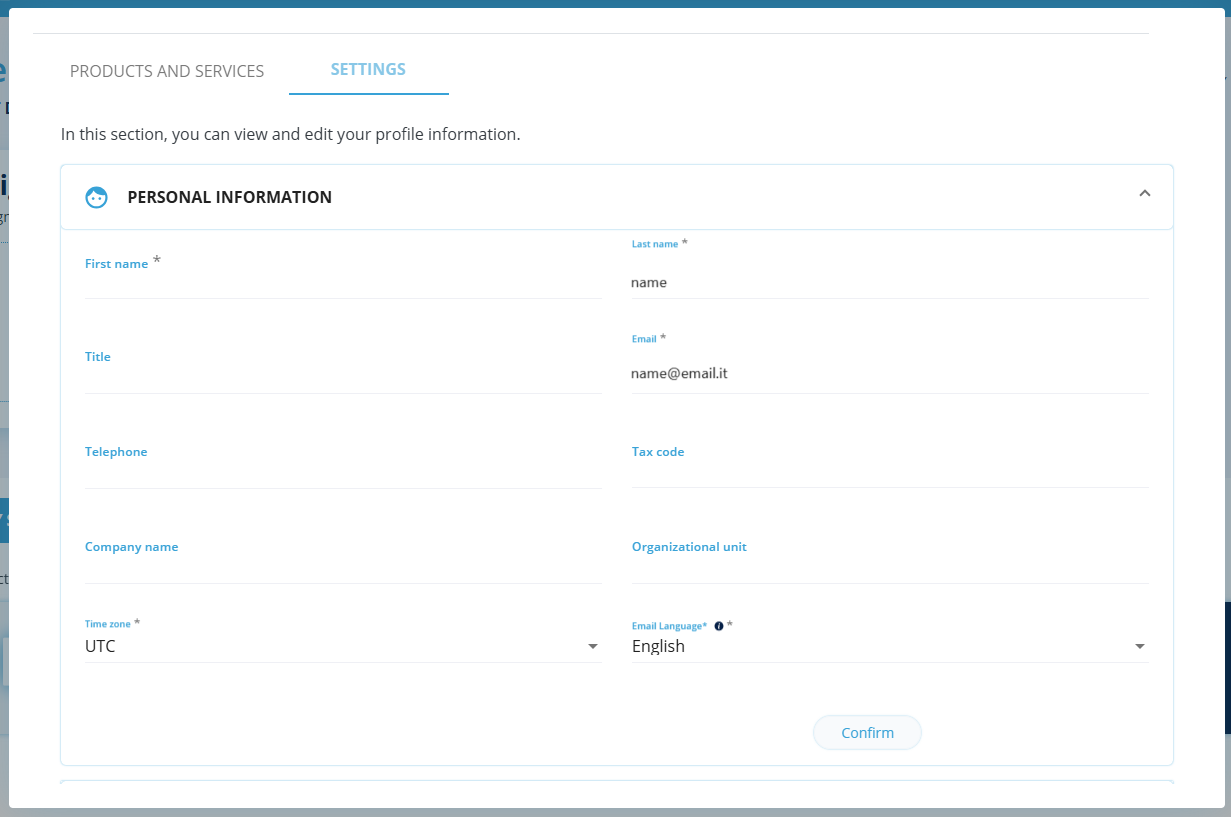
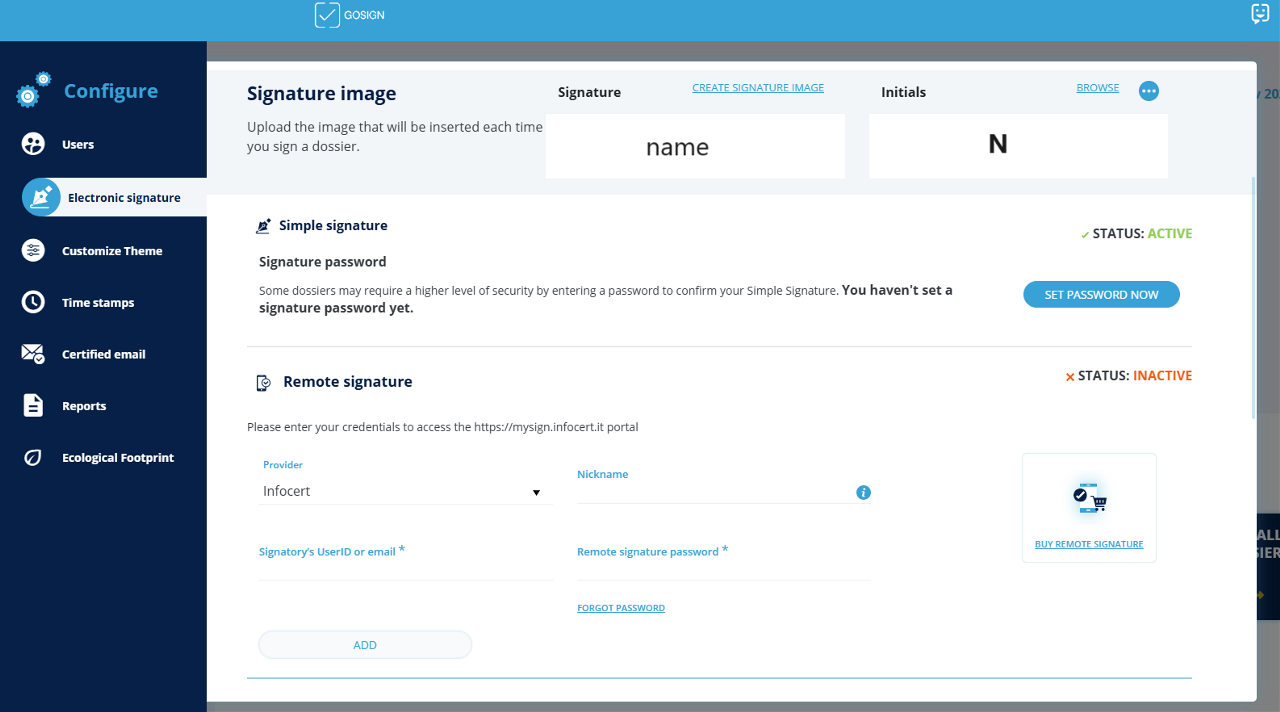
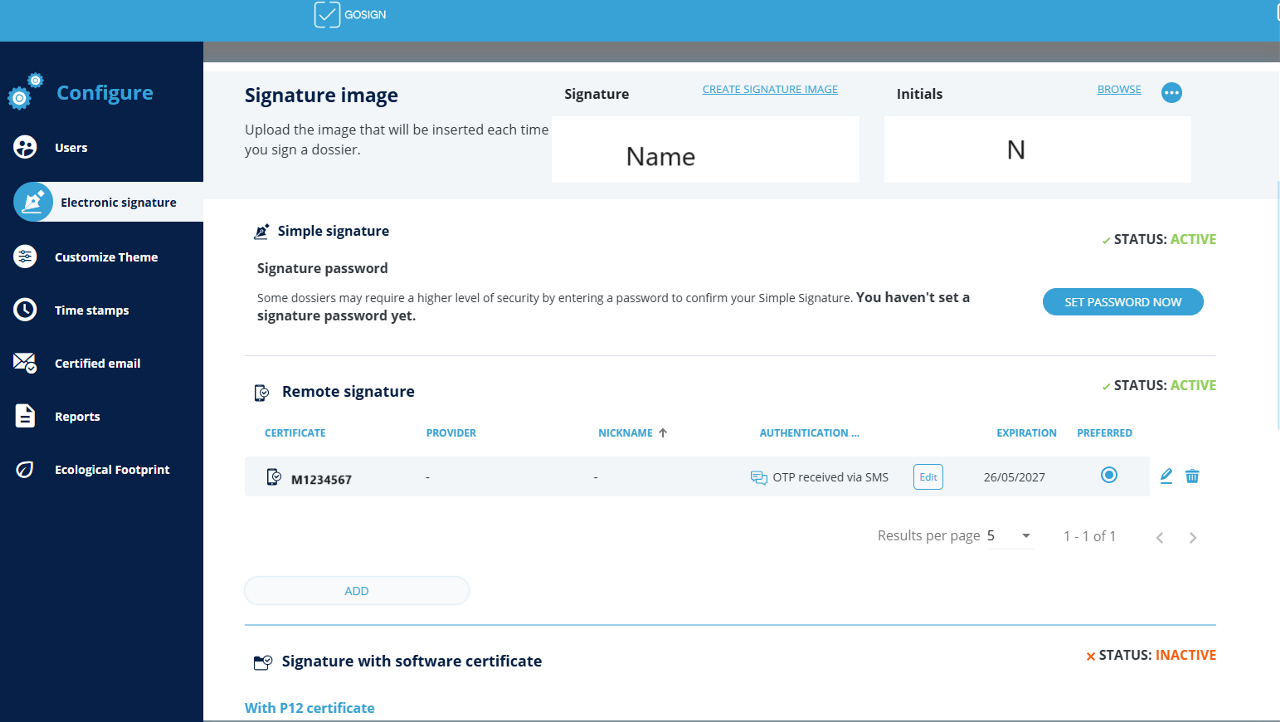
In order to sign a document, the first step is to configure the QES signature.
Under the ELECTRONIC SIGNATURE section there is the section for configuring the remote signing certificate.
the email or username of the signatory that is related to the account that purchased the service (the credentials are issued to the user by InfoCert at the time of the certificate request, it can be found on the copy of the Registration Request delivered on that occasion);
the Password (which corresponds to the password used to access the portal dedicated to the holders of a remote certificate, MySign, and must be customized at the time of activation of the certificate).
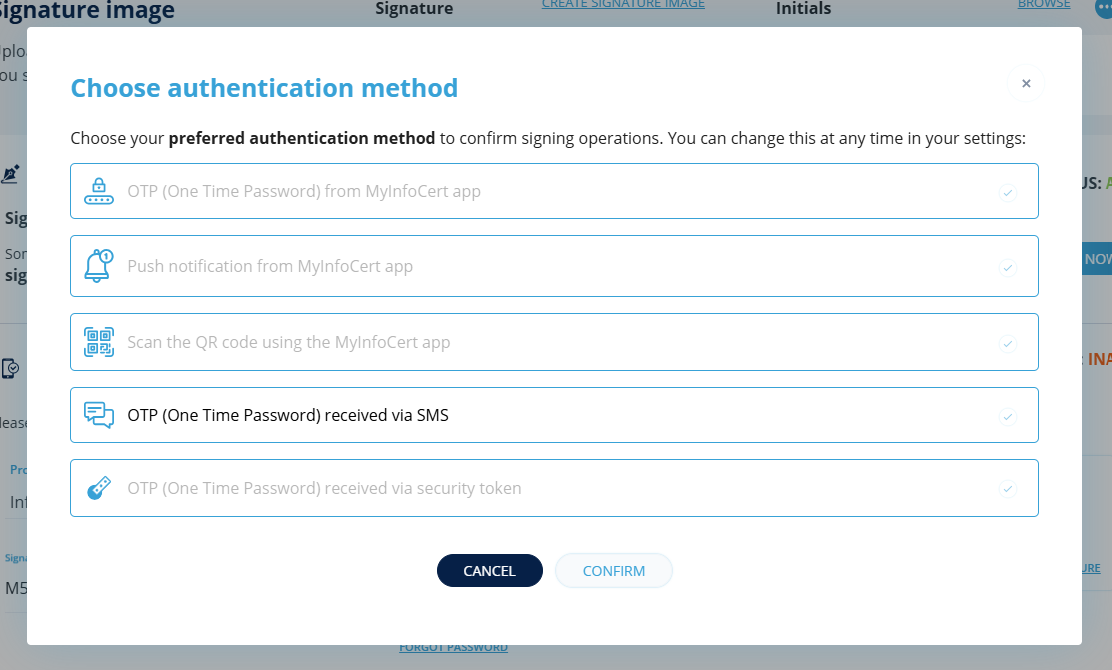
Next, you will need to confirm the authentication method, which can be changed later in the settings.
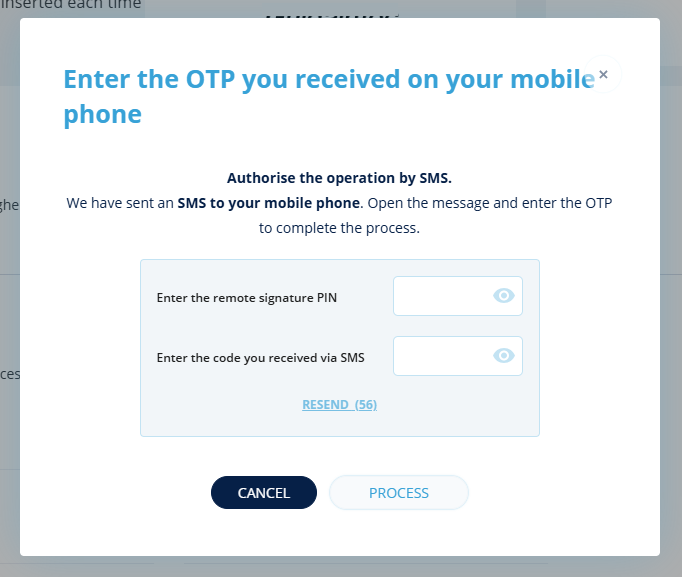
To complete the configuration of the QES signature in GoSign Web, you are required to enter the signature PIN and the OTP code that you will receive on the phone number associated with the QES.
Once you have entered all the codes to activate the certificate, you must click on Confirm.
Once the configuration operation is complete, it is possible to view the QES Certificate in the software.
Once you have selected the file to be signed, or dragged it into the appropriate section, GoSign Web displays the document details (type, size, etc.).
With GoSign Web you have the ability to upload any type of file (.pdf, .doc, .xls, documents in .p7m format).
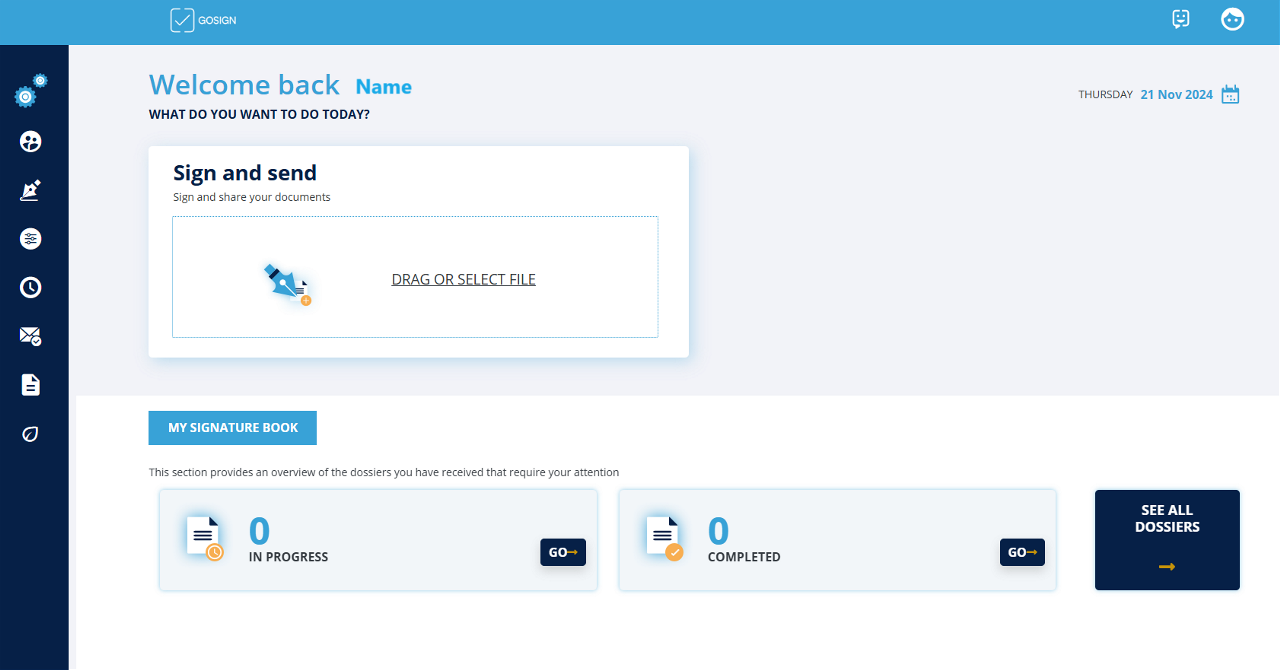
There are four signatures that can be affixed to the files, however, the only ones that have legal value are the PDF Digital Signature and the P7M Digital Signature.
If the file consists of a document with a .p7m extension, the only possible option is the P7M Digital Signature.
To select the type of signature, simply click on one of the boxes.

A preview of the document appears on the right side of the screen. A few actions are possible.
It is possible to change the preview display mode by clicking on the first icon on the left; zoom in and out on the document by clicking on the magnifying glass icon with the + and - symbols; print the document by clicking on the printer icon; search within the document by clicking on the magnifying glasses.
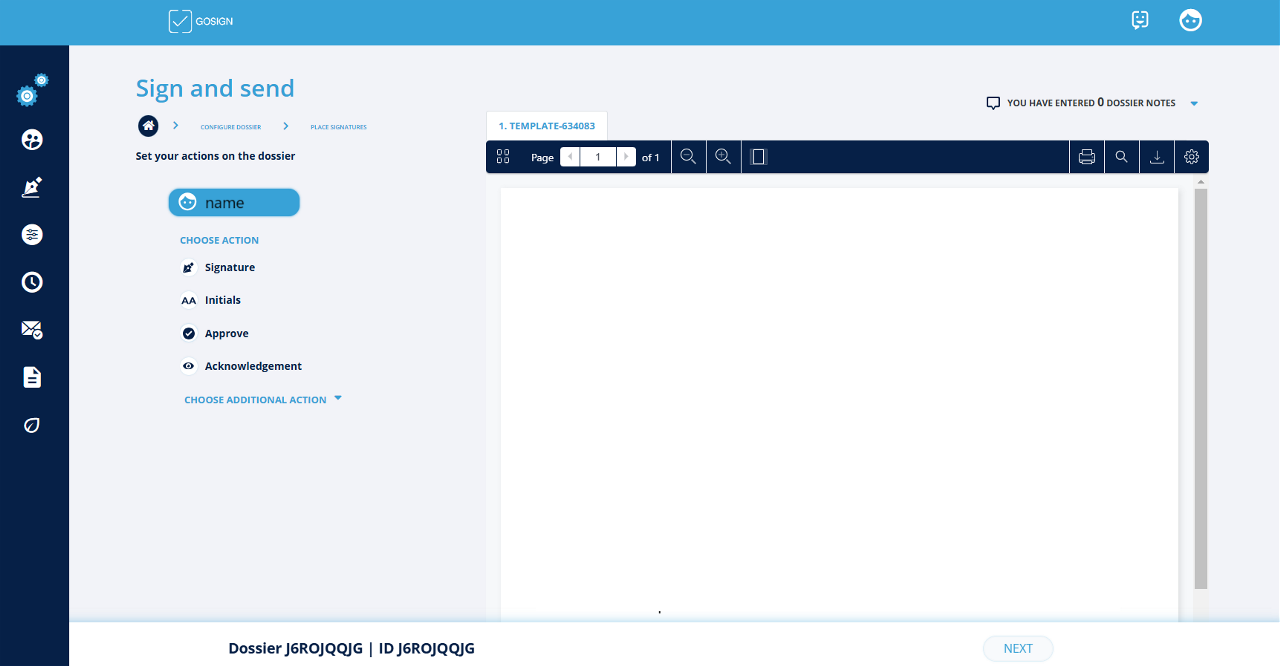
At the top there is the Signature section, where input the graphic representation of the signature that will be inserted on the documents once signed.
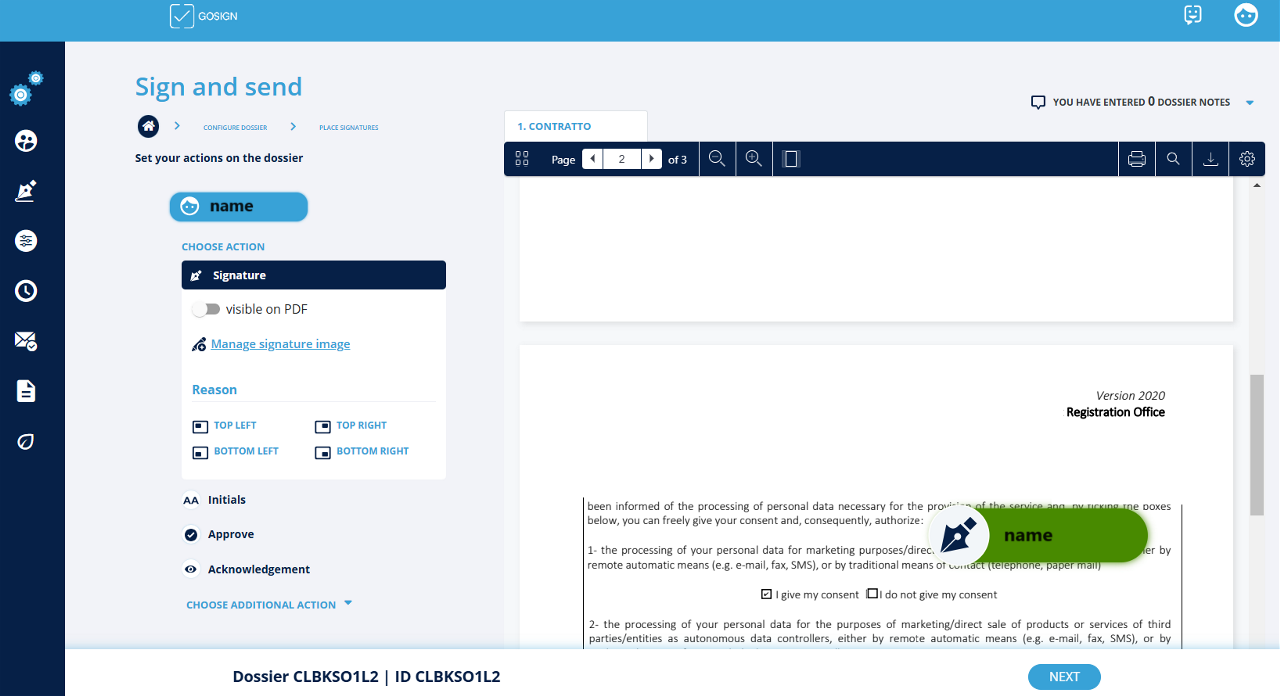
To the left of the document preview, multiple actions are possible
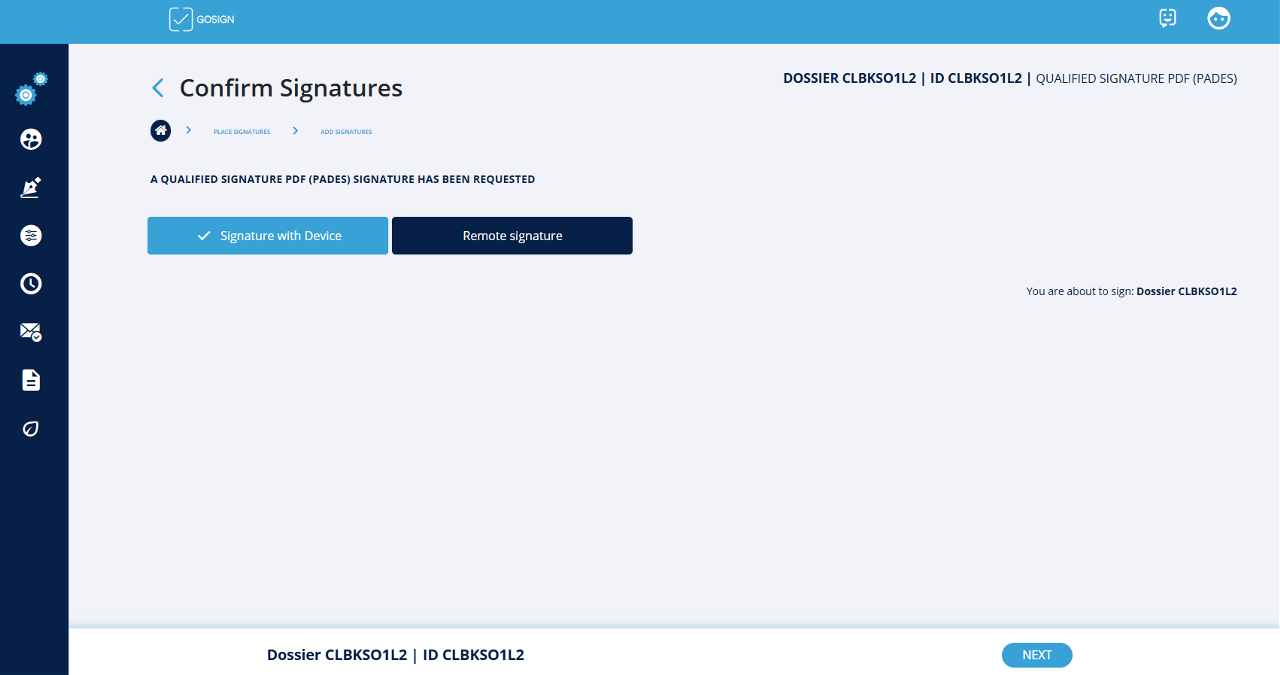
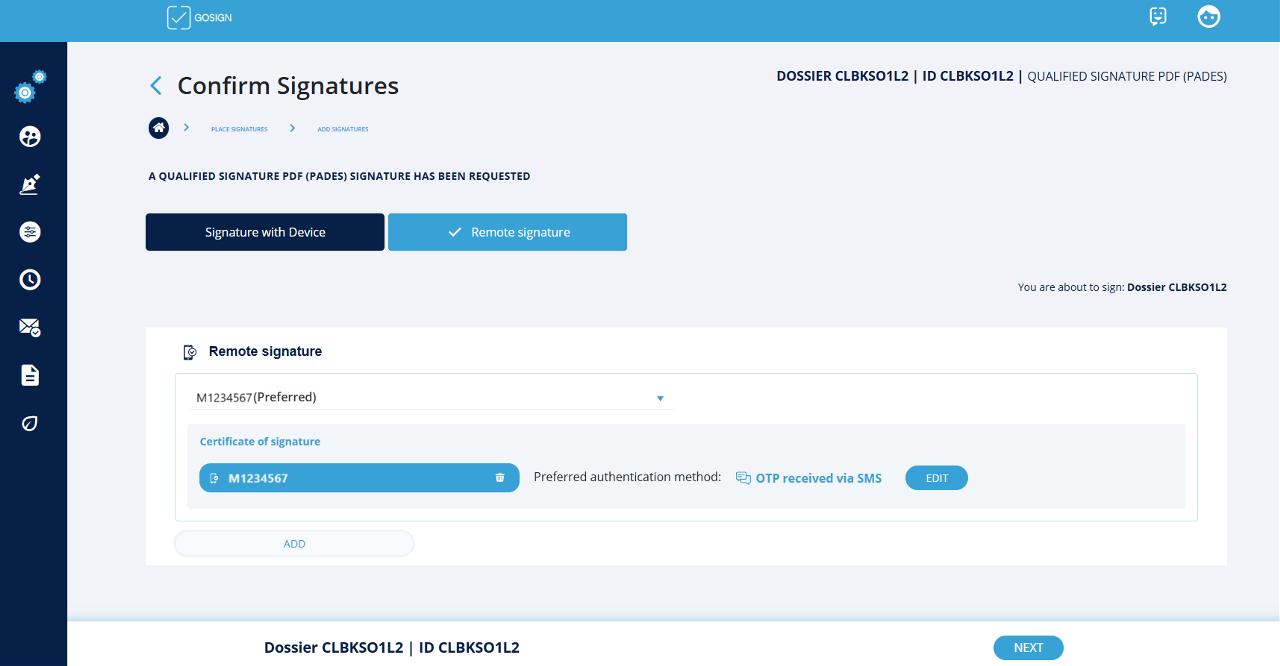
In the case of PDF digital signature, P7M digital signature, it is necessary to specify which type of signature must be affixed to the file: you can choose between the Device Signature or Remote Signature.
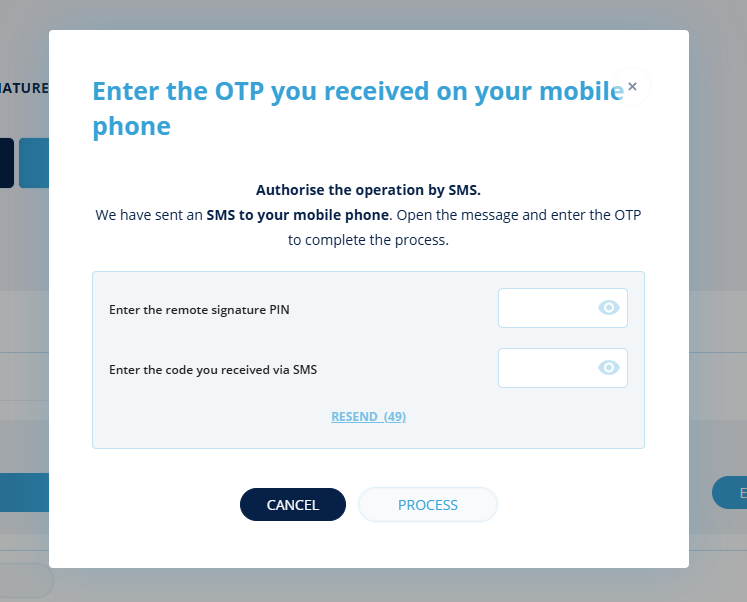
With the QES signature, the operation will be successfully completed by entering the QES signature PIN (previously set) and OTP code (received via SMS).
Finally, you will receive confirmation of the signature.
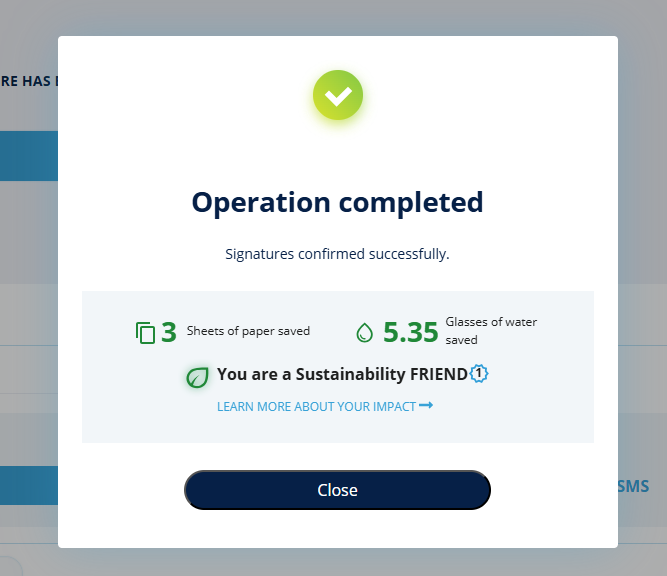
Click on the "Close" button you will see the section with all dossiers handled in the last two months.
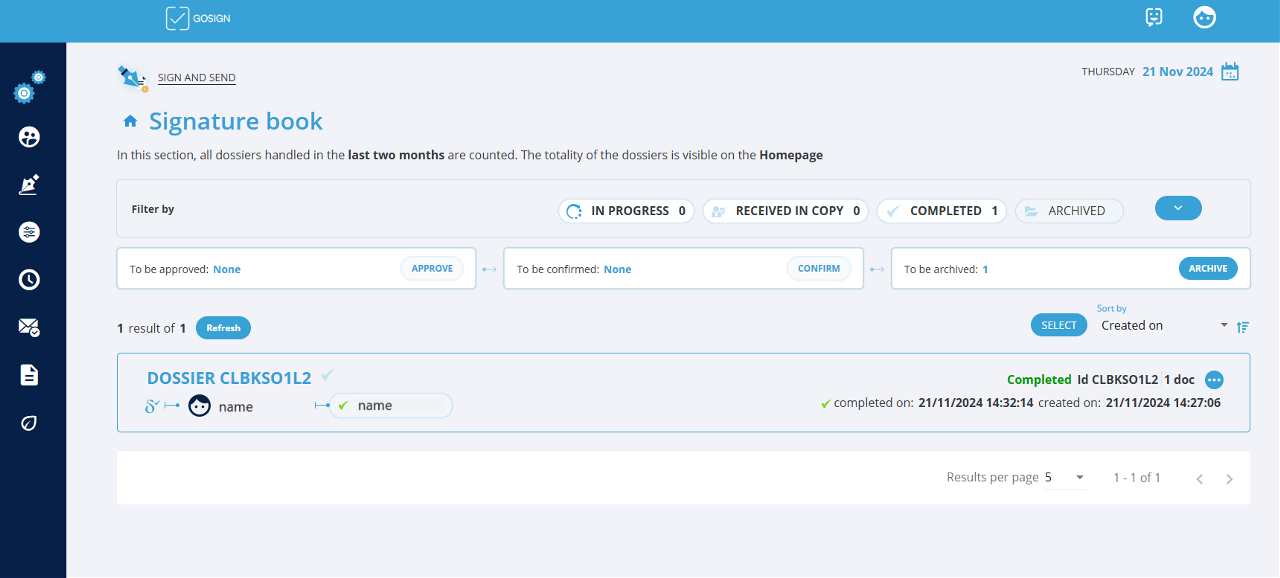
The totality of the dossiers is visible in the Homepage.
