contact_support Contact us
Open on another device
Scan QR code with your device and keep using your computer to follow the Guide step-by-step
qrcode
Titolo
  • What you need
  • Start activity
  • Sign a document
  • Verifying a document
  • Time Stamping a document
  • End Activity
Guide to Signing Documents with GoSign (Mobile)

What you need

  1. A valid sign certificate;
  2. PIN number to finalize your signature;
  3. GoSign mobile app installed in your Smartphone or tablet;
  4. The phone number you entered in the registration process to receive SMS with OTP number;
  5. A file to sign;
  6. An internet connection.

Start activity

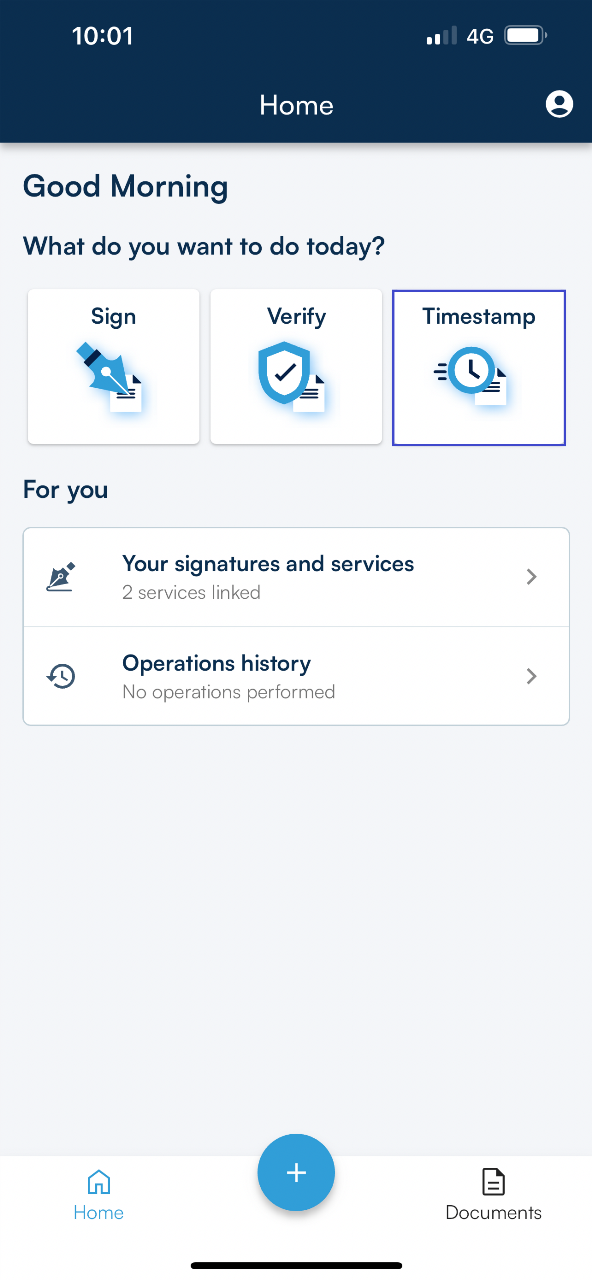
Click on GoSign Mobile Icon to open the app.

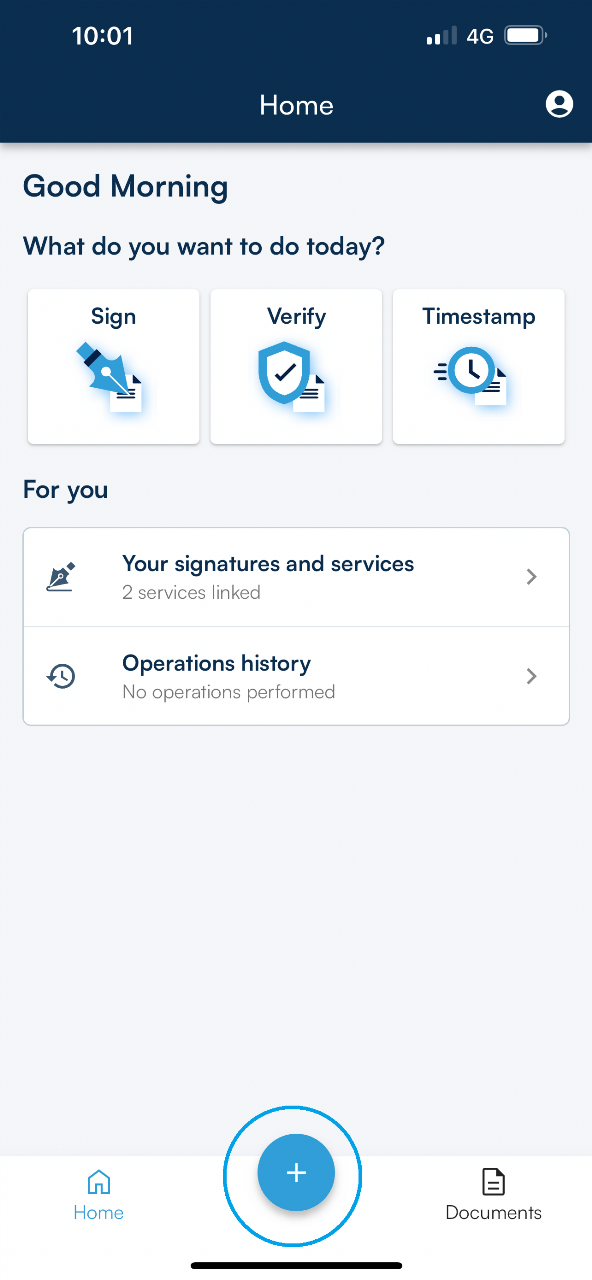
In the home page you can choose different options:
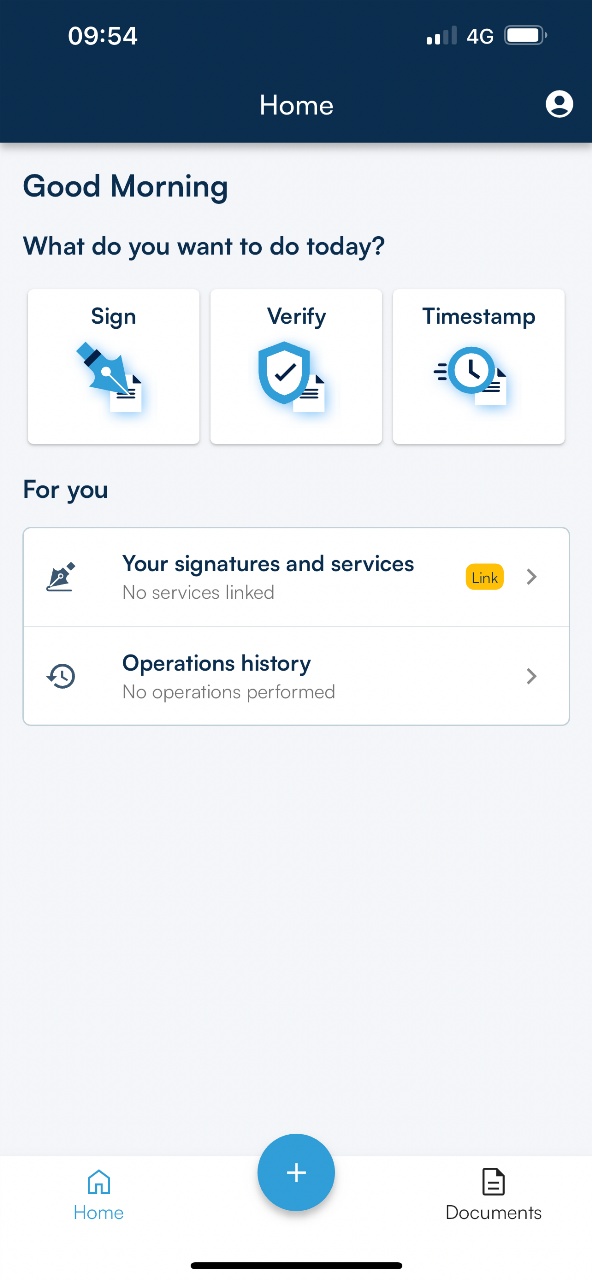
  • Sign a Document;
  • Insert a time stamp on your document;
  • Verify validity of a document signed.

Sign a document

The signature functions are located at the bottom in the navigation bar, while other document management functions are displayed in the centre of the screen.

Uploading documents

You can add documents to be digitally signed to the GoSign Mobile Documents or Upload a Document folders.

GoSign Mobile Documents contains folders with documents that have already been loaded to the GoSign Mobile app.

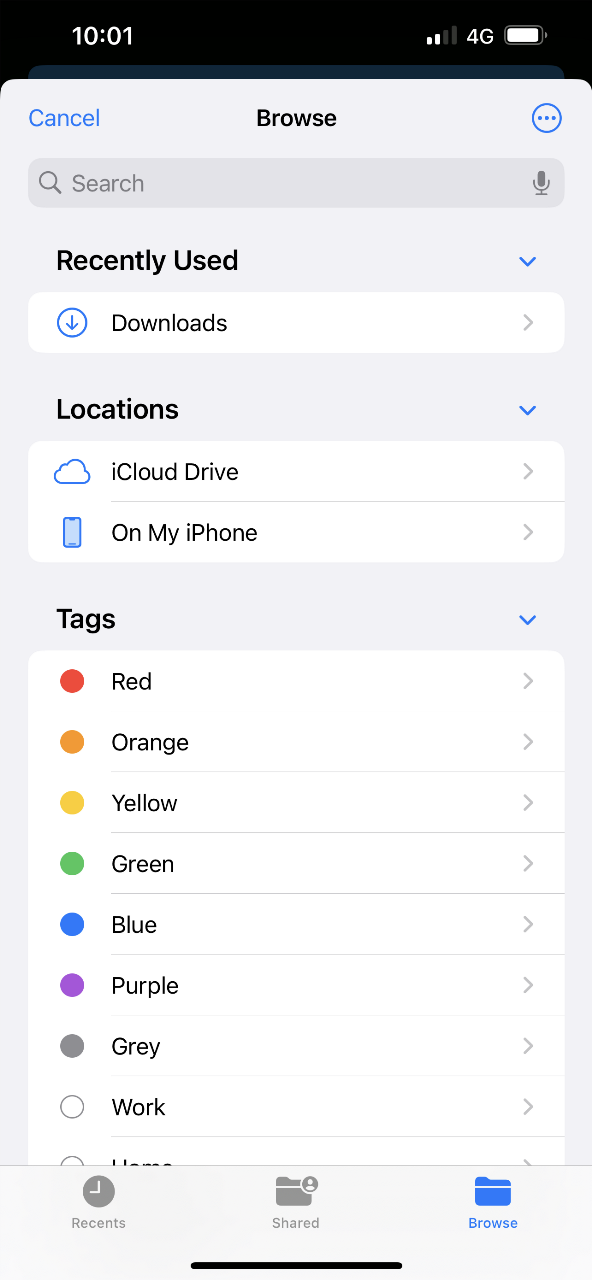
Upload a Document finds the list of folders and documents available on your smartphone.

Select a document to add it to GoSign Mobile’s Added folder. We recommend you use this method to share documents in your smartphone with the GoSign Mobile app. If your smartphone runs on iOS, this will be the only option.

You can also tap Sign in the navigation bar at the bottom of the screen to select the document. Find the path to the folder where the documents have been saved (those available to the app or saved on your phone), then select the document you want to use.

Choosing the signature format

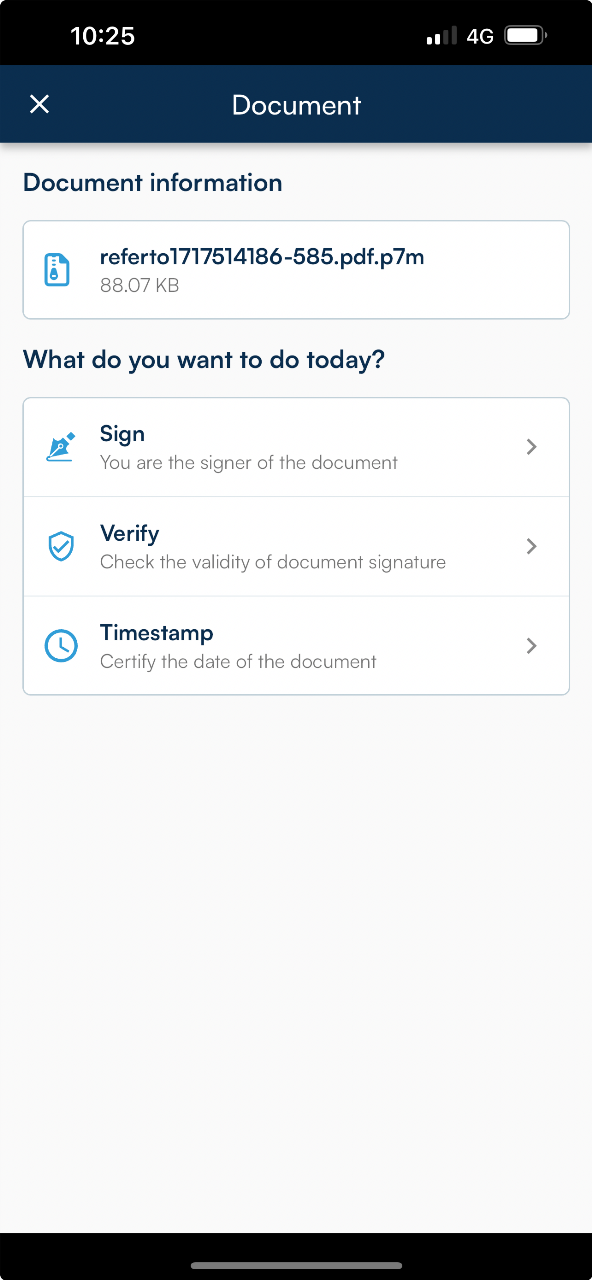
Once you have chosen the document you want to sign, the document information (name, size, last modified date) is displayed.

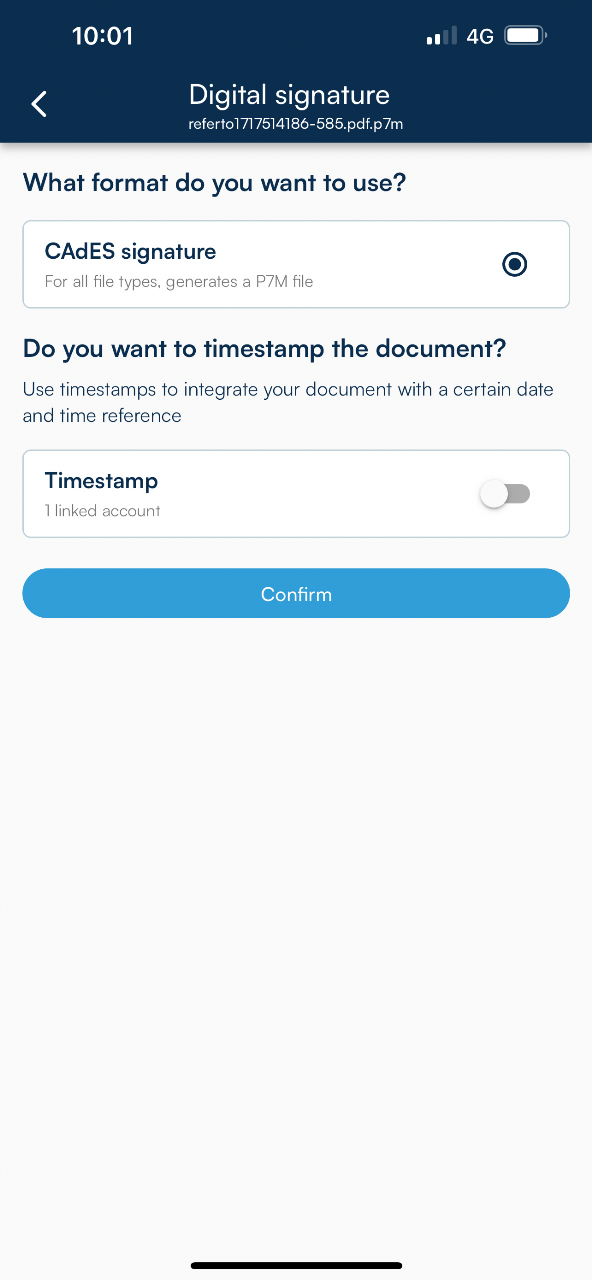
GoSign Mobile lets you choose one of two types of signature:

  • CAdES can be used to sign any type of document and generates signed documents in .p7m format;
  • PAdES can be used for documents in .pdf format and generates signed documents in .pdf format.

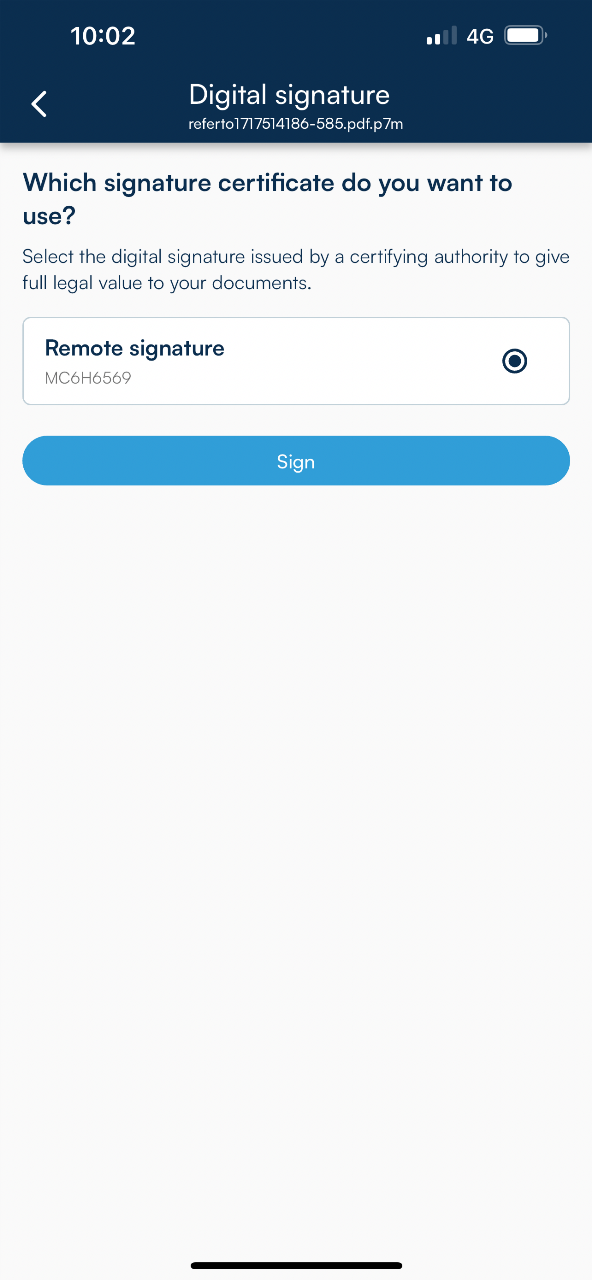
Signing with Remote Signature

To sign a document with a Remote Signature or QES certificate, set the Sign with option to Remote Signature.

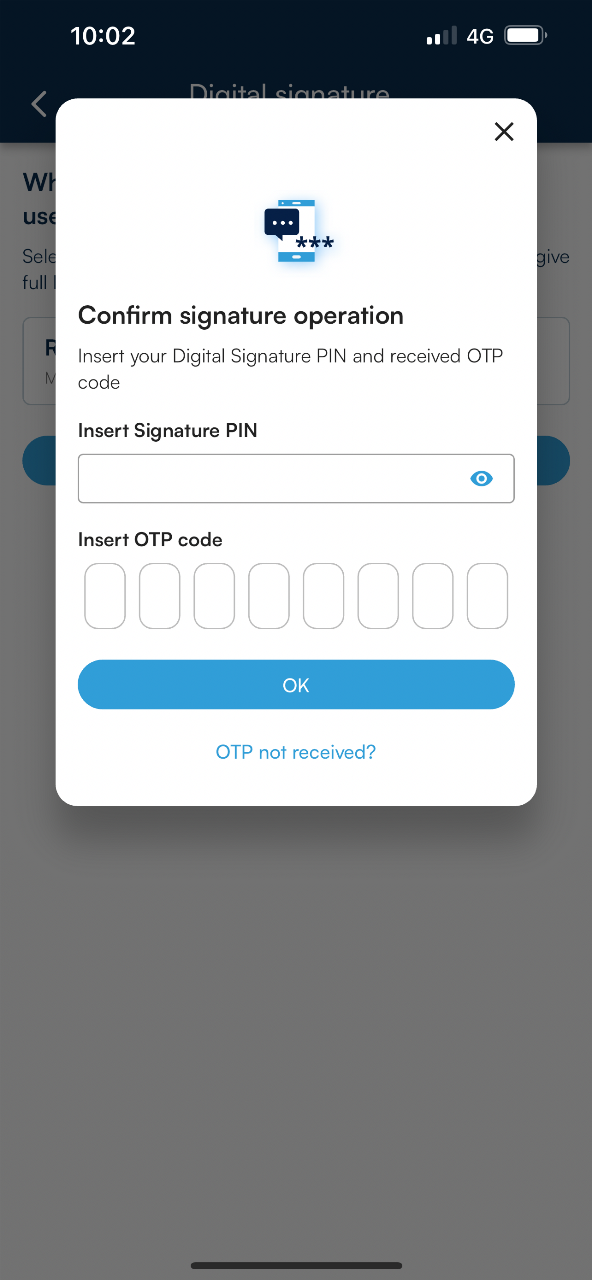
You will need to enter your Remote Signature or QES certificate security PIN in the Enter your PIN field.

If you have already configured the OTP code generator, the eight-digit OTP code will already be entered in the Enter OTP field.

Otherwise, you will receive a text message on your mobile phone containing the OTP that you enter in the Enter OTP field.

Tap Confirm.

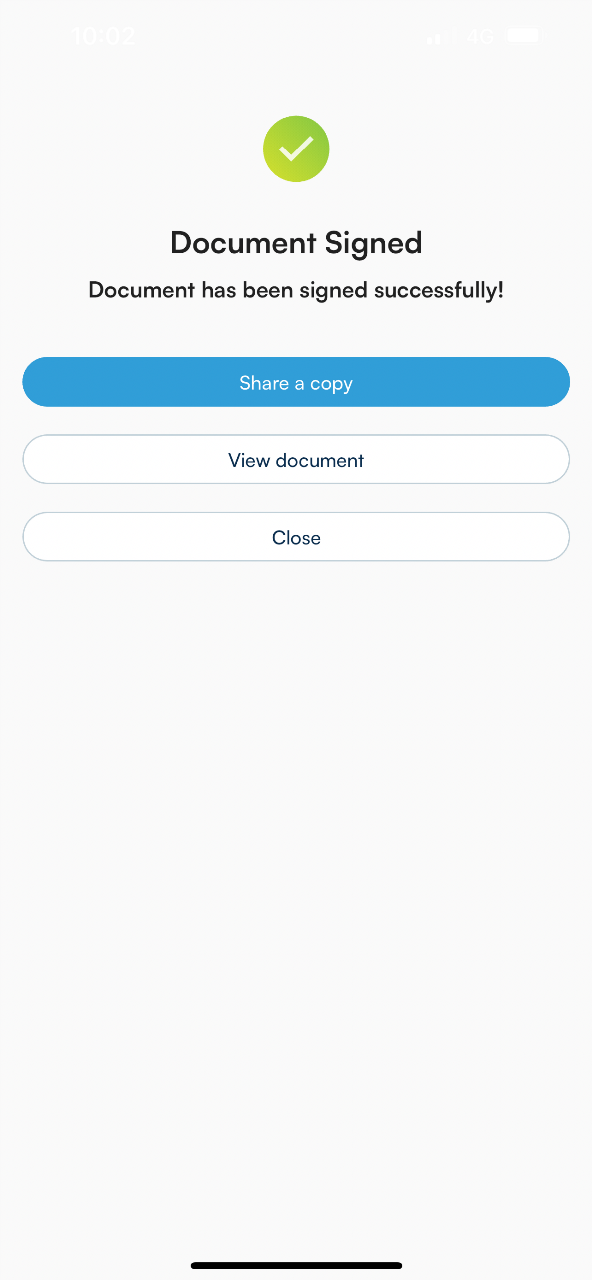
A confirmation message will be displayed when signing is complete.

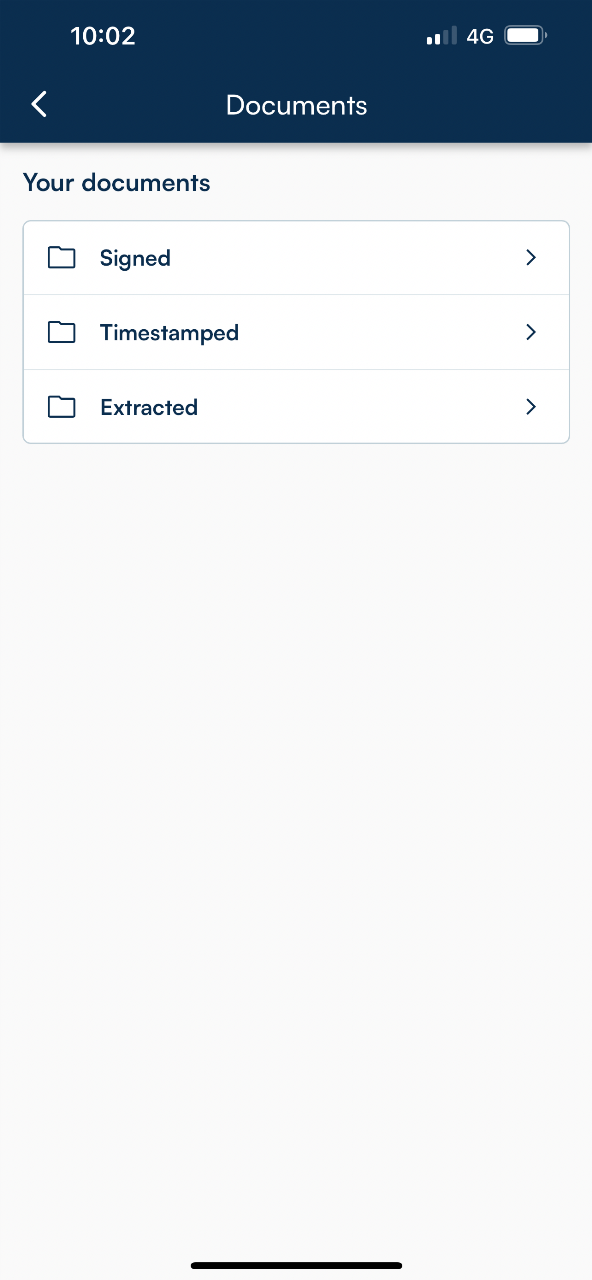
Digitally signed documents and digitally signed and time-stamped documents are saved in the Signed area of the GoSign Mobile Documents folder.

Signature with Device

To sign a document with a device (Wireless Key) check that the Wireless Key is correctly connect with your mobile phone or tablet. If it is not, connect them and proceed to configuration in GoSign mobile.

If you connected GoSign Mobile to the time stamp service, you can add a time stamp by selecting Insert Timestamp at the time of signature.

Now, enter your certificate security PIN in the Enter your PIN field and tap Confirm.

A confirmation message will be displayed when signing is complete.

Digitally signed documents and digitally signed and time-stamped documents are saved in the Signed area of the GoSign Mobile Documents folder.

Sharing signed documents

You can share the document from the screen showing the signing results: tap Share document to open the list of sharing options. Choose one and tap Confirm.

Verifying a document

Verifying a digitally signed and/or time-stamped document is just as important as signing and time stamping it.

GoSign Mobile provides a Verify function in the navigation bar at the bottom of the screen. Tap the blue Verify icon to select the signed and/or time-stamped document to be verified.

Uploading documents

You can add documents to be digitally signed to the GoSign Mobile Documents or Upload a Document folders.

GoSign Mobile Documents contains folders with documents that have already been loaded to the GoSignMobile app.

Upload a Document finds the list of folders and documents available on your smartphone.

Select a document to add it to GoSign Mobile’s Added folder. We recommend you use this method to share documents in your smartphone with the GoSign Mobile app. If your smartphone runs on iOS, this will be the only option.

You can also tap Verify in the navigation bar at the bottom of the screen to select the document. Find the path to the folder where the documents have been saved (those available to the app or saved on your phone), then select the document you want to use.

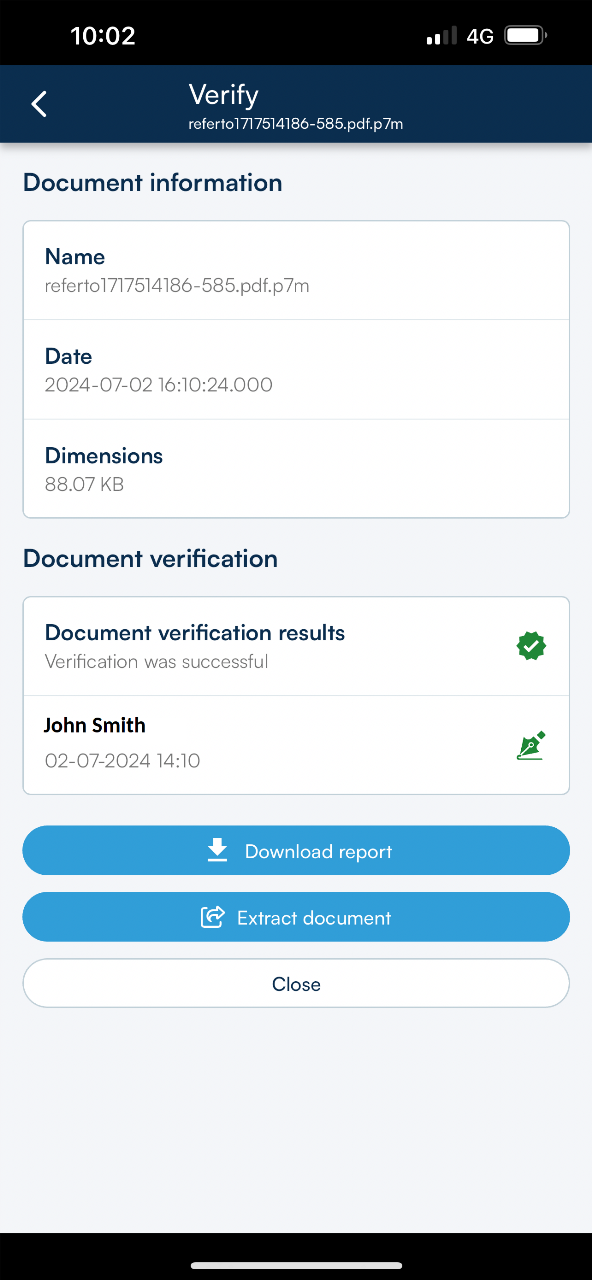
Results of Verification

After you have selected the document to be verified, GoSign Mobile immediately displays information on the signature and the signatory. Tap the grey rosette icon for detailed information on the certificate used for signing.

Verification report

The verification report is a pdf document containing the results of the verification done on the document.

Tap the document icon to generate the report. To view it using the default pdf application on your device, tap View Report.

Sharing the verification report

You can share the verification report as a .pdf file via email, chat, or any other document-sharing application on your device. To share it, tap the Share Report button. Choose an option from the list of sharing options, and tap Confirm.

Time Stamping a document

Time stamps are used to prove – or validate – the existence of a document on a given date.

Select the document you want to time stamp from the GoSign Mobile Documents or Upload a document folder, or tap the Time Stamp icon in the navigation bar at the bottom of the screen.

Select the Insert Time Stamp option.

A time stamp can be applied to both signed and unsigned documents.

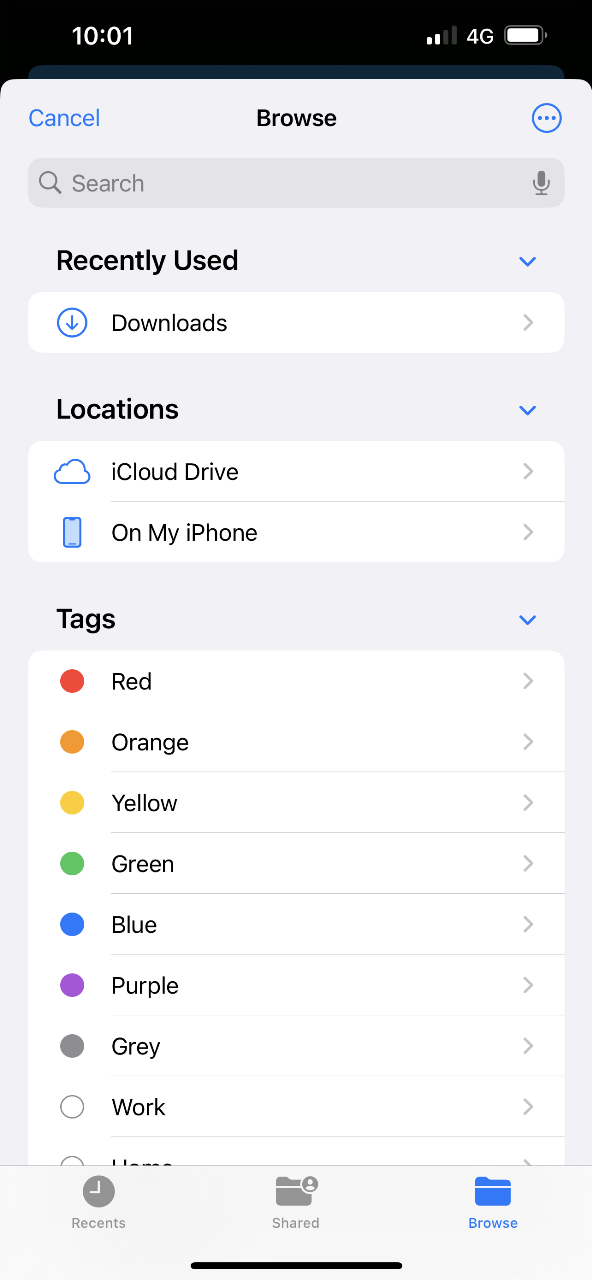
Uploading documents

You can add documents to be digitally signed to the GoSign Mobile Documents or Upload a Document folders.

GoSign Mobile Documents contains folders with documents that have already been loaded to the GoSign Mobile app.

Upload a Document finds the list of folders and documents available on your smartphone.

Select a document to add it to GoSign Mobile’s Added folder. We recommend you use this method to share documents in your smartphone with the GoSign Mobile app. If your smartphone runs on iOS, this will be the only option.

You can also tap Timestamp in the navigation bar at the bottom of the screen to select the document. Find the path to the folder where the documents have been saved (those available to the app or saved on your phone), then select the document you want to use.

Applying a time stamp

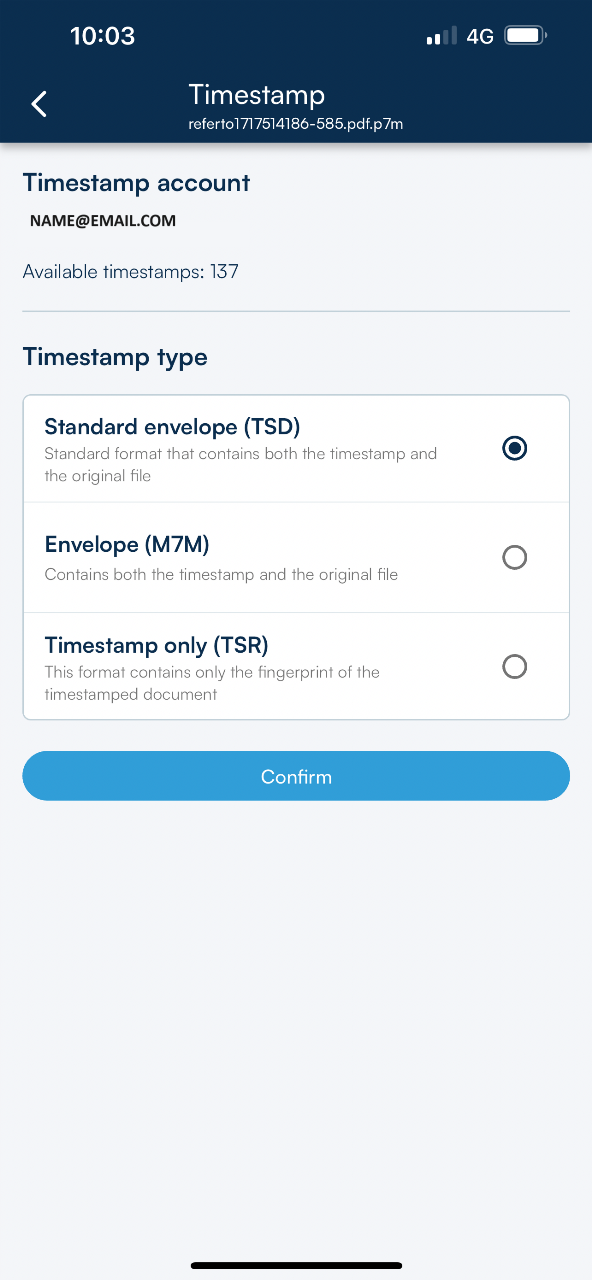
Once the document has been uploaded, it is shown in the control panel for time stamping.

GoSign Mobile lets you create:

  • documents containing both the document and its time stamp (with a .tsd extension);
  • documents whose time stamp is applied in detached mode, i.e., the document and time stamp are separate (the time stamps have a .tsr extension);
  • documents combining the electronic document and its time stamp (with an .m7m extension).

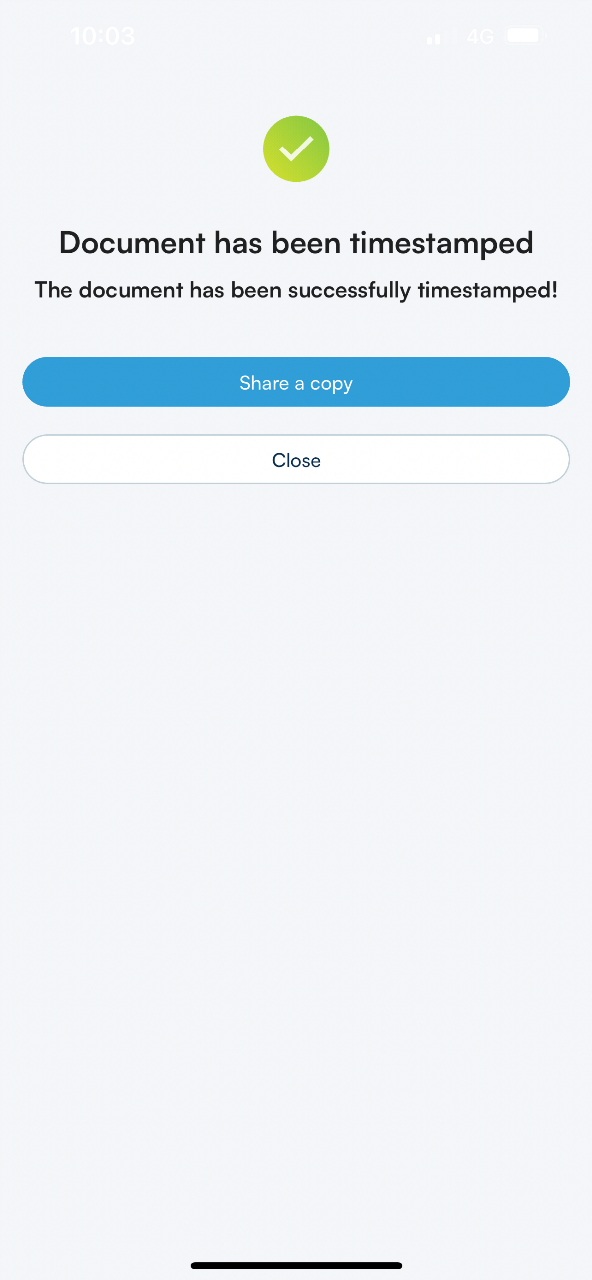
Once you have selected a type of time stamp to apply to the document, tap the blue Time Stamp icon. When time stamping is complete, GoSign Mobile will confirm that it was successful.

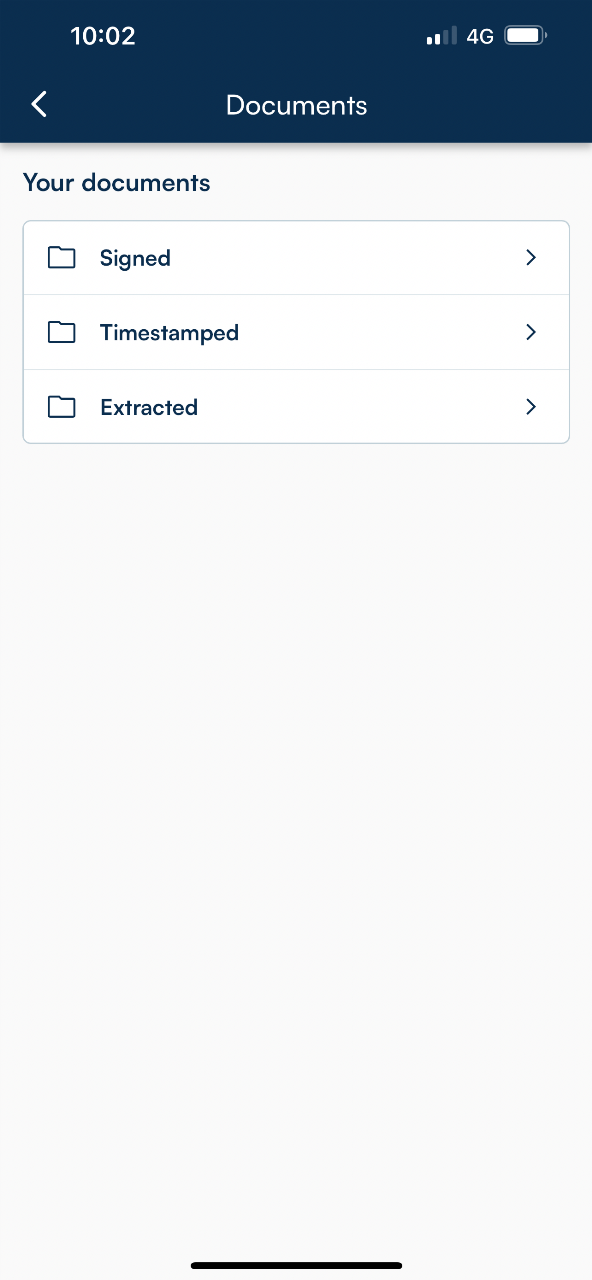
Time-stamped documents are saved in the Time-stamped area of the GoSign Mobile Documents folder.

Sharing time-stamped documents

You can share the document from the screen showing time-stamping results: tap Share Document to open the list of sharing options. Choose one of them and tap Confirm.

End activity

At the end of the signature / time stamping of a document activity, or verifying the validity of a signature / time stamp activity, You can close GoSign Mobile app.

Share:
Was this content helpful?
Didn't find an answer? Back to the search page
Icona Top